
Pruning
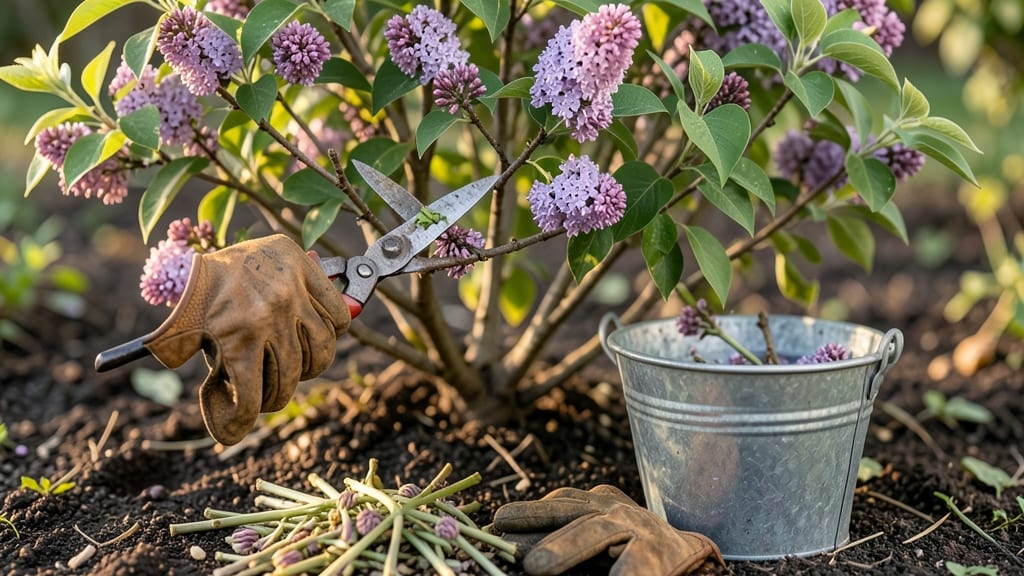
Spring is the season to wake up your garden with hand pruners—sharp cuts that breathe new life into dormant branches and set the stage for a season of lush growth. ✂️ I’ve seen firsthand how a few well-placed snips in early spring can transform leggy shrubs into vibrant, productive plants by summer, while also preventing disease and encouraging stronger blooms.
The key is timing and technique: prune just as buds begin to swell, but before new leaves unfurl, and always cut at a 45-degree angle just above an outward-facing bud. This simple method improves air circulation, reduces pest hiding spots, and shapes plants for their best possible form.
My go-to tools? A pair of bypass pruners for clean cuts and a small folding saw for thicker branches—both essential for any spring pruning session.
You’ll notice the difference almost immediately—plants perk up, new growth appears faster, and you’ll avoid the common mistake of over-pruning, which stresses plants and invites pests. The right cuts now mean fewer headaches later, like crowded branches or weak flowering. Think of it as a fresh start for your garden.
Works for everything from roses and hydrangeas to fruit trees and perennials, so grab your pruners and let’s get growing! The best part? You’ll spend less time battling unruly plants and more time enjoying their full potential all season long.
📚 In This Guide
- What you need
- Instructions
- Tips and common mistakes
- Wrapping up and next steps
What you need
- ● Hand Pruners: 1 pair of bypass pruners (for clean cuts on small branches, ¼"–¾" diameter). Look for stainless steel or high-carbon steel blades for durability.
- ○ Anvil pruners (optional backup for thicker branches, but bypass is preferred for precision).
- ● Pruning Shears: 1 pair (for delicate trimming of flowers or foliage).
- ● Gloves: 1 pair of cut-resistant, breathable gloves (gardening or pruning-specific).
- ● Disinfectant: Rubbing alcohol (70%+) or a pruning sealant (to prevent disease spread).
- ● Sharpener: A pruner sharpening stone (fine-grit, 1000+ grit) or a folding hone for on-the-go touch-ups.
- ● Cleaning Brush: A stiff-bristled brush (to remove sap/resin from blades).
- ● Safety Gear: Sunglasses (UV protection)
- ● Long sleeves/pants (to avoid scratches or sap irritation)
- ● Pruning Oil: Apply to blades after cleaning to prevent rust.
- ● Loppers: For branches ¾"–2" in diameter (if your pruners can’t handle them).
- ● Extension Pole: Attach to pruners for high branches (saves ladder time!).
- ● Marking Twine: To tag branches for removal (helps with large-scale pruning).
- ● First-Aid Kit: Bandages + antiseptic (just in case of minor cuts).
How to use hand pruners for spring pruning
Spring is the perfect time to refresh your garden—here’s how to make clean cuts that boost plant health.
🌿 Step 1: Inspect and Sharpen Your Pruners
Start by checking the blades of your hand pruners for nicks or dullness. A sharp blade makes cleaner cuts that heal faster and reduces the risk of tearing bark or damaging stems. Run your finger along the edge—if it catches, it’s time to sharpen. I use a fine-grit whetstone to restore the edge, keeping the angle consistent with the original bevel. A dull blade crushes stems instead of cutting cleanly, inviting disease.
After sharpening, wipe the blades with rubbing alcohol to remove any metal filings or plant residue. This keeps your tools sterile and ready for use. Store them in a dry place when not in use—rust is the enemy of sharpness. I keep mine in a tool roll with silica gel packets to absorb moisture. The goal is to work with tools that feel effortless, not like you’re forcing each cut.
✂️ Step 2: Identify What to Prune
Spring pruning focuses on three key tasks: removing dead or diseased wood, thinning crowded branches, and shaping plants for airflow. Start with the obvious—any branches that are brown, brittle, or devoid of buds are dead and should be cut back to the nearest healthy growth. Look for stems that are still green at the base; that’s your cue to stop cutting. I always work from the bottom up, making it easier to spot hidden damage.
Next, target branches that cross or rub against each other. These create wounds that invite pests and disease. Aim to open up the center of shrubs and trees to let sunlight and air circulate. For flowering plants, prune just above a leaf node or bud that faces outward. This encourages new growth in the right direction. If you’re unsure, take a photo first—you’ll thank yourself later when you’re not second-guessing your cuts.
☀️ Step 3: Make Clean, Precise Cuts
Position the pruners just above a bud or branch collar—the swollen area where the branch meets the stem. Cut at a 45-degree angle if you’re removing a branch thicker than a pencil, but for thinner stems, a straight cut works fine. The angle helps water runoff, preventing rot. Avoid leaving stubs—these are entry points for disease. I like to hold the branch steady with one hand while using the other to guide the pruners, ensuring the cut is smooth and controlled.
For larger branches, use the "three-cut method" to avoid tearing the bark: make two undercuts on opposite sides of the branch, then complete the cut just outside the branch collar. This prevents the weight of the branch from tearing as you remove it. After each cut, wipe the blades clean to avoid spreading sap or sap-borne diseases between cuts. Pay attention to the plant’s natural shape—your goal is to enhance, not transform, its structure.
🌱 Step 4: Clean Up and Monitor Recovery
After pruning, collect all clippings and dispose of them properly. If you notice signs of disease (like black spots or mold), bag the debris and throw it away—don’t compost it. Sterilize your pruners again with rubbing alcohol to prevent cross-contamination. I also like to spray the cuts with a copper fungicide as a precaution, especially if the plant was showing signs of stress before pruning. This step is quick but can save your plant from future problems.
Watch the plant closely in the days following pruning. New growth should appear within 2-4 weeks, signaling that the cuts were successful. If leaves yellow or wilt, it might be a sign of over-pruning or stress. Adjust your approach next time—sometimes less is more. Keep an eye out for pests that might take advantage of fresh cuts, and be ready to intervene early if needed. A well-pruned plant is a resilient plant.
⏰ Step 5: Schedule Follow-Up Pruning
Spring isn’t the only time to prune—plan for light maintenance pruning throughout the growing season to keep your plants healthy. Summer is a good time to trim back any overgrowth that’s shading the lower branches, while late summer or early fall is ideal for shaping deciduous trees before they enter dormancy. I mark my calendar with reminders so I don’t miss these key windows. Consistent pruning keeps plants strong and encourages better flowering or fruiting the following year.
Take notes after each pruning session. Jot down what you cut, why, and how the plant responded. Over time, you’ll develop a rhythm and intuition for what your garden needs. If a plant struggles after pruning, it might be a sign to prune less aggressively next time. The goal is to work with the plant, not against it. With practice, you’ll see your garden thrive year after year.
Tips & tricks for perfect spring pruning with hand pruners
Here's what nobody tells you about making your spring pruning sessions effortless and effective.
Tool Prep is Non-Negotiable: I learned this the hard way after ruining three batches of cuts—always sharpen your pruners before starting. A dull blade tears rather than cuts, creating jagged wounds that invite disease. Test sharpness by running your finger along the edge: if it catches, it's time to sharpen. I use a fine-grit whetstone and keep the angle consistent with the original bevel. This single step makes all the difference between clean cuts and messy damage.
The Three-Cut Method for Large Branches: When tackling thicker branches in Step 3, the three-cut method is your best friend. First make two undercuts on opposite sides of the branch, then complete the final cut just outside the branch collar. This prevents the weight of the branch from tearing as you remove it. I've seen too many pruning jobs go wrong because someone tried to cut through a large branch in one go—don't make that mistake!
Visual Cues Over Guessing: Instead of relying on memory, use visual cues to determine when to stop cutting. Look for stems that are still green at the base—this is your cue to stop in Step 2. For flowering plants, prune just above a leaf node or bud that faces outward. I always take a quick photo before making major cuts, especially when working with unfamiliar plants. This simple habit saves me from second-guessing my work later.
Post-Pruning Care Pays Off: The work doesn't end when you've made your cuts. In Step 4, collect all clippings and dispose of diseased ones properly—don't compost them! Sterilize your pruners between cuts to prevent spreading sap-borne diseases. I also keep a spray bottle of copper fungicide handy for plants that looked stressed before pruning. This extra care helps your plants recover faster and stay healthier throughout the growing season.
Pro Tips for Hand Pruner Spring
- Here's what nobody tells you about making your spring pruning sessions effortless and effective.
- Tool Prep is Non-Negotiable: I learned this the hard way after ruining three batches of cuts—always sharpen your prun...
- The Three-Cut Method for Large Branches: When tackling thicker branches in Step 3, the three-cut method is your best ...
Frequently asked questions
Got questions about hand pruners for spring? You’re not alone! Here are answers to the most common concerns—from timing to troubleshooting—to help you tackle your pruning like a pro.
When is the best time to use hand pruners in spring?
The ideal window is late winter to early spring (before buds swell), but avoid pruning during frost or extreme cold. For flowering shrubs, prune right after blooming to encourage new growth. Evergreens can be shaped anytime in early spring, but never prune in fall—it stresses the plant.
How do I keep my hand pruners sharp for precise cuts?
Start by wiping blades clean after each use to prevent rust. Hone them every few uses with a sharpening stone (hold at a 20° angle) or take them to a professional. For a quick fix, use a file or sandpaper on stubborn dull spots. Pro tip: Store pruners with a blade guard or in a dry place to maintain sharpness!
Can I use hand pruners for thick branches, or should I get bypass pruners?
Hand pruners are best for thin to medium branches (up to ¾ inch thick). For thicker stems, opt for bypass pruners (cleaner cuts) or loppers. Warning: Never force a hand pruner—it dulls blades and damages plants. If you’re struggling, it’s time to upgrade!
Why are my cuts jagged or tearing instead of clean?
Jagged cuts usually mean dull blades or wrong technique. Hold the pruner fully open and close it on the branch (don’t squeeze shut). For stubborn stems, make a small notch first to guide the cut. If tearing persists, sharpen or replace the blades—a crisp cut heals faster and looks pro!
Do I need to sterilize my hand pruners between plants?
Absolutely!
Sterilizing prevents disease spread (like fungal infections). Wipe blades with rubbing alcohol (70%+) or a 10% bleach solution between plants. For heavy-duty cleaning, scrub with soapy water, rinse, and dry thoroughly. Pro tip: Keep a small bottle of alcohol in your gardening toolkit for quick disinfection!
What’s the difference between anvil and bypass pruners?
Anvil pruners have one flat blade crushing against a metal base—great for tough, woody stems but can crush tissue. Bypass pruners mimic scissors, creating cleaner cuts ideal for live plants, flowers, and delicate branches. For spring pruning, bypass pruners are usually the better choice for healthy regrowth.
Wrapping up and next steps
Spring is the perfect time to revitalize your garden with sharp, clean cuts—and the right hand pruners make all the difference! 🌿 Whether you’re trimming dead branches, shaping shrubs, or encouraging new growth, investing in quality tools ensures precision and efficiency.
With the right technique and a little care, your plants will thank you with lush, vibrant foliage all season long.
Ready to get started? Grab your pruners, roll up your sleeves, and give your garden the fresh start it deserves! For even better results, explore our pruning guide or check out seasonal pruning tips to keep your green space thriving.