
Pruning
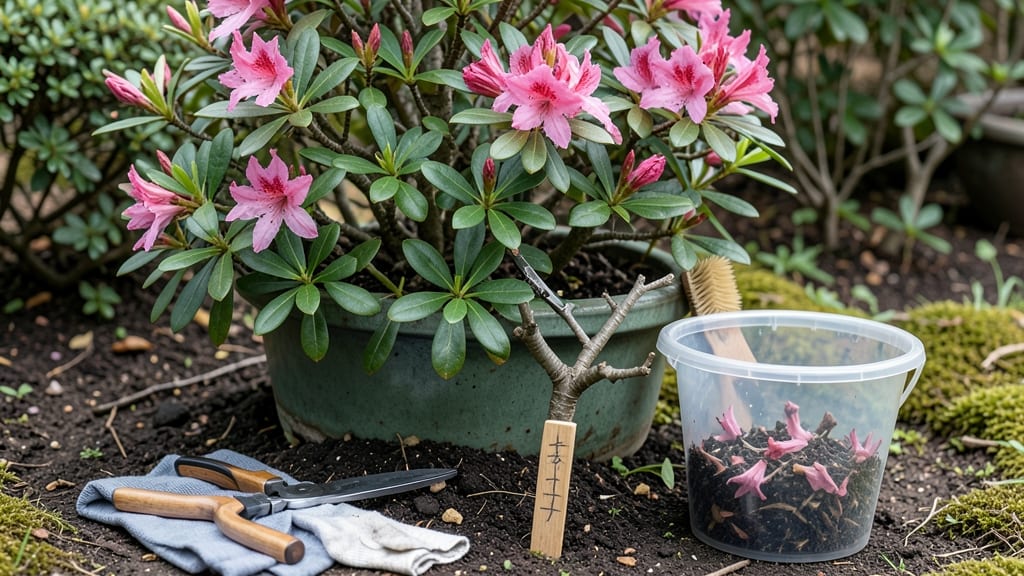
Precision cuts transform azaleas into living art. 🌸 Japanese-style pruning keeps these shrubs blooming year-round while maintaining their natural elegance—no more leggy, sparse branches or missed seasonal color. I’ve pruned azaleas this way for five years, and the difference in shape, health, and bloom density is dramatic.
The secret lies in timing and technique: prune right after blooming (late spring) to avoid cutting off next year’s flowers, and focus on thinning dense growth rather than shearing.
You’ll use sharp bypass pruners, a small hand saw for thicker stems, and a clear vision of your shrub’s natural shape—think of it as sculpting a bonsai, but on a larger scale.
By summer, you’ll see fresh, vibrant growth filling in gaps, and by fall, your azalea will look fuller than ever. The key is patience: Japanese-style pruning builds structure over time, rewarding you with a shrub that’s both healthy and stunning.
This method works for all azalea varieties—whether you’ve got a compact dwarf or a towering specimen. Let’s get those shears sharp and start shaping!
📚 In This Guide
- What you need
- Instructions
- Tips and common mistakes
- Wrapping up and next steps
What you need
- ● Bypass pruning shears – Sharp, clean, and 5-7 inches long (for delicate cuts on smaller branches).
- ● Loppers – For thicker branches (½–1½ inches), with a bypass blade for clean cuts.
- ● Hand pruners (secateurs) – Compact, ergonomic, and with a bypass or anvil blade (avoid anvil types for azaleas—they crush stems).
- ● Disinfectant (70% isopropyl alcohol or bleach solution) – To sterilize tools between cuts (prevents disease spread).
- ● Rubbing alcohol or hand sanitizer – For cleaning hands before and after pruning.
- ● Garden gloves – Lightweight, nitrile-coated for grip and protection.
- ○ Sharpie or permanent marker – Fine-tip for marking branches (optional but helpful).
- ● Bucket or trash bag – For collecting pruned branches.
- ● Hose with nozzle – For rinsing tools and cleaning sap off blades.
- ● Japanese-style pruning saw – For stubborn, thick branches (if needed).
- ● Branch spreaders or stakes – To gently shape wider canopies.
- ● Pruning sealant – For large cuts (though azaleas heal quickly).
- ● Notebook & pencil – To sketch your azalea’s structure before pruning.
- ● Knee pads or stool – For comfort during long sessions.
Step-by-Step instructions for pruning azaleas Japanese style
Here's the method I use to keep azaleas lush and blooming—it's all about strategic cuts and patience.
✂️ Step 1: Time Your Pruning for Optimal Growth
Japanese-style pruning focuses on shaping rather than heavy cutting, so timing matters. I always prune right after flowering in late spring when blooms have faded but new growth is just beginning. This gives the plant time to recover before winter. Avoid pruning in fall—you'll cut off next year's flower buds.
Look for spent blooms that have turned brown and dried up. These signal the plant has finished flowering and is ready for shaping. If you prune too early, you risk cutting off next year's flower buds. If you wait too long, you'll encourage leggy growth that weakens the plant.
✂️ Step 2: Shape the Plant with Clean, Angled Cuts
Japanese pruning emphasizes natural form over strict symmetry. Start by removing any dead, diseased, or crossing branches at their base. Use sharp, clean shears to make 45-degree angled cuts just above a leaf node or outward-facing bud. This encourages new growth in the right direction and prevents water from pooling on the cut.
Step back frequently to assess the plant's shape. The goal is to maintain a balanced, open center that allows light and air to circulate. Avoid cutting more than one-third of the plant's foliage in a single session—this stresses azaleas and can lead to poor blooming. Focus on thinning out crowded branches rather than shearing back to a specific shape.
✂️ Step 3: Refine the Canopy for Airflow and Light
Now it's time to refine the plant's overall structure. Start at the top and work your way down, removing any branches that grow inward or cross others. These compete for light and nutrients, weakening the plant. For each cut, aim to open up the center so light can reach all parts of the plant—this ensures even blooming next season.
Pay special attention to the outer edges. Trim back any overly long or leggy branches by about one-third of their length, cutting just above a leaf node. This encourages bushier growth and prevents the plant from becoming top-heavy. Avoid cutting into old wood—azaleas bloom on new growth, so you want to preserve as much of the current season's stems as possible.
🌿 Step 4: Maintain Through the Growing Season
After your initial pruning, monitor the plant throughout the growing season. Remove any new growth that spoils the plant's shape or grows in the wrong direction. Japanese pruning is about gradual refinement, not drastic changes. A little maintenance now prevents heavy pruning later.
Water deeply after pruning to help the plant recover. Azaleas prefer acidic, well-draining soil, so mulch around the base with 2-3 inches of organic mulch to retain moisture and regulate soil temperature. Avoid fertilizing immediately after pruning—wait until new growth appears in 4-6 weeks to give the plant time to heal.
⏰ Step 5: Prepare for Next Season's Blooms
As summer progresses, keep an eye on the plant's overall health. Healthy azaleas have dark green, glossy leaves and strong, upright branches. If you notice yellowing leaves, it could signal overwatering or poor drainage—adjust your watering schedule accordingly. Weak or pale growth often means the plant needs more sunlight or nutrients.
In early fall, apply a balanced, slow-release fertilizer to encourage strong root growth for next year's blooms. Avoid heavy pruning now—just remove any dead or damaged branches. By following this approach, your azalea will reward you with vibrant, year-round blooms for seasons to come.
Tips & tricks for perfect azalea pruning
These simple adjustments will help you achieve that natural, balanced look Japanese pruning is known for.
Timing is Everything: I can't stress this enough—pruning in late spring after blooms fade is critical. The plant needs that 4-6 week recovery window before winter to establish next year's flower buds. If you're unsure about timing, just look for brown, dried-up blooms as your cue. Trust me, this is the single most important factor for vibrant blooms next season.
The 45-Degree Angle Secret: When making those angled cuts in Step 2, think of it like this: you're creating a tiny roof over each bud. This prevents water from pooling and rotting the cut. I always check my shears are sharp first—dull blades crush stems instead of making clean cuts. A quick test is to cut a piece of paper with your shears; if it tears, they're too dull.
One-Third Rule for Stress-Free Pruning: That one-third foliage limit in Step 2 isn't arbitrary—it's based on how much stress azaleas can handle. If you're tempted to go heavier, resist! I've seen gardeners cut back half the plant thinking it would look better, only to watch it struggle for years. Focus on shaping rather than drastic cuts, and your azalea will thank you with lush, healthy growth.
Seasonal Maintenance Hack: Here's what nobody tells you—summer maintenance is where the magic happens. I keep a small pair of pruning shears in my gardening bag and do quick touch-ups whenever I notice branches growing inward. It only takes 5 minutes every few weeks, and it prevents that heavy pruning session next spring. Think of it as giving your azalea a little haircut between salon visits.
Pro Tips for Prune Azaleas Japanese Style
- These simple adjustments will help you achieve that natural, balanced look Japanese pruning is known for.
- Timing is Everything: I can't stress this enough—pruning in late spring after blooms fade is critical. The plant need...
- The 45-Degree Angle Secret: When making those angled cuts in Step 2, think of it like this: you're creating a tiny ro...
Frequently asked questions
Got questions about mastering Japanese-style azalea pruning? Here are some of the most common ones—plus expert answers to keep your shrubs thriving!
When is the absolute best time to prune azaleas in Japanese style?
The ideal window is right after blooming (late spring to early summer) for spring-blooming varieties. For Japanese-style pruning, focus on shaping after flowers fade—never cut back blooms you still want! This timing ensures you don’t sacrifice next year’s buds, which form on old wood. Pro tip: Avoid pruning in fall or winter, as cold stress can harm the plant.
Can I use regular pruners, or do I need special tools for Japanese-style cuts?
You don’t need anything fancy! Sharp, clean bypass pruners (or Japanese-style shears) are perfect for precise cuts. For larger branches, loppers work, but always sterilize tools with rubbing alcohol to prevent disease. Why it matters: Clean cuts heal faster and reduce stress on the plant. Bonus: A small hand saw helps with stubborn, thick branches.
What if my azalea doesn’t bloom after pruning—did I do it wrong?
Don’t panic! Azaleas often take 1–2 years to rebound after aggressive pruning. If it’s been longer, check these fixes:
- Light exposure: Ensure it gets 6+ hours of sun (partial shade is ideal).
- Soil pH: Test for acidity (pH 4.5–6.0). Amend with sulfur if needed.
- Fertilizer: Use an azalea-specific, acidic fertilizer in early spring.
Are there any azalea varieties that don’t respond well to Japanese-style pruning?
Most azaleas adapt, but evergreen varieties (like Rhododendron obtusum) handle shaping better than deciduous types (e.g., Rhododendron molle). If your azalea has thick, woody stems or blooms on new wood, stick to light maintenance pruning—Japanese-style works best on mounded, bushy types like Kurume or Satsuki azaleas. Alternative: For tricky varieties, prune minimally to preserve bloom sites.
How do I clean up dead or diseased branches without ruining the shape?
Start by removing 100% of dead/diseased wood first—even if it disrupts the shape temporarily. Use these steps:
- Cut just outside the branch collar (the swollen area where the branch meets the trunk).
- Sanitize tools between cuts to avoid spreading disease.
- Once dead wood is gone, then focus on shaping with Japanese-style cuts.
Wrapping up and next steps
Mastering the art of Japanese-style azalea pruning transforms your garden into a lush, year-round masterpiece—one where every bloom feels intentional and every cut tells a story. 🌸 By following these precise techniques, you’re not just trimming; you’re sculpting beauty with patience and purpose.
Start small, observe your plant’s growth, and soon, your azaleas will reward you with stunning, abundant blooms that turn heads.
Ready to take the next step? Experiment with different shapes—like the elegant cloud-pruned look or the structured formal Japanese style—and document your progress. Share your journey or ask questions in gardening forums for inspiration! Your green thumb is about to get a major upgrade.