
Pruning
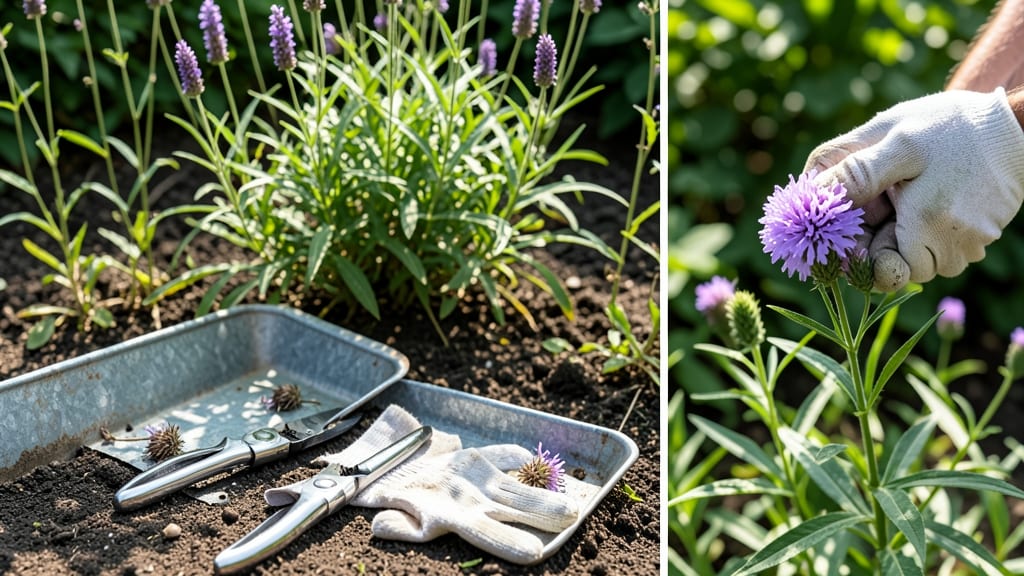
Late-winter pruning turns your verbena into a blooming powerhouse by spring. ✂️ I’ve learned that cutting back now—just as new growth starts—triggers vibrant, bushier plants with flowers that last all season. The key is timing: too early and you risk frost damage; too late and you lose early blooms.
You’ll need sharp pruners, gloves, and a sunny day (verbena hates wet cuts). Focus on removing dead or leggy stems first, then trim back the rest by one-third to encourage dense growth.
The goal is to shape the plant while keeping the center open for airflow—this prevents mildew and keeps blooms coming. What you’ll end up with is a compact, flower-covered bush that starts blooming in 6-8 weeks.
The flowers stay brighter longer because you’re removing spent blooms regularly, and the plant puts energy into new growth instead of seed production. Avoid cutting into old wood (the bare stems)—this kills the plant. And never prune in fall, as verbena needs the winter to rest.
With these cuts, you’ll have longer stems, more flowers, and fewer gaps between blooms all season.
📚 In This Guide
- What you need
- Instructions
- Tips and common mistakes
- Wrapping up and next steps
What you need
- ● Bypass pruners – Sharp, clean (sterilized with rubbing alcohol), and 1/4"–3/8" blade capacity for precise cuts. (1 pair)
- ● Hand pruners or shears – For smaller stems or trimming delicate foliage. Ergonomic handles recommended for comfort. (1 pair)
- ● Garden gloves – Nitrile-coated (for grip and protection) or leather (for thicker stems). (1 pair)
- ● Disinfectant spray – 70% isopropyl alcohol or a bleach-water mix (1:9 ratio) to sterilize tools between cuts. (Small spray bottle)
- ○ Sharpie or permanent marker – For marking stems if you’re dividing or propagating later. (Optional)
- ● Hedge shears – For boxwood verbena (Verbena rigida) or large patches needing uniform trimming. (1 pair)
- ○ Knee pad or stool – If your verbena is ground-covering or in a hard-to-reach spot. (Optional)
- ○ Compost bin or bucket – To collect pruned stems for mulch or composting. (Optional)
- ○ Plant food (balanced 10-10-10 or bloom booster) – Apply 2–4 weeks post-pruning to encourage fresh growth. (Optional)
Step-by-step instructions for pruning verbena
Here's my foolproof method for late-winter pruning that keeps verbena blooming like crazy all season.
✂️ Step 1: Time Your Cut for Maximum Growth
Prune verbena in late winter, just as new growth begins but before tender shoots emerge. I look for the first hint of green at the plant base—this signals the plant is waking up from dormancy. If you cut too early, you remove potential blooms; too late, and you risk damaging tender new growth.
For most climates, this falls in February or early March. In warmer zones, wait until late January. Avoid pruning after March 15 in colder regions, as new growth may not harden off before spring frosts.
✂️ Step 2: Cut Back to the Right Height
Use clean, sharp pruners to cut back one-third of the plant's height. I aim to leave 3-4 inches of stem above the soil line—this ensures the plant has enough energy reserves to fuel new growth. Never cut into old, woody stems, as these won't regenerate.
Make cuts at a 45-degree angle, just above a leaf node or bud. This encourages water to run off the cut and prevents rot. If your plant looks leggy, you can trim even more aggressively—just don't remove more than half the plant in one season.
🌿 Step 3: Shape for Better Airflow and Blooms
After the initial cut, step back and assess the plant's shape. Verbena blooms best when it gets good airflow, so I remove any dead, crossing, or crowded branches. Focus on creating an open, rounded form—this lets sunlight penetrate to the center, where most buds form.
If your verbena has woody stems at the base, trim these back to 1-2 inches above the soil. This rejuvenates the plant and encourages fresh, flowering growth from the base. Avoid cutting into bare wood—you'll just create wounds that won't heal.
💧 Step 4: Water and Fertilize for Recovery
After pruning, water deeply to help the plant recover. I give verbena 1 inch of water right after cutting, then monitor soil moisture—keep it evenly moist but not soggy for the next 2 weeks. Overwatering now can lead to root rot, especially if the weather stays cool.
Apply a balanced, 10-10-10 fertilizer at half strength to encourage new growth. I like to use a slow-release granular fertilizer mixed into the soil around the plant. Avoid high-nitrogen fertilizers—they promote leafy growth at the expense of flowers.
☀️ Step 5: Monitor and Maintain Through Spring
Watch for new growth in 3-4 weeks. You'll see fresh, vibrant green shoots pushing from the base and along the remaining stems. Once new growth appears, reduce watering slightly—verbena prefers slightly drier conditions once established.
Continue pruning lightly throughout the season to encourage bushier growth. Pinch back new tips after they've grown 4-6 inches to promote branching. This keeps verbena compact and flowering heavily instead of leggy and sparse.
Tips & tricks for perfect late-winter verbena pruning
These simple strategies will help you avoid common mistakes and get the most vibrant blooms from your verbena all season.
Timing is Everything: I can't stress this enough—those late-winter dates (February/March) are critical. If you prune too early, you risk cutting off next year's blooms before they form. Too late, and you'll damage tender new shoots. Here's my trick: Check for the first hint of green at the plant base, then wait 3-5 days before cutting. This ensures you're catching the plant at exactly the right moment when it's waking up but still protected.
Tool Prep Prevents Problems: Before you even touch the plant, clean and sharpen your pruners. Dull blades tear stems instead of making clean cuts, which stresses the plant and invites disease. I like to wipe my pruners with rubbing alcohol between cuts to prevent spreading any potential pathogens from dead branches. Also, keep a small bucket nearby to collect trimmings—you can compost them later or use them as mulch around other plants.
Visual Cues for Perfect Cuts: When making those 45-degree cuts in Step 2, think of it like this: You want the cut to look like a tiny roof that sheds water. The angle should be just steep enough that water runs off, but not so steep that it weakens the stem. For the 3-4 inch height guideline, imagine stacking three quarters—about that height from the soil. This leaves enough stem to support new growth while removing enough old growth to encourage bushiness.
Post-Pruning Care Makes All the Difference: After you've finished cutting, don't just walk away! The first 2 weeks are critical for recovery. I like to create a mini "greenhouse effect" by loosely covering the plant with a clear plastic bottle (cut in half) for the first few days after pruning. This helps maintain humidity while the plant recovers. Then, stick to that 1 inch of water and monitor soil moisture—verbena hates soggy roots but needs consistent moisture to establish new growth.
Pro Tips for How Do You Prune Verbena
- These simple strategies will help you avoid common mistakes and get the most vibrant blooms from your verbena all sea...
- Timing is Everything: I can't stress this enough—those late-winter dates (February/March) are critical. If you prune ...
- Tool Prep Prevents Problems: Before you even touch the plant, clean and sharpen your pruners. Dull blades tear stems ...
Frequently asked questions
Got questions about pruning verbena? You’re not alone! Here are some of the most common concerns—and straightforward answers—to help you keep your plants thriving.
When is the exact best time to prune verbena?
Late winter (just before new growth starts) or early spring is ideal for Verbena bonariensis and Verbena officinalis. For tropical varieties (like Verbena tenuisecta), prune lightly after flowering in late summer or early fall. Avoid pruning in extreme heat or cold—wait for mild weather!
How much should I cut back—can I go too far?
For established plants, trim back one-third to half of the plant’s height. Never cut into woody stems (they won’t regrow). If you’re unsure, err on the side of caution—verbena is resilient and will bounce back! Over-pruning can stress the plant, so observe its shape before snipping.
What if my verbena looks sad after pruning?
Don’t panic! Verbena often looks leggy or sparse right after pruning, but it’s just rebooting. Within 2–4 weeks, you’ll see fresh, bushy growth. Keep soil moist (but not soggy) and fertilize lightly with a balanced 10-10-10 mix to encourage recovery. Yellowing leaves? That’s normal—focus on new growth.
Can I prune verbena in containers differently?
Yes! Potted verbena benefits from regular light pruning (every 4–6 weeks) to encourage compact growth. Trim just above a leaf node, and pinch back tips to promote branching. Since containers dry out faster, water thoroughly after pruning to reduce stress. Dwarf varieties (like Verbena ‘Superbena’) need less aggressive cuts.
What if my verbena blooms less after pruning?
Pruning should boost flowering—if blooms dwindle, you might be cutting too late in the season or missing deadheading. For continuous blooms, trim spent flowers regularly (every 2–3 weeks) and avoid heavy pruning after mid-summer. Over-fertilizing with high nitrogen can also reduce flowers—stick to a low-nitrogen, high-phosphorus feed for blooms!
Wrapping up and next steps
Pruning your verbena in late winter isn’t just about tidying up—it’s your secret to longer, brighter blooms all season! 🌸 By following the right steps, you’ll encourage bushier growth, prevent disease, and keep your plants thriving. Remember, timing, sharp tools, and a little patience are your best friends here.
Now that you’re armed with the know-how, grab those shears and get pruning! Watch your verbena reward you with a dazzling display of color—you’ve got this! For extra tips, check out our guide on post-pruning care to keep your garden looking its best.