
Pruning
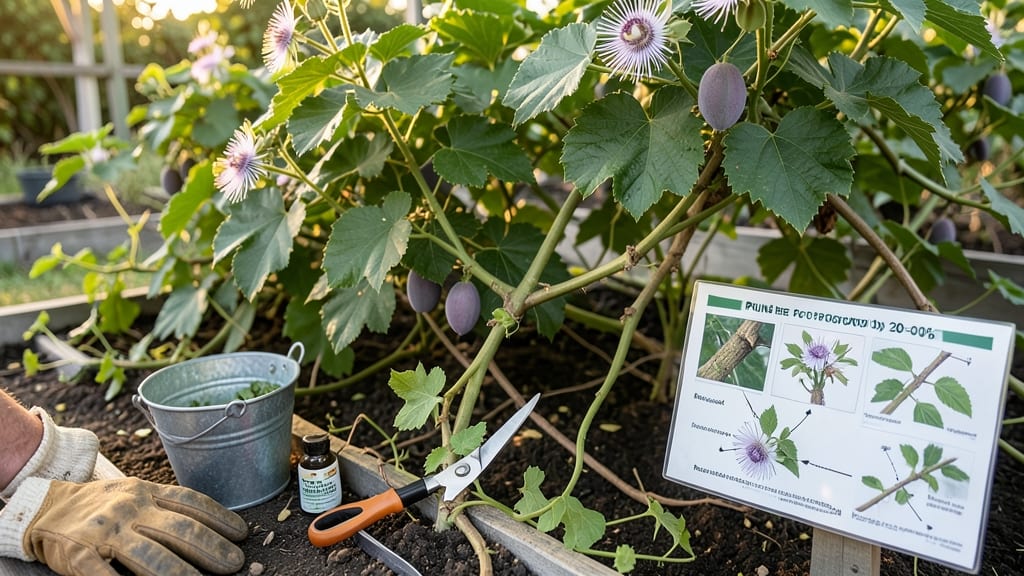
Pruning a passion fruit vine in late winter unlocks its full potential—stronger vines, more flowers, and a harvest that puts your neighbors to shame. ✂️ I’ve watched my vines go from tangled messes to productive powerhouses after just one dormant-season trim, and the difference in fruit production is staggering.
The key? Timing, technique, and knowing exactly which growth to encourage (and which to cut). You’ll need sharp pruners, a clean workspace, and about 30 minutes to reshape your vine. Start by removing dead or diseased wood first—those are easy wins.
Then focus on thinning out crowded stems to improve airflow, which cuts down on fungal diseases and lets sunlight reach the center of the plant where most of your fruit will form.
After pruning, your vine will respond with new shoots within 2-3 weeks, and those will be your future fruit-bearing branches. The goal is a balanced canopy that supports heavy harvests without breaking under the weight of those sweet, tangy fruits.
Just avoid the rookie mistake of cutting too aggressively—you want to keep at least one-third of the old growth to maintain the vine’s structure. This method works for both passiflora edulis and passiflora ligularis, whether you’re growing in containers or training along a trellis.
Once you’ve mastered the basics, you can experiment with shaping for easier harvesting or even propagating new plants from your cuttings.
📚 In This Guide
- What you need
- Instructions
- Tips and common mistakes
- Wrapping up and next steps
What you need
- ● Pruning shears or secateurs: Sharp, bypass-style shears (4-6 inches long) for clean cuts. Disinfect with rubbing alcohol before and after use to prevent disease spread.
- ● Gloves: Heavy-duty, cut-resistant gloves (gardening or thorn-proof) to protect hands from sharp vines and thorns.
- ○ Loppers (optional but helpful): For thicker stems (1-2 inches in diameter). Choose bypass or anvil-style with a 10-12 inch blade.
- ● Pruning saw (if needed): For very thick, woody stems (rare in young vines). A folding pruning saw with a 7-8 inch blade works best.
- ● Disinfectant (rubbing alcohol or 10% bleach solution): 1 cup bleach + 1 gallon water for sterilizing tools between cuts.
- ● Sharpie marker or tape: To label cuts if training the vine (e.g., marking new leader stems).
- ○ Garden twine or stakes (optional but useful): For temporarily securing heavy branches post-pruning.
- ● Hand pruners with a crimping tool: For sealing larger cuts and reducing sap loss.
- ● Knee pad or stool: If your vine is tall or sprawling, save your back!
- ● Trash bags or bucket: For collecting pruned debris (compost later or dispose of diseased material).
- ● Plant growth regulator (e.g., hydrogen peroxide 3%): Dilute 1:10 with water to spray on cuts and prevent fungal infections.
Step-by-Step instructions for pruning a passion fruit vine
Here's my foolproof method for dormant-season pruning that boosts fruit production and keeps vines manageable.
✂️ Step 1: Identify and Remove Dead or Diseased Wood
Start by examining the entire vine for any branches that look brown, brittle, or hollow—these are dead and must be cut out completely. I always use clean, sharp pruners to make a clean slice just outside the branch collar where it meets the main stem. This prevents unsightly stubs that can trap moisture and invite rot.
Look for any signs of fungal spots or oozing sap, which signal disease. Remove these infected branches immediately, even if they're otherwise green. Healthy wood should snap cleanly when bent, while dead wood will crumble or break with a dry, brittle sound. Bag up all the debris and dispose of it far from your garden to prevent reinfection.
✂️ Step 2: Prune Back Last Year's Growth by One-Third
Passion fruit vines grow aggressively, so I never hesitate to cut back last year's growth by about one-third. Focus on the oldest, thickest branches first—they've already produced fruit and won't recover as quickly. Use your pruners to make angled cuts just above a leaf node or outward-facing bud, which encourages new growth in the right direction.
This dramatic reduction might seem scary, but it forces the vine to redirect its energy into fewer, stronger new shoots. You'll see fresh green growth within weeks, and those new branches will bear fruit more reliably than overworked old wood. Avoid cutting into the center of the vine—this creates dense, shaded areas that promote disease.
✂️ Step 3: Thin Out Crowded Growth for Better Airflow
Next, I focus on improving airflow by removing any branches that are growing inward or crossing over others. These crowded stems compete for sunlight and nutrients, and their leaves stay damp too long, inviting fungal problems. Cut these back to their point of origin, making sure your cuts are clean and at a slight angle.
Look for any "water sprouts"—those fast-growing, vertical shoots that pop up along the main stem. These saplings steal energy from fruit production, so I remove them completely. You'll know you've done this right when you can see light and air moving freely through the vine's structure. This open framework means better fruit set and easier harvesting.
✂️ Step 4: Shape the Vine for Optimal Fruit Production
Now it's time to shape the vine like a professional arborist. I aim to create a balanced structure with 3-4 main branches radiating outward from the central leader. Cut back any branches that are growing straight up—these rarely produce fruit and create weak, top-heavy growth. Instead, encourage horizontal branches that angle outward at about 45 degrees.
Make your final cuts just above a leaf node that faces the outside of the vine. This outward-facing growth will receive maximum sunlight and produce the most fruit. Step back and admire your work—the vine should now resemble an open, airy umbrella rather than a tangled mess. This shape makes harvesting easier and ensures every branch gets its fair share of sunlight.
⏰ Step 5: Clean Up and Apply Post-Pruning Care
After all your cuts, I always take a moment to clean up the area around the base of the vine. Remove any fallen leaves or debris within 3 feet of the plant—this reduces hiding spots for pests and diseases. Then, I apply a 2-inch layer of organic mulch around the base, keeping it clear of the trunk itself to prevent rot.
The final touch is a balanced fertilizer application to give the vine the nutrients it needs to recover from pruning. I use a 10-10-10 formula at about half strength, watering it in thoroughly. This gives the vine a gentle boost without overwhelming it. Within 4-6 weeks, you'll see new growth emerging from the pruned areas—your reward for a job well done.
Tips & tricks for pruning a passion fruit vine
Real talk: Pruning passion fruit vines feels intimidating at first, but these simple tricks will help you cut with confidence—and get a vine that produces like a champ.
Tool Prep: Before you even touch the vine, clean and sharpen your pruners with a fine-grit stone or sandpaper. Dull blades tear wood and create jagged cuts that invite disease. I also spray them with rubbing alcohol to sterilize between cuts—this prevents spreading any hidden pathogens from branch to branch. A small investment in quality pruners (look for bypass-style) makes all the difference when dealing with passion fruit's tough, fibrous wood.
The One-Third Rule: When pruning back last year's growth in Step 2, think of it like a haircut—you're not trying to shave it all off, just shape it. I mark my cuts with a piece of masking tape wrapped around the branch at the one-third point before making the cut. This visual guide prevents over-pruning, which stresses the vine. Remember, passion fruit vines are aggressive growers—they'll bounce back quickly from this moderate cut.
Shape Matters More Than Size: In Step 4, focus on creating that open umbrella shape rather than worrying about exact branch lengths. I use a small mirror to check hard-to-see areas where branches might be crossing. The goal is sunlight penetration to every part of the vine. Pro tip: If you're unsure about a cut, leave it—better to have slightly more growth than too little. You can always prune back more next season if needed.
Post-Prune Recovery: After all your cuts, don't be tempted to fertilize immediately. The vine needs time to heal from pruning wounds. I wait the full 4-6 weeks mentioned in Step 5 before applying fertilizer, and even then, I use only half-strength solution. This gentle approach prevents burning new growth while still giving the vine the nutrients it needs to recover and produce fruit.
Pro Tips for Prune A Passion Fruit Vine
- Real talk: Pruning passion fruit vines feels intimidating at first, but these simple tricks will help you cut with co...
- Tool Prep: Before you even touch the vine, clean and sharpen your pruners with a fine-grit stone or sandpaper. Dull b...
- The One-Third Rule: When pruning back last year's growth in Step 2, think of it like a haircut—you're not trying to s...
Frequently asked questions
Got questions about pruning your passion fruit vine? You’re not alone! Here are some of the most common concerns—plus clear, actionable answers to keep your vine thriving.
When is the best time to prune a passion fruit vine?
The ideal window is late winter or early spring, just before new growth begins. This aligns with the vine’s dormant season (typically January–February in most climates). Avoid pruning during flowering or fruiting—wait until after harvest to minimize stress. Pro tip: If you missed the dormant season, prune in early summer, but expect slightly slower recovery.
How much can I cut back without harming the vine?
Passion fruit vines are resilient! You can safely remove up to 30–50% of the previous year’s growth to encourage bushier, more productive canopies. Focus on:
- Dead or diseased branches (cut to the base).
- Overcrowded stems (thin to 3–5 main shoots per vine).
- Leggy or weak growth (prune back to a strong bud or joint).
Will pruning reduce my passion fruit harvest?
Not if done correctly! Pruning actually boosts fruit production by redirecting energy to healthier growth. However, heavy pruning in the first year (or during fruiting) may delay harvests. For established vines, expect a 20–30% increase in fruit yield after proper pruning. Patience pays off—give the vine 1–2 seasons to rebound!
What if my vine doesn’t have many leaves after pruning?
Don’t panic! Passion fruit vines often shed leaves temporarily after pruning as they redirect nutrients. Here’s how to troubleshoot:
- Check for pests: Inspect for spider mites or aphids (spray with neem oil if needed).
- Adjust watering: Keep soil consistently moist (but not soggy) for 4–6 weeks post-prune.
- Fertilize lightly: Use a balanced fertilizer (10-10-10) to support regrowth.
Can I prune a passion fruit vine in containers or small spaces?
Container-grown vines need more frequent pruning to control size and encourage fruiting. Use these adjustments:
Challenge
Solution
Limited space
Train vines vertically (use a trellis) and prune aggressively to 2–3 main stems.
Slow growth
Prune lightly (10–20%) in early spring, then fertilize with compost or citrus-specific nutrients.
Root-bound roots
Repot every 2–3 years and prune roots gently during transplanting.
Wrapping up and next steps
Pruning your passion fruit vine during the dormant season isn’t just about tidying up—it’s your secret weapon for a healthier, more productive harvest! 🌱 With the right tools, timing, and technique, you’ll encourage stronger growth, better airflow, and those coveted sweet fruits.
Now that you’re armed with the know-how, there’s only one step left: roll up your sleeves and get pruning! Start small if you’re new, and soon you’ll be a pro at shaping your vine like a master gardener. Happy growing—your future passion fruit bounty is waiting! 🍈✨