
Pruning
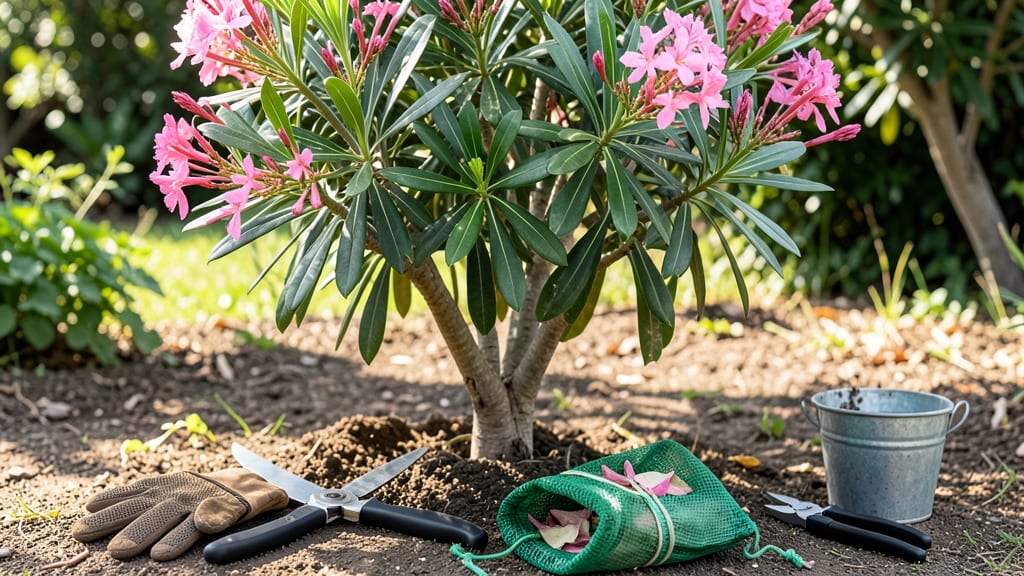
Pruning Nerium oleander transforms your shrub from a wild, leggy mess into a showstopping blooming machine. ✂️ I’ve watched my own oleander go from sparse, sad stems to a dense, flower-covered powerhouse—all by following these precise steps that keep it healthy and blooming year after year.
The key is timing and technique, not brute force cutting. This evergreen beauty thrives when pruned late winter or early spring, before new growth starts. You’ll need sharp bypass pruners (oleander sap is toxic—wear gloves!) and a clear vision for shaping.
The goal is to encourage new growth at the base while removing dead wood and spent blooms. Over-pruning weakens the plant, so aim to remove no more than one-third of the foliage at once.
What you’ll end up with is a neat, bushy oleander that blooms earlier and more abundantly than unpruned plants. The flowers stay vibrant longer, and you’ll avoid the messy seed pods that sap energy. Plus, the toxic sap warning means fewer pests—nature’s built-in protection.
Works for both small shrubs and tall hedges, and the same principles apply whether you’re shaping a single plant or a formal hedge. Let’s get those shears ready!
📚 In This Guide
- What you need
- Instructions
- Tips and common mistakes
- Wrapping up and next steps
What you need
- ● Bypass pruners – Sharp, clean bypass pruners (not anvil-type) for clean cuts on smaller stems. Recommended: Felco F-2 or similar (1 pair).
- ● Loppers – For thicker branches (½" to 1½" diameter). Recommended: Fiskars PowerGear Lopper (1 pair).
- ● Pruning saw – For stubborn, woody branches (1½" or larger). Recommended: Fiskars X7 or similar.
- ● Disposable gloves – Nerium oleander sap can irritate skin. Opt for nitrile-coated gloves (1 pair).
- ● Rubbing alcohol (70% or higher) – For sterilizing tools between cuts (small bottle).
- ● Heavy-duty trash bags or bucket – For collecting pruned debris (1–2 bags or a 5-gallon bucket).
- ● Ladder (if needed) – For tall oleanders (extendable or sturdy step ladder, 6–10 ft).
- ● Hand pruners with ratcheting mechanism – Eases pressure for repetitive cuts (e.g., Corona Ratcheting Pruner).
- ● Pruning sealant – Helps larger cuts heal faster (e.g., Tanglefoot Tree Wound Pruning Sealer).
- ● Safety glasses – Protects eyes from debris (especially when using a saw).
- ● Hose or spray bottle – For rinsing tools and cleaning sap off gloves.
- ● Notebook & pen – To sketch a pruning plan or track growth patterns.
How to prune Nerium oleander for healthier growth and more blooms
Here's the method I rely on to keep oleanders lush, flowering, and free of troublesome seed pods.
✂️ Step 1: Time Your Pruning for Maximum Impact
Prune your oleander right after flowering—typically in late spring or early summer. This timing ensures you remove spent blooms while leaving enough foliage for photosynthesis. I always wait until at least 50% of flowers have faded before cutting, as fresh blooms may still be forming on the same stems.
Never prune in fall or winter—oleanders are evergreens but still enter a semi-dormant phase. Pruning then stresses the plant and can lead to weak growth or even dieback. If you missed the spring window, hold off until next year's blooms have finished.
✂️ Step 2: Deadhead Spent Blooms and Remove Seed Pods
Use sharp, clean bypass pruners to snip off flower clusters at the first set of leaves below the bloom. Cutting too close to the stem can leave a stub that attracts disease. I make my cuts at a 45-degree angle just above a leaf node—this encourages new growth from that point.
Look for those unsightly seed pods forming after blooms fade. These sap-sucking energy vampires drain the plant. Pinch or cut them off immediately—they won't form if you stay on top of deadheading. Real talk: if you let them develop, you'll have a bush full of seeds next year instead of flowers.
✂️ Step 3: Thin Out Overcrowded Branches
Examine the plant's structure and remove any branches growing inward or crossing others. These compete for sunlight and air circulation, creating prime conditions for fungal issues. I target branches that are thinner than a pencil—they rarely produce meaningful blooms and just take up space.
Make your cuts just above an outward-facing leaf node to maintain an open, vase-like shape. Never remove more than 25% of the plant's foliage at once—oleanders are tough but not invincible. If you see water sprouts (thin, weak shoots growing from the trunk), remove them immediately—they're a sign of stress.
✂️ Step 4: Shape for Airflow and Light Penetration
Step back and assess the plant's overall shape. Oleanders respond well to light shaping, so I aim for a slightly rounded form that allows sunlight to reach all branches. Use your pruners to trim back any overlong stems by one-third to one-half their length, cutting just above a leaf node.
Pay special attention to the plant's center—this is where most problems start. If you see dense growth with little light penetration, thin aggressively but don't remove entire branches. Instead, cut back to a strong lateral branch. The goal is to create a bush that looks full from all angles while maintaining airflow.
💧 Step 5: Post-Pruning Care for Recovery
Water your oleander deeply right after pruning to help it recover. The plant will temporarily have less foliage to photosynthesize, so it needs moisture to support new growth. I give it 1 inch of water per week during the recovery period, checking that the soil drains well—oleanders hate soggy roots.
Apply a balanced 10-10-10 fertilizer two weeks after pruning to support new growth. I use half-strength solution to avoid burning the plant. Watch for new shoots emerging from leaf nodes within 4-6 weeks. These are your reward for proper pruning—strong, healthy growth that will produce next year's blooms.
Tips & tricks for perfect Nerium oleander pruning
Between us, I've seen oleanders go from show-stopping bloomers to sad, seed-pod-covered shrubs—and it always came down to these simple but critical moves. Here's what nobody tells you about keeping your oleander thriving.
Timing Secret: The 50% bloom fade rule is non-negotiable. I've watched plants produce second flushes of flowers right after I started pruning too early. Wait until at least half the blooms have dropped before touching your pruners. This ensures you're not removing potential new buds that might still be forming. In my zone 9 garden, this usually falls in late May to early June—mark your calendar!
Tool Technique: Your pruners are only as good as their sharpness. Dull blades crush stems instead of making clean cuts, which invites disease. I sharpen mine with a diamond file before each pruning session and wipe them down with rubbing alcohol between cuts. That 45-degree angle isn't just for looks—it creates a larger surface for water to evaporate, reducing rot risk. Pro tip: Cut just above a leaf node where you want new growth to emerge.
Structural Strategy: Think of your oleander like a sculpture—you're shaping it to let light and air circulate. When thinning branches in Step 3, focus on creating that open vase shape. I always remove branches growing toward the center first, then work outward. The goal is to see sunlight reaching all the way to the trunk. If you're unsure which branches to cut, imagine looking at your plant from all sides—you should be able to see through the center like a window.
Recovery Wisdom: That first deep watering after pruning isn't just helpful—it's essential. Oleanders have thick leaves that lose water quickly, and with less foliage after pruning, they're more vulnerable to stress. I use a soaker hose to deliver that inch of water per week directly to the roots, avoiding the leaves entirely. And yes, the half-strength fertilizer two weeks later makes all the difference—full strength can burn those new growth points you're trying to encourage.
Pro Tips for Nerium Oleander Pruning
- Between us, I've seen oleanders go from show-stopping bloomers to sad, seed-pod-covered shrubs—and it always came dow...
- Timing Secret: The 50% bloom fade rule is non-negotiable. I've watched plants produce second flushes of flowers right...
- Tool Technique: Your pruners are only as good as their sharpness. Dull blades crush stems instead of making clean cut...
Frequently asked questions
Got questions about pruning your Nerium oleander? You’re not alone! Here are answers to the most common concerns—from timing to troubleshooting—to keep your plant thriving and blooming beautifully.
When is the best time to prune oleander?
Prune oleander after blooming (late spring to early summer) to encourage new growth and more flowers next season. Avoid heavy pruning in fall or winter, as cold weather can stress the plant. Light shaping in early spring is fine, but never cut into old wood—it won’t regrow!
How much can I trim oleander without harming it?
You can safely remove up to 1/3 of the plant’s height in one session. Focus on deadheading spent blooms and shaping leggy stems. Avoid over-pruning—oleander is resilient but may struggle to recover if cut back too aggressively. Pro tip: Use clean, sharp tools to prevent disease!
Why does my oleander keep growing seed pods?
Seed pods form when flowers aren’t deadheaded promptly. To stop them, remove faded blooms within 24 hours by snipping the stem just above a leaf or bud. This redirects energy to new flowers instead of seed production. Bonus: Fewer pods mean less mess and more blooms!
Can I prune oleander in pots or containers?
Yes! Container-grown oleander follows the same rules as in-ground plants, but with extra caution. Prune lightly to maintain shape and size, and repot every 2–3 years if roots become root-bound. Watch for: Yellowing leaves (overwatering) or wilting (underwatering) after pruning. Drainage is key!
What if I prune at the wrong time and the plant looks sad?
Don’t panic! Oleander is tough. If pruned too late (fall/winter), it may drop leaves but will bounce back in spring. If you see blackened stems or oozing sap, you may have cut too deeply—trim back to healthy tissue. Keep the plant well-watered but avoid soggy soil. Patience is key!
Wrapping up and next steps
Mastering nerium oleander pruning—especially deadheading—can transform your plant into a vibrant, blooming powerhouse while keeping pesky seed pods at bay. 🌸 With the right tools, timing, and technique, you’ll encourage healthier growth and stunning flowers year after year. Ready to roll up your sleeves?
Your next step? Grab those pruners, schedule a quick session after your oleander’s final bloom, and watch your plant thrive! Happy pruning—your garden will thank you! 🌿✨