
Pruning
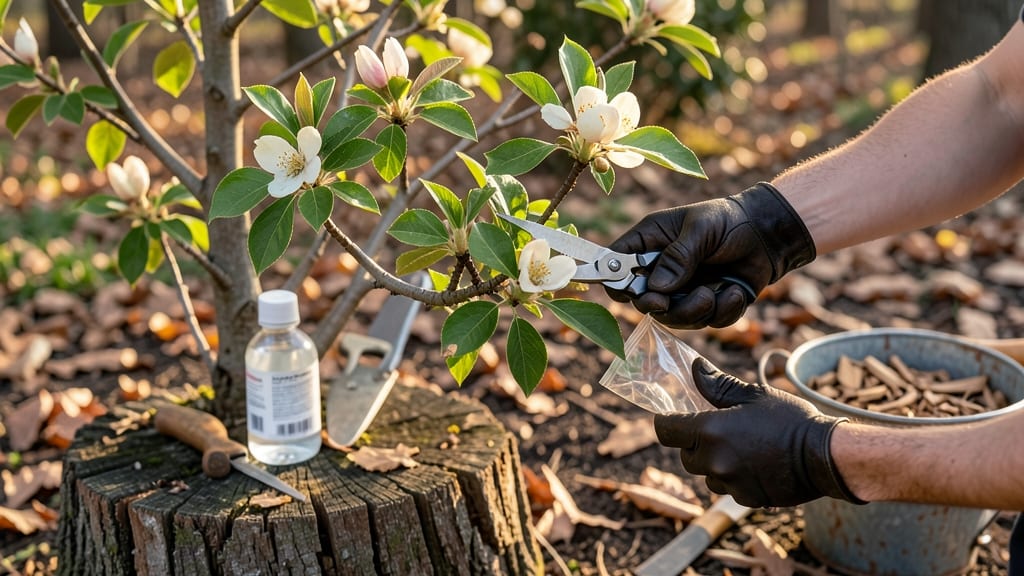
Pruning dogwood shrubs isn’t just about shaping—it’s about breathing life into your plants. ✂️ I’ve learned that skipping this step turns vibrant shrubs into disease magnets with crowded branches blocking sunlight.
The right cuts open up the canopy, letting air and light reach every leaf, which means fewer fungal issues and more flowers next spring.
Timing matters most: late winter or early spring, just as new growth begins, is ideal. You’ll need sharp bypass pruners, loppers for thicker branches, and a clean bucket for clippings. Start by removing dead or crossing branches first—these are the weak points where pests and disease take hold.
Then work on thinning out the interior to improve airflow, cutting back to an outward-facing bud.
What you’ll end up with is a dogwood that looks neat and intentional, not overgrown and stressed. The blooms will be bigger, the foliage denser, and the whole plant will bounce back faster after winter.
I’ve seen shrubs that were once scraggly transform into showstoppers with just this approach—it’s that powerful.
For larger shrubs, spread the pruning over 2-3 years to avoid shocking the plant. And always sterilize your tools between cuts to prevent spreading any hidden infections. The key is patience—dogwoods reward careful, gradual work with years of healthy growth.
📚 In This Guide
- What you need
- Instructions
- Tips and common mistakes
- Wrapping up and next steps
What you need
- ● Pruning shears: Bypass pruners (sharp, clean, and disinfected with rubbing alcohol or bleach solution). Required for cuts up to ½ inch thick.
- ● Loppers: Bypass loppers (for branches ½ to 1½ inches thick). Look for ratcheting handles for extra leverage.
- ○ Pruning saw: Curved-tooth pruning saw (for branches over 1½ inches thick). Optional but handy for stubborn cuts.
- ● Gloves: Heavy-duty gardening gloves (to protect against thorns and sap). Recommended for comfort.
- ● Disinfectant: 1-part bleach to 9-parts water (or 70% isopropyl alcohol) to sterilize tools between cuts. Critical for disease prevention!
- ● Rags or paper towels: For wiping tools and hands post-pruning.
- ● Ladder or step stool: If your dogwood is over 6 feet tall. Ensure it’s stable and non-slip.
- ● Sealant: Pruning sealant (like Tanglefoot Tree Wound Pruning Seal) for large cuts over 2 inches thick. Controversial—skip if your dogwood is young or healthy!
- ● Trash bags: For collecting pruned branches and debris.
- ● Safety glasses: To shield eyes from flying debris.
- ● Marking spray: Fluorescent spray paint (to mark branches for removal before cutting).
- ● Notebook & pen: To jot down notes on pruning patterns or future maintenance.
Step-by-Step instructions for pruning dogwood shrubs
Here’s my go-to method for revitalizing dogwoods—clean cuts that boost airflow and keep diseases at bay.
✂️ Step 1: Time Your Pruning for Optimal Growth
Prune dogwoods in late winter or early spring, just as buds begin to swell but before new growth starts. This timing prevents stressing the plant and avoids inviting pests or fungal infections. If you missed the window, late summer works too—but avoid pruning in fall, which can leave cuts vulnerable to winter damage.
Check your local climate zone. In warmer regions, you can prune as late as February, while colder zones should wait until March or April. The key is to finish before leaves emerge, so the plant can heal quickly and focus energy on new growth.
✂️ Step 2: Gather the Right Tools and Sanitize
Use sharp, clean pruning shears for cuts under ½ inch thick, and a pruning saw for thicker branches. Dull tools crush stems, slowing healing and inviting disease. Before you start, wipe blades with 70% isopropyl alcohol or a 10% bleach solution to kill any lingering bacteria or fungi.
I also keep a bucket of soapy water handy to dip tools between cuts—this prevents cross-contamination if your shrub has any existing infections. Avoid touching the cut ends of branches, as oils from your hands can further stress the plant.
✂️ Step 3: Remove Dead, Diseased, or Damaged Branches First
Scan the shrub for branches that are dead (no green bark, hollow when cut), diseased (black spots, oozing sap), or damaged (split, broken, or rubbing against others). Cut these out completely at the base, using a 45-degree angle just outside the branch collar—the swollen area where the branch meets the trunk.
Don’t leave stubs; they trap moisture and rot. If a branch is too thick to cut cleanly, make two cuts: the first ⅓ of the way down at a slight angle, then a second cut parallel to the first to remove the notch. This prevents tearing the bark.
✂️ Step 4: Thin the Canopy for Airflow and Light
Step back and visualize the shrub’s shape. Remove 20-30% of the oldest, thickest branches to open the center, starting from the bottom and working upward. Focus on branches that cross or rub, as these create wounds and reduce airflow. Aim for an open vase shape that lets light and air circulate freely.
Cut branches back to a side bud or lateral branch rather than leaving a stub. This encourages new growth in the right direction. Avoid "heading back" (cutting back into a stem)—dogwoods respond poorly to this and often produce weak, leggy growth.
✂️ Step 5: Clean Up and Monitor for Recovery
Rake up all pruned branches and dispose of them in the trash—not your compost pile—since diseased material can spread. Seal any large cuts (over ½ inch) with pruning sealant to reduce water loss and infection risk, but skip this for small cuts, as it’s unnecessary and can trap moisture.
Water the base of the shrub deeply after pruning to help it recover. Over the next few weeks, watch for new growth at the cut sites. If you see yellowing leaves or wilting, your cuts may have been too severe—adjust next time by removing less material.
Tips & tricks for perfectly pruned dogwood shrubs
These practical insights will help you avoid common mistakes and get the most out of your pruning effort.
The Right Time Matters: In Step 1, when you're deciding between late winter/early spring or late summer, consider your local climate. In warmer zones, February is ideal, but if you're in a colder region, wait until March or April. The key is to finish pruning before leaves emerge - this gives the plant time to heal before new growth begins. I always check my local frost dates to time it perfectly.
Tool Prep is Non-Negotiable: Before you even touch your shrub, take 5 minutes to properly sanitize your tools in Step 2. I keep a small spray bottle of 70% isopropyl alcohol handy for quick blade disinfection between cuts. This prevents spreading any potential diseases from one branch to another. Don't skip this - I've seen entire shrubs get infected because of contaminated tools.
Branch Collar Awareness: When removing branches in Step 3, pay special attention to the branch collar - that swollen area where the branch meets the trunk. Make your cut just outside this collar at a 45-degree angle. If you cut too close, you'll damage the collar and slow the plant's healing. For thicker branches, the two-cut technique (first ⅓ of the way down, then parallel) prevents tearing the bark beautifully.
Visualize the Final Shape: In Step 4, before you make any cuts, step back and visualize your shrub's final shape. I like to sketch a quick outline on paper first. Aim for that open vase shape - this isn't about making your shrub look like a topiary, but rather about creating space for air to circulate. Remember, you're removing 20-30% of the oldest branches, so be selective about which ones go.
Pro Tips for Pruning Dogwood Shrubs
- These practical insights will help you avoid common mistakes and get the most out of your pruning effort.
- The Right Time Matters: In Step 1, when you're deciding between late winter/early spring or late summer, consider you...
- Tool Prep is Non-Negotiable: Before you even touch your shrub, take 5 minutes to properly sanitize your tools in Step...
Frequently asked questions
When is the best time to prune dogwood shrubs?
The ideal time is late winter or early spring (before new growth starts) to avoid stressing the plant. Never prune in fall—this can encourage new growth that won’t harden off before winter, increasing frost damage risk. For heavily overgrown shrubs, light pruning can be done in summer to improve airflow, but avoid heavy cuts.
How much can I prune a mature dogwood shrub?
For healthy dogwoods, remove up to 25-30% of the oldest wood to rejuvenate growth. Avoid cutting more than 1/3 of the canopy at once—this can shock the plant. Focus on thinning dense branches from the center outward to improve airflow and sunlight penetration.
What should I do if my dogwood has dead or diseased branches?
Remove any dead, diseased, or crossing branches first—sterilize pruners with rubbing alcohol between cuts to prevent spreading pathogens. Look for blackened cankers, fungal spots, or oozing sap; these are signs of anthracnose or borers. Dispose of infected debris immediately in sealed bags.
Can I prune dogwoods in hot or humid climates?
Yes, but time cuts carefully. Prune on cool, overcast days to reduce stress. In humid areas, prune early morning to allow wounds to dry faster, lowering fungal infection risks. Avoid pruning during peak summer heat—opt for late winter/early spring instead.
What’s the difference between thinning and heading cuts?
Thinning cuts
remove entire branches back to the trunk or main stem, improving airflow and structure. Heading cuts (shortening branches) encourage bushier growth but can lead to dense centers. For dogwoods, thinning is always preferred—heading can promote weak, disease-prone growth.
Wrapping up and next steps
Pruning your dogwood shrubs isn’t just about keeping them tidy—it’s a game-changer for their health, airflow, and long-term beauty! 🌿 By mastering thinning cuts and timing, you’ll help prevent disease, encourage vibrant blooms, and shape your shrubs with confidence.
Remember, patience and precision are key, so take your time and enjoy the process.
Ready to transform your garden? Grab your tools and schedule your next pruning session—your dogwoods will thank you with lush, thriving foliage for years to come! 🌸