
Pruning
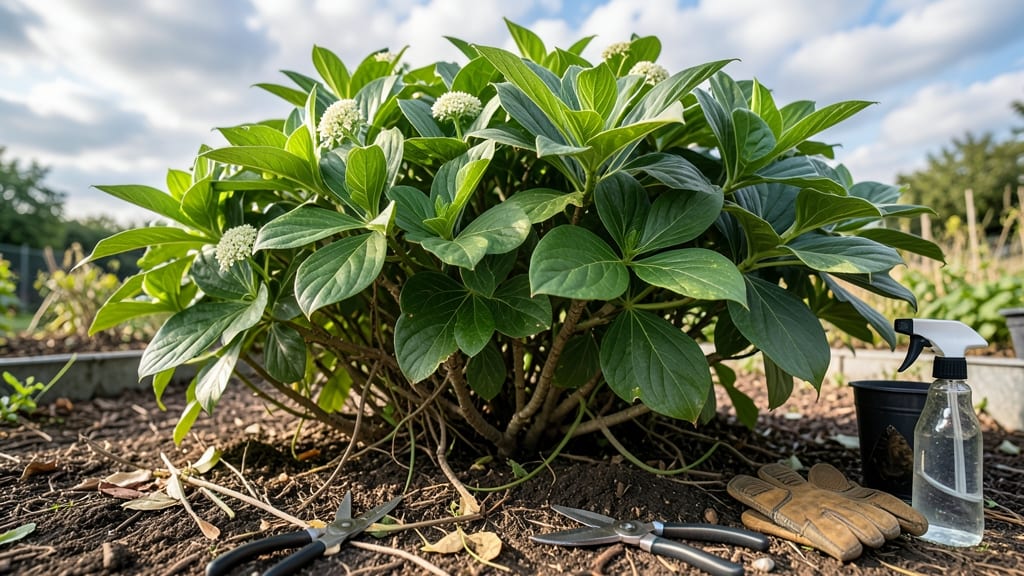
Pruning a Fatsia japonica plant in late winter is the secret weapon for transforming it into a bushier, more vibrant shrub. ✂️ I’ve pruned mine for years, and this is the exact method that turns leggy growth into a lush, compact shrub—no guesswork involved. The key? Timing, sharp cuts, and understanding how this tropical-looking plant really wants to grow.
You’ll need just three things: clean pruning shears, rubbing alcohol (to sterilize between cuts), and a clear day when temps are above 40°F. The goal isn’t to hack away randomly—it’s to encourage new growth from the base while maintaining that classic rounded shape.
Think of it like giving your plant a fresh start before spring’s growth spurt.
After pruning, you’ll see fresh, bright green leaves emerging within 4-6 weeks, and the plant will fill out noticeably by summer. The secret’s in the cuts: always trim just above a leaf node at a 45-degree angle, and never remove more than one-third of the plant at once.
This keeps stress low while maximizing regrowth.
Works for both container-grown fatsias and in-ground plants, and the same principles apply whether you’re shaping a young plant or rejuvenating an older one. The payoff? A plant that looks neat, healthy, and thriving all season long—without the winter browning that plagues neglected specimens.
📚 In This Guide
- What you need
- Instructions
- Tips and common mistakes
- Wrapping up and next steps
What you need
- ● Bypass pruners: Sharp, high-quality pruners (e.g., Felco or Fiskars) with 4- to 6-inch blades for clean cuts.
- ● Loppers: For thicker stems (up to 1-inch diameter), opt for loppers with a 10- to 12-inch reach.
- ● Hand saw: A pruning saw with a curved blade for stubborn, woody stems (if needed).
- ● Disinfectant (70% isopropyl alcohol or bleach solution): To sterilize tools between cuts and prevent disease.
- ● Gloves: Heavy-duty gardening gloves to protect your hands from thorns and sap.
- ● Bucket or trash bag: For collecting pruned branches (aim for 10-20 gallons, depending on plant size).
- ● Sharpie or permanent marker: To label cuts if you’re practicing selective pruning.
- ● Hose or spray bottle: To rinse tools or clean sap off leaves post-pruning.
- ● Pruning sealant: (e.g., tree wound dressing) for large cuts over ½-inch in diameter.
- ● Ladder or step stool: If your Fatsia japonica is taller than 6 feet.
- ● Compost bin: For repurposing small, healthy prunings as mulch.
- ● Camera or phone: To document your plant’s progress before and after!
Instructions for pruning Fatsia japonica plant
Here's how I revive this bold shrub every late winter—it's the secret to those thick canes and glossy leaves.
✂️ Step 1: Time Your Prune for Late Winter Dormancy
Prune your Fatsia japonica in late winter, just as buds begin to swell but before new growth starts—typically February to early March in most climates. This timing ensures you remove last year's growth while allowing the plant to focus energy on fresh, strong canes. I always check for tight, plump buds along the stems before grabbing my shears.
Never prune in fall or early winter. The plant needs those leaves to store energy for spring growth, and cutting too early can leave it vulnerable to cold damage. If you missed the window, wait until early spring when you see the first signs of new growth emerging from the buds.
✂️ Step 2: Remove Dead, Weak, or Crossing Branches First
Start by inspecting the plant for dead wood—stems that are brittle, hollow, or lack leaves entirely. These should come off first using clean, sharp pruners at the base of the branch. Next, look for weak or spindly growth—these are the thin stems that never quite bulked up. Cut these back to a strong lateral branch or the main stem.
Pay special attention to branches that cross or rub against each other. These create wounds and invite disease. I always make my cuts at a 45-degree angle, about ¼ inch above an outward-facing bud. This encourages new growth to shoot out, not inward toward the center of the plant.
✂️ Step 3: Thin Out to Improve Airflow and Light Penetration
Fatsia japonica thrives when sunlight and air circulate freely through the canopy. Step back and look for overcrowded areas where branches are too close together. Selectively remove one-third of the oldest stems at the base to rejuvenate the plant. Cut these back to healthy, outward-facing buds—never leave stubs.
For the remaining branches, trim back the outermost growth by about one-third to encourage bushier, denser foliage. You'll see the plant's natural shape emerge as you work—this is your guide. Avoid cutting into the woody center of the plant, as Fatsia japonica doesn't regenerate well from old wood.
✂️ Step 4: Shape the Plant for Balance and Structure
Now it's time to refine the plant's form. Use your hand as a guide—if you can't see light filtering through the center, you still have work to do. For a natural, rounded shape, trim the top growth slightly more than the lower branches. This prevents the plant from becoming too top-heavy.
If your Fatsia japonica has grown leggy, cut back the longest stems by half. You'll be surprised how quickly the plant fills out with fresh, vibrant growth. Always step back occasionally to check your progress—what looks balanced from close up might need adjustment from a few feet away.
💧 Step 5: Clean Up and Encourage New Growth
After pruning, sterilize your tools with rubbing alcohol to prevent spreading disease. Remove all pruned material from the area—don't leave it on the ground, as it can harbor pests. Give the plant a light application of balanced fertilizer (10-10-10) to support the new growth you've encouraged.
Water deeply after pruning to help the plant recover, but avoid overwatering—Fatsia japonica prefers well-draining soil and can suffer from root rot if kept too wet. Within 4-6 weeks, you should see new shoots emerging from the buds you left behind. That's your sign the pruning worked!
Tips & tricks for pruning Fatsia japonica plant
Here's what nobody tells you about transforming your Fatsia japonica into a lush, vibrant plant—these are the details that make all the difference.
Timing Secret: The February-to-early-March window is critical because that's when the plant's energy shifts from dormancy to growth. If you prune too early, you risk stressing the plant before it's ready; too late, and you'll cut off potential spring growth. I've learned this the hard way—waiting for those tight, plump buds to appear is your green light.
Tool Prep: Your pruners are your most important tool, so don't skip the prep. Sterilize them with rubbing alcohol before and after pruning to prevent spreading disease between cuts. I also sharpen my blades regularly—dull tools crush stems instead of making clean cuts, which stresses the plant. A quick wipe with a clean cloth between cuts keeps sap from gumming up the blades.
Visual Cues for Pruning: When you're deciding what to cut, think about light and airflow. Hold your hand up to the plant—if you can't see light filtering through the center, you still have work to do. For that one-third reduction of oldest stems, look for branches that are thinner than a pencil or have fewer leaves. These are the ones that won't contribute much to next year's growth.
Post-Prune Care: After you've finished shaping, give your Fatsia japonica a deep drink of water to help it recover from the stress of pruning. I like to add a light application of balanced fertilizer (10-10-10) right after pruning to give the plant a boost as it prepares for new growth. Just avoid overwatering—this plant prefers its soil on the drier side to prevent root rot.
Pro Tips for Pruning Fatsia Japonica Plant
- Here's what nobody tells you about transforming your Fatsia japonica into a lush, vibrant plant—these are the details...
- Timing Secret: The February-to-early-March window is critical because that's when the plant's energy shifts from dorm...
- Tool Prep: Your pruners are your most important tool, so don't skip the prep. Sterilize them with rubbing alcohol bef...
Frequently asked questions
Got questions about pruning your Fatsia japonica? You’re not alone! Here are some of the most common concerns—and straightforward answers—to help you prune with confidence.
When is the best time to prune Fatsia japonica?
The ideal window is late winter (just before new growth starts) or early spring. This timing minimizes stress on the plant and encourages vibrant, healthy foliage. Avoid pruning in fall or winter when the plant is dormant—it won’t recover as well.
How much can I cut back my Fatsia japonica?
You can safely remove up to one-third of the plant’s growth in a single pruning session. For older canes, cut back to a healthy bud or joint to promote bushier regrowth. Avoid over-pruning—this shrub is resilient but benefits from gradual shaping.
What if my Fatsia japonica doesn’t grow back after pruning?
If new growth stalls, check for root damage, pests, or disease. Ensure it’s in well-draining soil and receives partial shade. If the plant is still healthy but slow, wait a few weeks—Fatsia japonica can be slow to bounce back but will recover with patience.
Can I prune Fatsia japonica for shape instead of just trimming old growth?
Use pruning to encourage a fuller, more balanced shape. Focus on thinning out crowded branches and cutting back leggy stems to the base. For a hedge-like look, prune evenly on all sides. Just avoid shearing—Fatsia japonica prefers natural, layered pruning.
Should I prune Fatsia japonica after a storm or heavy wind damage?
Yes, but wait until the plant is dry to assess damage. Remove broken or split branches immediately to prevent disease. For minor damage, prune back to a healthy joint. If the plant is severely stressed, hold off on heavy pruning until spring.
Wrapping up and next steps
Pruning your Fatsia japonica in late winter isn’t just about tidying up—it’s a rejuvenating ritual that sets the stage for vibrant growth and resilience. With the right tools, timing, and technique, you’ll encourage stronger canes and lush foliage that’ll wow you all season long. 🌿✨
Now that you’re armed with the know-how, roll up your sleeves and give your plant the care it deserves! Start by scheduling your next pruning session—mark your calendar for late winter and enjoy the transformation. Happy gardening!