
Pruning
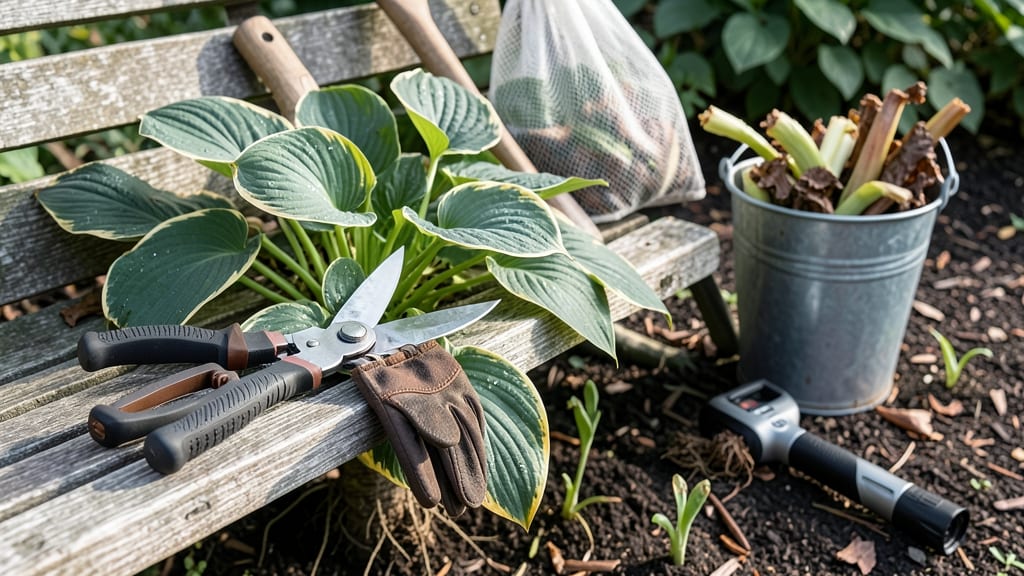
Pruning hostas in fall isn't just about tidying up—it's the secret to stronger plants and fewer slug battles next spring. 🌿 After the foliage yellows and collapses (usually late October to November, depending on your zone), grab your pruners and get to work.
I’ve learned the hard way that skipping this step means muddy, rotting leaves smothering the crown all winter—inviting disease and pests.
Here’s the key: cut back everything—even the stalks—down to the soil level. Use clean, sharp pruners (sterilized with rubbing alcohol) to avoid spreading fungus, and focus on removing all dead foliage, not just the brown bits.
The goal? A clean slate that lets sunlight and air reach the crown, preventing soggy, slimy messes under snow.
What you’ll end up with is a neat, dormant plant ready to wake up stronger in spring. The roots stay healthier, slugs have fewer hiding spots, and next year’s foliage emerges 2-3 weeks earlier—plus, your garden beds look spotless by winter.
No more digging through gunk to plant spring bulbs!
For colder climates (zones 3-5), wait until after the first hard frost—this ensures the plant’s energy is already stored underground. In milder zones (6-9), prune before winter rains start. Either way, never leave old leaves standing—they’re just a slug buffet waiting to happen.
📚 In This Guide
- What you need
- Instructions
- Tips and common mistakes
- Wrapping up and next steps
What you need
- ● Pruning shears or sharp bypass pruners – 1 pair (sterilized with rubbing alcohol to prevent disease spread). Opt for bypass blades (not anvil) for cleaner cuts.
- ● Heavy-duty gardening gloves – 1 pair (nitrile-coated for grip and protection against thorns or sap).
- ● Disposable gardening shears or hedge clippers – 1 pair (for larger hosta patches; 7- to 10-inch blades recommended).
- ● Garden kneeler or pad – 1 unit (to protect your knees and keep you comfortable).
- ● Compost bin or bucket – 1 medium-sized (for clippings; 5-gallon capacity works well).
- ● Rake or leaf blower – 1 unit (to clear debris after pruning).
- ● Hand sanitizer or disinfectant wipes – For quick cleanups between cuts.
- ● Labeling tags or markers – If you’re reorganizing your garden layout.
- ● Mulch (straw or shredded leaves) – 1-2 bags (to protect hostas over winter).
- ● Knee brace or support – If you have joint concerns (trust us, it’s worth it!).
- ● Wait until after the first frost (typically late fall, October-November in most U.S. zones) but before hard freezes (below 20°F/-7°C).
- ● Choose a dry, overcast day to avoid stressing the plants.
- ● Check local plant hardiness zones—adjust timing if you’re in Zone 3-5 (earlier) or Zone 8+ (later).
Step-by-step instructions for pruning hostas in fall
Here's how I prepare my hostas for winter—keeping them healthy and tidy without stressing the plants.
✂️ Step 1: Wait for the Right Time to Prune
Never prune hostas until after the first hard frost when the foliage turns completely brown and crispy. This signals the plant has entered dormancy and won't regrow from old leaves. I wait until mid-to-late fall, typically 4-6 weeks after your first frost date, to avoid cutting back new growth that might emerge.
If you prune too early, you risk stimulating fresh growth that won't harden off before winter. Look for fully brown, dry leaves that crumble easily when touched—that's your cue. I usually prune in November in my zone 5 climate, but adjust based on your local frost dates.
✂️ Step 2: Cut Back Foliage to the Ground
Use clean, sharp pruners or shears to cut the foliage back to within ½ inch of the soil line. Avoid leaving stubs, as they can harbor pests or diseases over winter. I make clean cuts at a slight angle to prevent water from pooling on the crown.
Don't pull or tear the leaves—this can damage the crown and leave wounds that invite rot. Work in dry conditions to reduce soil splatter, which spreads potential pathogens. For large clumps, I remove the foliage in stages to avoid overwhelming myself.
🪴 Step 3: Clean Up Debris and Protect the Crown
Remove all cut foliage from the garden immediately to prevent fungal spores from overwintering. I place the debris in a sealed trash bag and dispose of it with yard waste. This single step drastically reduces next season's risk of leaf blight and other diseases.
Apply a 2-3 inch layer of mulch around the base of the hostas, keeping it 2 inches away from the crown to prevent rot. I use shredded hardwood mulch because it breaks down slowly and insulates the roots. This protects against extreme temperature swings and keeps the soil consistently moist.
⏰ Step 4: Monitor and Adjust for Winter Conditions
In areas with heavy snow or freezing winds, I add a layer of evergreen boughs or straw over the mulch for extra insulation. This extra step is critical in zone 4 or colder, where winter temperatures can drop below -10°F.
Check your hostas in early spring before new growth emerges. If you see any mold or slimy residue on the crown, remove it and treat with a fungicide. Healthy hostas will send up fresh leaves by late April or early May—that's your signal everything survived winter.
Tips & tricks for perfect fall hosta pruning
Here's what I learned after years of trial and error about keeping your hostas thriving through winter.
Timing is Everything: The 4-6 week window after your first frost is non-negotiable. I've learned the hard way that pruning too early can stimulate tender new growth that won't survive winter. In my zone 5 garden, I mark November 1st on my calendar as the absolute latest I'll prune—this gives the plants time to fully harden off. If you're unsure about frost dates, check your local cooperative extension service for precise timing.
Tool Selection Matters: Never use dull or dirty pruners—they can tear leaves and create jagged wounds that invite disease. I keep a dedicated pair of pruners just for hostas, and I sterilize them with rubbing alcohol between uses. For large clumps, I've found that heavy-duty bypass pruners make quick work of the job without crushing stems. Always make clean cuts at a slight angle to prevent water pooling on the crown.
Mulching Strategy: That 2-3 inch layer of mulch isn't just decoration—it's insulation. I've seen firsthand how hostas in unmulched beds suffer from heaving during freeze-thaw cycles. For extra protection in colder zones, I add a layer of evergreen boughs over the mulch. This creates an insulating blanket that can make the difference between survival and loss in temperatures below -10°F. Just remember to keep mulch 2 inches away from the crown to prevent rot.
Spring Inspection: Your early spring check isn't just about aesthetics—it's a health assessment. I look for three things: fresh green shoots (good), mold or slimy residue (bad), and any signs of pests. If you find mold, remove it immediately and treat with a fungicide. Healthy hostas will show fresh leaves by late April—if you don't see them by then, your plants might need winter protection adjustments for next year.
Pro Tips for Pruning Hostas In Fall
- Here's what I learned after years of trial and error about keeping your hostas thriving through winter.
- Timing is Everything: The 4-6 week window after your first frost is non-negotiable. I've learned the hard way that pr...
- Tool Selection Matters: Never use dull or dirty pruners—they can tear leaves and create jagged wounds that invite dis...
Frequently asked questions
Got questions about pruning hostas in fall? You’re not alone!
Here are answers to the most common concerns to help you tackle this task with confidence.
When is the exact best time to prune hostas in fall?
Prune hostas in late fall—after the first hard frost (when foliage turns brown and crispy) but before winter dormancy sets in. Aim for October to November, depending on your climate zone. This timing prevents disease spread and gives plants a clean slate for spring regrowth.
Do I have to cut hostas all the way to the ground?
Nope! While cutting to the ground is standard, you can leave 1–2 inches of stubble if you prefer. This protects the crown from frost heave and still allows for easy cleanup. Just avoid leaving tall, dead stalks—they can harbor pests or diseases over winter.
What if my hostas look healthy but still have brown leaves? Should I prune them?
If leaves are only slightly browned (not mushy or slimy), hold off until winter. But if they’re crispy and dry, go ahead and prune—this is a sign of natural dormancy. Never prune soggy or diseased leaves; remove those immediately to prevent spread.
Can I compost the pruned hosta leaves, or should I throw them away?
You can compost healthy, dry hosta leaves—they’ll break down into nutrient-rich soil. Just avoid composting leaves with visible mold, spots, or pests (like slugs or snails). For diseased foliage, bag and trash it to prevent garden reinfection.
What if I missed fall pruning? Can I still do it in early spring?
Yes! If you skip fall pruning, prune in early spring (March–April) before new growth emerges. Remove dead foliage, but avoid cutting into fresh green shoots—this can harm the plant. Just be patient and let hostas wake up naturally!
Wrapping up and next steps
Pruning hostas in fall is your secret weapon for healthier, more vibrant plants next spring! 🌱 By removing dead foliage, thinning crowded growth, and sharpening your tools, you’re giving your garden a fresh start—all while saving time and effort in the long run.
Now that you’re armed with the when, how, and why, it’s time to roll up your sleeves and transform your hosta patch into a winter-ready masterpiece.
Next step? Grab your pruners, pick a crisp fall day, and revisit the 3-step guide to tackle your hostas with confidence. Your future self—and your garden—will thank you! 🌿✨