
Pruning
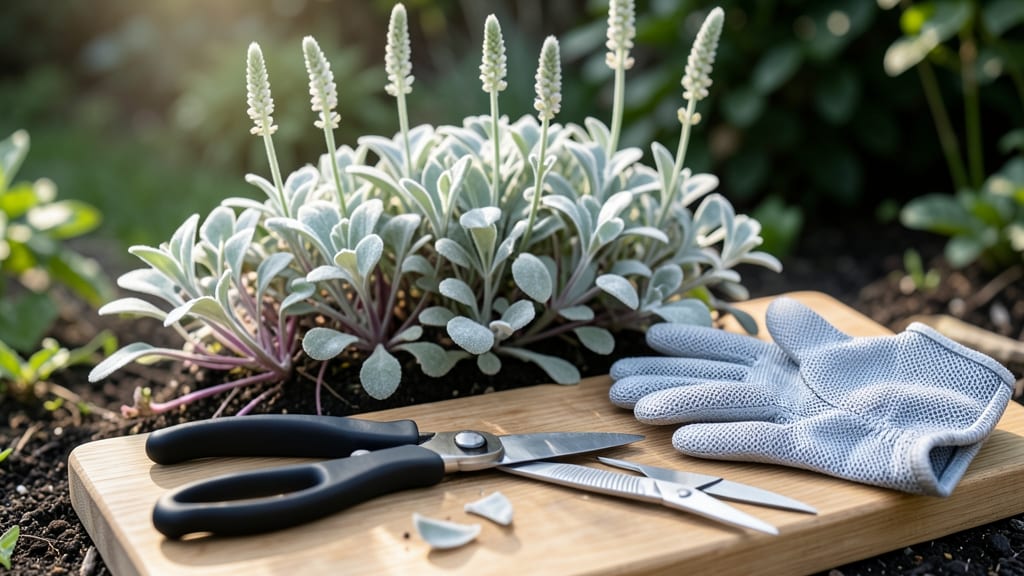
Pruning lambs ear isn't just about keeping it tidy—it's the secret to fluffier, faster growth all season long. 🌿 I've learned that skipping this step means watching your plant turn into a leggy, sparse mess instead of the velvety cloud it should be.
The right cuts at the right time transform this perennial into a showstopper that multiplies effortlessly.
Timing matters most: spring is for shaping and encouraging new growth, while fall is for cleanup to prep for winter. You'll need sharp pruners and a light touch—lambs ear responds best to gentle trimming rather than aggressive hacking.
The goal is to maintain that signature fuzzy texture while encouraging bushier habits.
After pruning, you'll notice fresh silver-green foliage emerging within 2-3 weeks, and the plant will spread 2-3 times faster than unpruned neighbors. The key is cutting just above leaf nodes to stimulate branching, never removing more than one-third of the plant at once.
Works perfectly for containers, borders, or ground cover—just adjust your pruning frequency based on how quickly it fills its space. Here's how to do it right without sacrificing that signature velvety charm.
📚 In This Guide
- What you need
- Instructions
- Tips and common mistakes
- Wrapping up and next steps
What you need
- ● Pruning shears – Bypass-style (sharp, clean blades, 5–7" length) for precise cuts. Dull shears crush stems—avoid this!
- ● Garden gloves – Heavy-duty (nitrile-coated) to protect hands from fuzzy texture and sharp stems.
- ● Disinfectant (70% isopropyl alcohol or bleach solution) – 1 part bleach to 9 parts water (sterilize tools between plants to prevent disease).
- ○ Garden twine or plant ties – Optional but helpful for supporting leggy stems post-prune.
- ● Compost bin or mulch – To recycle pruned foliage (rich in nutrients!).
- ● Hand pruners – For hard-to-reach spots (smaller, ergonomic handles).
- ● Plant food (balanced fertilizer, 10-10-10) – Lightly feed after pruning for a growth boost.
- ● Spray bottle with water – Dab stems after cuts to prevent wilting.
- ● Notebook & pen – Track pruning dates and plant responses for future reference.
Step-by-Step instructions for pruning lambs ear
Here's how to keep your lambs ear looking lush and growing fast all season long.
✂️ Step 1: Prune Dead or Damaged Foliage in Early Spring
Start by inspecting your lambs ear plants for any brown, crispy, or mushy leaves—these are dead and need removal. Use clean, sharp pruning shears to snip these leaves at the base, right where they meet the stem. I always work on a dry morning because wet leaves can harbor fungal spores and spread disease if you handle them roughly.
Look for stems that appear hollow or mushy inside—they're likely infected. Cut these back to healthy tissue immediately. You'll notice the plant's center often stays the healthiest, so focus on the outer leaves first. This first pruning jumpstarts fresh growth by removing anything blocking sunlight from reaching new leaves.
🌿 Step 2: Thin Out Overcrowded Growth for Airflow
Lambs ear grows in dense rosettes, but too much crowding invites pests and fungal issues. Every 4-6 weeks, assess the plant's center and remove any stems growing too close together. I aim to leave about 2-3 inches of space between each healthy stem—this prevents moisture from lingering and encourages faster, fluffier foliage production.
Watch for stems that lean dramatically toward the light. These "leggy" growths weaken the plant. Snip them back to a lower leaf node or side branch. You'll see new, stronger growth emerge within 10-14 days of this pruning. This is the secret to keeping lambs ear compact and bushy rather than sprawling.
☀️ Step 3: Encourage Bushier Growth with Strategic Summer Pruning
Mid-summer is prime time for shaping lambs ear. Every 2-3 weeks, cut back the longest stems by about one-third of their length. This triggers branching at the leaf nodes below the cut, creating a fuller, more fluffy plant. I always make cuts just above a set of leaves or a side bud—never leave a stub.
Pay attention to the plant's natural shape. If it's growing taller than wide, focus on cutting back the vertical stems. If it's spreading too much, trim the outer leaves. You'll notice new growth appears within 7-10 days, and the plant will fill out more densely. This method keeps lambs ear looking lush without sacrificing its signature velvety texture.
⏰ Step 4: Light Pruning in Fall to Prepare for Winter
As temperatures drop below 50°F in fall, reduce your pruning to just removing dead or yellowing leaves. Avoid heavy cutting now—you want the plant to store energy for next season. Focus on cleaning up any debris around the base, as this prevents fungal overwintering. I leave the plant's natural shape intact but trim only the most unsightly growth.
If you're in a cold climate (below 20°F), consider covering the plant with a light layer of mulch after your final pruning. This protects the roots while still allowing airflow. In milder climates, minimal pruning is all you need—just keep the plant tidy until spring. You'll see fresh, vibrant growth emerge as soon as temperatures rise in early spring.
Tips & tricks for pruning lambs ear
Here's what nobody tells you about keeping your lambs ear thriving year-round.
Timing is Everything: In Step 1, when you're removing dead foliage in early spring, don't rush—wait until the morning after a dry night. Dew can make leaves slippery and increase the risk of tearing healthy tissue. I've learned this the hard way after accidentally damaging perfectly good leaves during wet conditions. Also, always sterilize your pruning shears with rubbing alcohol between cuts to prevent spreading disease from infected to healthy stems.
The 2-3 Inch Rule: During Step 2's thinning process, maintaining that 2-3 inch spacing between stems isn't just about aesthetics—it's about airflow. I measure with my fingers (about two knuckles' width) to ensure consistency. This spacing prevents fungal issues like powdery mildew, which thrives in dense, humid conditions. You'll notice the difference in just two weeks when new growth appears more vigorous and less prone to yellowing.
Summer Pruning Precision: When you're doing your summer pruning in Step 3, focus on making clean cuts just above a leaf node or side bud. I use a magnifying glass to locate these growth points when working with mature plants. The key is to cut at a 45-degree angle to prevent water from pooling on the cut surface, which could lead to rot. This simple technique has kept my lambs ear looking full and healthy for years.
Fall Preparation: In colder climates, when temperatures drop below 20°F, I've found that adding a 2-3 inch layer of straw mulch around the base provides better insulation than regular mulch. The straw allows for better airflow while protecting the crown from extreme cold. This small adjustment has made a noticeable difference in my plants' ability to bounce back in spring.
Pro Tips for Pruning Lambs Ear
- Here's what nobody tells you about keeping your lambs ear thriving year-round.
- Timing is Everything: In Step 1, when you're removing dead foliage in early spring, don't rush—wait until the morning...
- The 2-3 Inch Rule: During Step 2's thinning process, maintaining that 2-3 inch spacing between stems isn't just about...
Frequently asked questions
Got questions about keeping your Stachys byzantina (aka Lamb’s Ear) looking its fluffiest? Here are some of the most common queries—plus quick, expert answers to keep your plant thriving!
When is the best time to prune Lamb’s Ear for maximum fluff?
Prune in early spring (just as new growth begins) or late summer (after flowering) to encourage dense, velvety foliage. Avoid heavy pruning in winter—focus on removing dead or yellowing leaves instead. Pro tip: A light trim after each harvest also keeps it bushy!
How much should I cut back? Is there a rule of thumb?
For a general shape-up, trim back 1/3 of the plant’s height—this stimulates fresh growth. For hard pruning (rejuvenating older plants), cut halfway to the ground in spring. Always use sharp shears to avoid tearing the fuzzy leaves.
My Lamb’s Ear looks leggy and sparse after pruning. What went wrong?
Leggy growth often means too little light or over-pruning. Move it to 6+ hours of sunlight daily and prune less aggressively next time. If the stems are bare, trim just above a leaf node to encourage new shoots. Bonus: Fertilize lightly with balanced 10-10-10 in spring!
Can I propagate Lamb’s Ear from cuttings? How do I do it?
Take 4-inch stem cuttings in spring/summer, strip the lower leaves, and dip in rooting hormone. Plant in sandy soil or perlite, keep moist, and cover with a plastic bag until roots form (4–6 weeks). Warning: Lamb’s Ear spreads easily—choose a spot with room to grow!
Does Lamb’s Ear need winter care? Should I prune in cold months?
In USDA Zones 5–8, Lamb’s Ear is perennial and handles frost well. Prune minimally in winter—just remove dead foliage. In Zone 4 or colder, mulch heavily and cut back after the last frost to protect roots. Fun fact: The fuzzy leaves act like tiny snow blankets!
Wrapping up and next steps
Pruning lamb’s ear isn’t just about keeping your garden tidy—it’s the secret to vibrant, lush growth and a plant that thrives year-round! 🌿 With the right tools, timing, and techniques, you’ll enjoy faster foliage expansion, fewer pests, and a bushier, healthier plant.
Whether you’re a seasoned gardener or just starting out, these tricks make the process simple and rewarding.
Ready to give your lamb’s ear the TLC it deserves? Grab your shears and start pruning today! For extra confidence, bookmark this guide or snap a photo of your progress—your future fluffier plant will thank you! 🌟