
Pruning
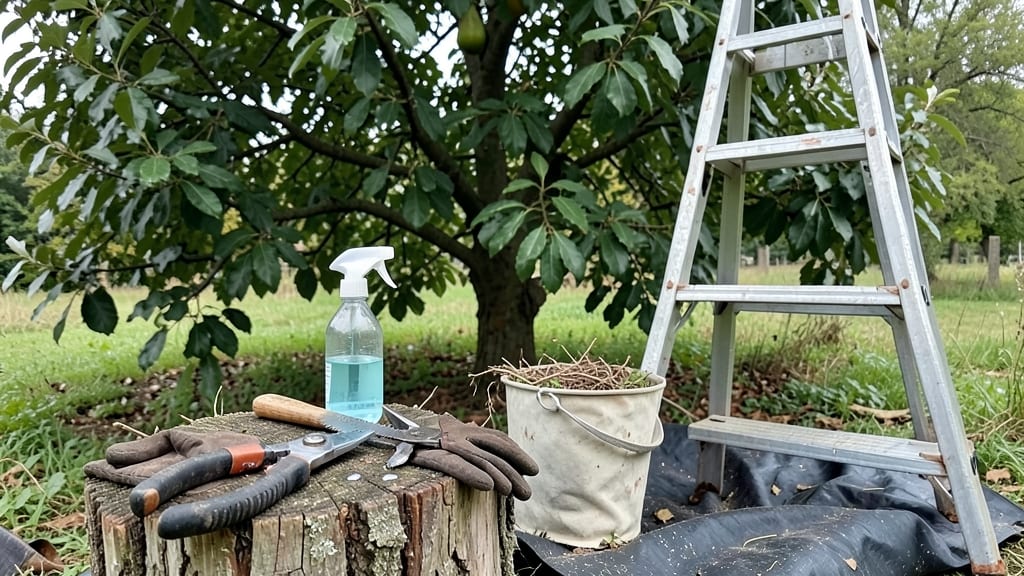
Pruning an overgrown pear tree in late winter isn’t just about hacking back branches—it’s the secret to stronger canes and better fruit next season. 🌱 I’ve watched my own neglected pear tree go from a tangled mess to a productive, open-grown beauty after just one careful pruning session.
The key is timing, technique, and knowing which branches to keep (and which to cut). You’ll need sharp pruners, loppers for thicker branches, and a ladder—plus a clear day to avoid sap splatter.
Sterilize your tools with rubbing alcohol to prevent disease spread, and wear gloves; pear sap can irritate skin. Start by removing dead, crossing, or diseased branches first, then thin out crowded areas to improve airflow and sunlight penetration.
By the time spring arrives, you’ll see new red shoots emerging from the cuts, signaling the tree’s recovery. The fruit that follows will be larger, sweeter, and easier to harvest because the branches are no longer overburdened. Just avoid heavy pruning in fall—it stresses the tree before winter dormancy.
This method works for Bartlett, Bosc, and Anjou varieties, whether you’re dealing with a backyard tree or a small orchard. The payoff? A tree that’s easier to manage, produces more fruit, and lives longer. Let’s get those branches under control!
📚 In This Guide
- What you need
- Instructions
- Tips and common mistakes
- Wrapping up and next steps
What you need
- ● Pruning saw: A sharp, bypass pruning saw (8–10 inches) for thick branches (1–2 inches in diameter). Required!
- ● Loppers: Bypass loppers (18–24 inches) for medium branches (½–1½ inches). Must be clean and sharp!
- ● Hand pruners: Bypass pruners (6–8 inches) for small branches (Disinfect with rubbing alcohol between cuts.
- ● Gloves: Heavy-duty, cut-resistant gloves (gardening or pruning-specific) to protect your hands.
- ● Safety glasses: Goggles to shield your eyes from debris.
- ● Ladder: Sturdy, extendable ladder (if tree is >8 feet tall). Always secure it to the tree!
- ○ Pruning sealant: Optional but helpful for sealing large cuts (3+ inches) to prevent disease.
- ● Disinfectant: 70% isopropyl alcohol or a 10% bleach solution (1 part bleach to 9 parts water) to sterilize tools.
- ● Marking twine or flags: To tag branches for removal if you’re unsure.
- ● Work gloves with grip: For extra comfort if handling thorny branches.
- ● Tree wound dressing: Controversial but some gardeners swear by it for extra protection.
- ● First-aid kit: Just in case—pruning can be a little rough!
Step-by-step guide to pruning an overgrown pear tree
Late winter is the perfect time to revive your pear tree—here’s how to shape it for stronger growth and better fruit.
✂️ Step 1: Gather the Right Tools and Safety Gear
Start by collecting your tools: a sharp pruning saw for thick branches, bypass pruners for smaller canes, and a ladder if your tree is tall. Wear gloves to protect your hands from thorns and a long-sleeved shirt to avoid scratches. I always sanitize my tools with rubbing alcohol before starting—this prevents spreading disease between cuts.
Check the weather too. Prune on a dry, calm day when temperatures are above 40°F. Wet branches are slippery, and cold weather stresses the tree. If you’re working near power lines, call your utility company first. I’ve seen too many close calls from DIY pruners who didn’t plan ahead.
✂️ Step 2: Remove Dead, Diseased, or Crossing Branches First
Scan the tree for branches that are dead (brown, brittle), diseased (mushrooms, oozing sap), or rubbing against others. These take priority—removing them opens up the canopy for better airflow and sunlight. Cut back to the branch collar (the swollen area where the branch meets the trunk), not flush with it. This ensures the wound heals properly.
For crossing branches, remove the one growing at a sharper angle. You’ll see this as a "V" shape where two branches compete. Use your pruners to make a clean cut just outside the branch collar. Avoid leaving stubs—they invite rot and pests. If a branch is larger than 4 inches in diameter, use your pruning saw and make the cut on the underside of the branch to prevent tearing.
✂️ Step 3: Thin the Canopy to Improve Light and Airflow
Now focus on thinning the interior of the tree. Pears need sunlight to ripen fruit, so aim to remove 20-30% of the smaller branches to open up the center. Look for branches growing straight up or inward—they block light and create a dense, shaded interior. Cut these back to a lateral branch or the trunk, but never leave a stub.
Watch for water sprouts (fast-growing, vertical shoots) and suckers (shoots from the base). These steal energy from fruit production. Snip them off at the base with your pruners. You’ll know you’re on the right track when you can see light filtering through the canopy and the tree’s structure looks more open. This step takes patience—don’t rush it.
✂️ Step 4: Shape the Tree for Balance and Fruit Production
Step back and assess the tree’s overall shape. Pears thrive with a rounded, open center. Focus on keeping the strongest, most vigorous branches while removing those that grow too close together. For horizontal branches, aim to space them 8-12 inches apart along the trunk. Vertical branches should be pruned back to encourage outward growth.
If your tree has a central leader (the main vertical trunk), prune competing leaders down to a lateral branch. This prevents multiple trunks from forming, which weakens the tree. For dwarf varieties, keep the height manageable—6-8 feet tall is ideal for easy harvesting. After each cut, wipe your tools with alcohol to keep them sterile.
✂️ Step 5: Clean Up and Monitor for Recovery
Once pruning is done, rake up and dispose of all debris—especially diseased branches. Never compost them, as this spreads pathogens. Seal larger wounds (over ½ inch in diameter) with pruning sealant to reduce the risk of infection. For smaller cuts, let them heal naturally—they’ll callus over in time.
Water the tree deeply after pruning to help it recover. You’ll see new growth in 4-6 weeks, signaling the tree is healing. Avoid heavy pruning in the following year—pear trees respond best to gradual shaping. Mark your calendar to prune again next late winter. With each cut, you’re building a stronger, fruit-bearing tree for years to come.
Tips & tricks for pruning an overgrown pear tree
Late winter pruning transforms your pear tree from a tangled mess into a productive powerhouse—here’s how to do it right.
Tool Prep is Non-Negotiable: I can’t stress this enough—sanitize your tools with rubbing alcohol before you start. I’ve seen fungal diseases spread just from using the same pruners on healthy and diseased branches. Also, sharpen your bypass pruners so they cut cleanly instead of crushing branches. Dull tools cause more damage than the cut itself, and your tree will heal slower.
Weather Watch: The instructions mention pruning above 40°F, but I’ll add this: avoid pruning during frost warnings. Cold temperatures stress the tree, and sap flow increases risk of disease. If you must prune in cooler weather, do it on the warmest part of the day when temps are above 45°F—just a little buffer makes a big difference in recovery.
Branch Collar Technique: When cutting back to the branch collar, look for the swollen ridge where the branch meets the trunk—it’s not always obvious on older trees. If you can’t see it clearly, trace the branch’s natural angle back to where it originated. Cutting too close to the trunk (or leaving a stub) creates weak points where infections can take hold. Think of it as the tree’s natural bandage.
Post-Prune Care: After finishing, water deeply—not just a sprinkle, but enough to soak the root zone. I’ve seen pruned trees struggle because they weren’t given the moisture boost they need to heal. Also, mulch lightly around the base (2-3 inches) to retain moisture and protect roots from temperature swings. This helps the tree focus energy on recovery instead of stress.
Pro Tips for Prune An Overgrown Pear Tree
- Late winter pruning transforms your pear tree from a tangled mess into a productive powerhouse—here’s how to do it ri...
- Tool Prep is Non-Negotiable: I can’t stress this enough—sanitize your tools with rubbing alcohol before you start. I’...
- Weather Watch: The instructions mention pruning above 40°F, but I’ll add this: avoid pruning during frost warnings. C...
Frequently asked questions
Got questions about pruning your overgrown pear tree? Here are some common concerns—and their answers—to help you tackle the task with confidence!
When is the absolute worst time to prune a pear tree?
Never prune during active fruit production (summer to early fall) or when the tree is under stress (drought, disease, or extreme heat). These times delay healing and invite pests. Late winter (before buds swell) is ideal, but avoid pruning after late spring—it can stunt fruit development for the next season.
How long does it take for a pruned pear tree to recover?
Recovery depends on the tree’s health and the severity of pruning. Light pruning (removing 10-20% of branches) shows results in 1-2 years, while heavy pruning (30%+) may take 3-5 years. Focus on gradual improvement—never prune more than 25% of the canopy in a single session to avoid shock.
What if my pear tree has dead or diseased branches—do I cut them now?
Yes! Remove dead, diseased, or crossing branches immediately—regardless of the season. Use sterilized pruners and seal cuts with pruning sealant to prevent fungal spread. Never leave deadwood; it weakens the tree and attracts pests. If disease is severe (e.g., fire blight), prune in late winter and dispose of infected branches in sealed bags.
Will pruning reduce my pear harvest next year?
Not if done correctly! Pruning opens the canopy to sunlight, improving air circulation and fruit quality. However, over-pruning (especially in spring) can reduce blossoms. Focus on structural shaping and thinning out crowded branches—this boosts fruit size and sweetness over time. Patience pays off!
What’s the best temperature range for pruning?
Prune when temperatures are above freezing but below 60°F (15°C). Cold snaps can stress the tree, while warm weather (above 70°F/21°C) encourages rapid sap flow, increasing disease risk. Early morning or late afternoon are ideal—tools and cuts stay cooler, and the tree recovers faster.
Can I prune a young pear tree the same way as an old one?
No! Young trees (under 5 years) need light shaping to establish a strong structure, while mature trees (10+ years) benefit from rejuvenation cuts to remove old wood. Young trees: Focus on central leader and scaffold branches. Mature trees: Prioritize thinning and deadwood removal. Always match pruning intensity to the tree’s age and health.
Wrapping up and next steps
Pruning your overgrown pear tree may feel like a big task, but with the right tools, timing, and techniques, you can transform it into a healthier, more productive tree. Remember, patience and precision are key—focus on removing dead wood, thinning out crowded branches, and encouraging airflow to prevent disease.
Your efforts will reward you with stronger canes, better fruit production, and a stunning, well-shaped tree!
Ready to take the next step? Mark your calendar for late winter or early spring and grab your pruners—your pear tree is waiting for its revival! 🌱✂️