
Pruning
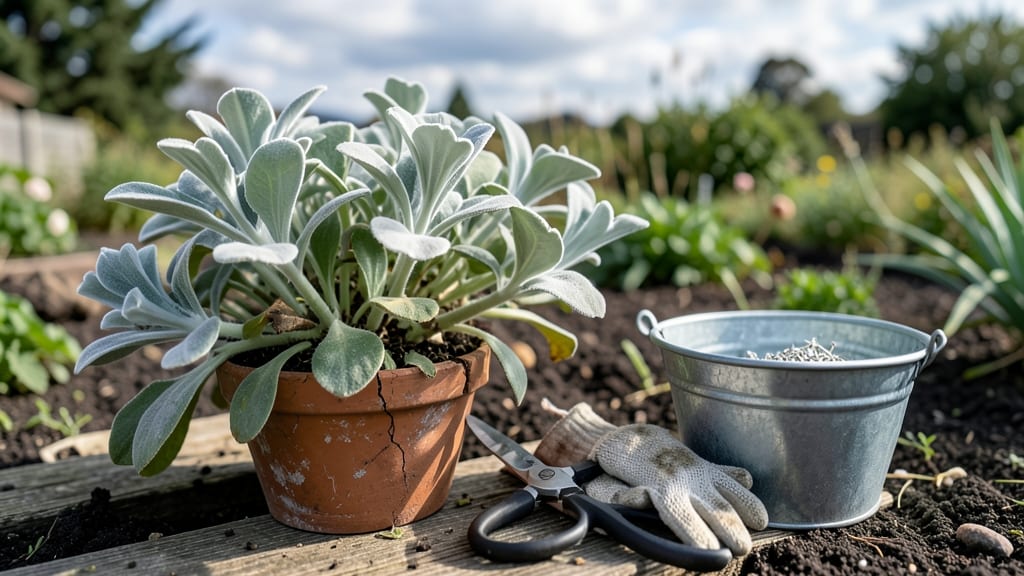
Pruning Dusty Miller plants transforms them from scraggly to showstopping in just 10 minutes. 🌿 I learned the hard way—skipping pruning left mine looking like a sad, lopsided cloud of silver.
The key is timing: late winter or early spring when new growth starts, or right after flowering if you want more blooms. You only need sharp pruners and a clear vision of the shape you want.
Snip back leggy stems by one-third to encourage bushier growth, and always cut just above a leaf node. Dusty Millers bounce back fast, so don’t be shy—just avoid shearing like you’re trimming a hedge. The fuzzy foliage stays fluffier when you prune strategically.
By summer, your plant will be a silver cloud of dense, velvety leaves that catches every ray of light. The secret is consistency: a quick trim every 4-6 weeks keeps it compact and prevents woody stems. Even if you miss a season, it forgives mistakes—just give it time to recover.
This works for both container plants and garden beds. Just avoid pruning during frost or extreme heat—Dusty Millers hate stress. Now grab those shears and let’s bring back that fluffy glory!
📚 In This Guide
- What you need
- Instructions
- Tips and common mistakes
- Wrapping up and next steps
What you need
- ● Pruning shears or bypass pruners: Sharp, clean, and sterilized (70% isopropyl alcohol works great). Opt for bypass pruners (not anvil-type) for cleaner cuts—1-2 pairs depending on plant size.
- ● Hand pruners (for smaller branches): Ergonomic and stainless steel blades (e.g., Felco or Fiskars) to avoid rust.
- ○ Gloves (optional but recommended): Garden gloves with tactile grip to protect against thorns or rough foliage (e.g., nitrile-coated for durability).
- ● Disinfectant solution: 70% rubbing alcohol or a 10% bleach solution (1 part bleach to 9 parts water) to sterilize tools between cuts and prevent disease.
- ● Sharpie or permanent marker: For labeling pruned branches if propagating (e.g., fine-tip for precision).
- ● Trash bag or bucket: To collect pruned debris—1-2 large bags (13-gallon size) or a 5-gallon bucket for composting.
- ○ Water spray bottle (optional): A 16-ounce misting bottle to dampen foliage if working in dry conditions (reduces dust).
- ● Rooting hormone: Powder or gel (e.g., Clonex) if propagating cuttings from pruned branches.
- ● Horticultural oil or soap: For deep-cleaning tools before storage (e.g., Neem oil or Dial Gold soap).
- ● Pruning saw (for large, woody plants): A curved-tooth saw (e.g., Fiskars X27) if your Dusty Miller has thick stems.
- ● Notebook or app: To log pruning dates, plant responses, or sketch growth patterns (e.g., Gardenate or a simple spiral notebook).
- ● Compost bin: If you plan to compost pruned material—ensure it’s well-aerated to avoid mold.
Step-by-Step instructions for pruning Dusty Miller plants
Here’s how I keep my Dusty Miller plants looking lush and full year-round—no guesswork, just simple cuts.
✂️ Step 1: Wait for the Right Time to Prune
Prune Dusty Miller in early spring (just as new growth begins) or after flowering in late summer. This timing ensures you’re cutting back before the plant’s natural growth surge, which keeps it vigorous. You’ll know it’s ready when you see fresh, bright green shoots at the base—those are your signal to start.
Skip pruning in fall or winter unless you’re in a mild climate. Dusty Miller goes semi-dormant in cooler months, and cutting then stresses the plant. If you’re in a warm zone, light trimming to shape can happen anytime, but avoid heavy cuts.
✂️ Step 2: Cut Back Overgrown Stems to Encourage Fullness
Use clean, sharp pruners to snip stems back to 1-2 inches above a leaf node (the bump where leaves grow). This encourages bushier growth by promoting new branches. If your Dusty Miller looks leggy, cut the longest stems first—they’ll often grow back thicker and fuller.
Don’t worry about making perfect cuts. Dusty Miller is forgiving, and even if you trim too much, it’ll bounce back with fresh, fuzzy foliage. Just avoid cutting into old, woody stems—they won’t regrow. If you’re unsure, trim back to where the stem is still green and flexible.
✂️ Step 3: Shape the Plant for a Neat, Balanced Look
Step back and look at your Dusty Miller—this is where you decide if it needs a little (or a lot of) shaping. Pinch or cut back any stems that are growing too close together to improve airflow, which prevents fungal issues. For a rounded shape, trim the outer stems slightly shorter than the inner ones.
If your plant is looking sparse on one side, focus pruning there to encourage denser growth. Dusty Miller responds well to shaping, so don’t be afraid to get creative. Just remember: less is more—you can always trim more later if needed, but you can’t un-cut a stem.
🌿 Step 4: Deadhead and Clean Up After Pruning
Remove any dead, brown, or yellowed leaves and stems immediately after pruning. These can harbor pests or diseases, so toss them in the trash (don’t compost them). Use your pruners to snip off spent flower stalks at the base—this redirects the plant’s energy into foliage growth instead of seed production.
Give your Dusty Miller a light watering after pruning to help it recover, but avoid soaking the soil. The goal is to keep the roots moist but not soggy. If you’re pruning in hot weather, do it in the early morning or late afternoon to reduce stress on the plant.
⏰ Step 5: Maintain Year-Round with Light Trims
After the initial prune, keep your Dusty Miller tidy with monthly light trims to remove any straggly stems or overgrown areas. This prevents the plant from becoming too woody and keeps that signature fluffy texture. In warm climates, you can prune lightly every 4-6 weeks to encourage continuous growth.
If your Dusty Miller is in a container, prune more frequently—potted plants grow faster and need regular shaping to stay compact. And here’s a pro tip: save your pruned stems! They root easily in water, so you can propagate new plants for free.
Tips & tricks for pruning Dusty Miller plants
Here's what nobody tells you about keeping your Dusty Miller looking its best—these tricks have saved my plants from looking ragged more times than I can count.
Timing is Everything: The early spring timing in Step 1 is critical because that's when Dusty Miller naturally starts its growth cycle. If you prune too early and the plant is still dormant, you risk stunting new growth. I've learned this the hard way—after pruning too early one year, my plants took months to recover. Look for those fresh green shoots at the base as your go-ahead signal.
The 1-2 Inch Rule: When cutting back in Step 2, those 1-2 inches above the leaf node are key for encouraging new growth. I always use a ruler to measure from the node—this precision makes all the difference. If you're unsure where the node is, just look for that little bump where leaves grow out. The rule of thumb is to cut just above it, never through it.
Shape with Purpose: In Step 3, don't just trim randomly—think about airflow and light penetration. I like to visualize the plant as a rounded dome. Trim outer stems slightly shorter than inner ones to create that perfect rounded shape. This not only looks better but also prevents fungal issues by improving airflow through the plant.
Propagation Bonus: Here's a secret I picked up from a local nursery: those pruned stems you're removing? Don't throw them away! Place them in water with just the bottom inch submerged, and in about 3 weeks, you'll have new baby Dusty Miller plants ready to transplant. I've propagated dozens this way—it's free greenery for your garden!
Pro Tips for Prune Dusty Miller Plants
- Here's what nobody tells you about keeping your Dusty Miller looking its best—these tricks have saved my plants from ...
- Timing is Everything: The early spring timing in Step 1 is critical because that's when Dusty Miller naturally starts...
- The 1-2 Inch Rule: When cutting back in Step 2, those 1-2 inches above the leaf node are key for encouraging new grow...
Frequently asked questions
Got questions about keeping your Dusty Miller (Jacobaea maritima) looking its best? Here are answers to the most common ones—so you can prune with confidence!
When is the best time to prune Dusty Miller?
Prune Dusty Miller in early spring (just as new growth starts) and late summer (after flowering) for the best results. Avoid pruning in winter unless you’re in a mild climate—frost can damage tender new shoots. Light trims can happen anytime, but major pruning should wait for active growth periods.
Should I cut back Dusty Miller all the way to the ground?
No! Only lightly trim dead or yellowed leaves in early spring. Cutting back too aggressively removes next year’s foliage. Aim to shape rather than shear—leave at least half the plant’s height intact. Over-pruning can stress the plant and reduce its signature fuzzy texture.
Will pruning Dusty Miller encourage more growth?
Yes, but only if done correctly! Pruning stimulates bushier, denser growth by redirecting energy to new shoots. Focus on removing spent flowers and leggy stems in late summer. Avoid heavy cuts—think of it as a haircut for your plant, not a buzz cut!
Can I propagate Dusty Miller from pruned cuttings?
Softwood cuttings
(from spring/summer pruning) root easily in water or moist potting mix. Dip the ends in rooting hormone for extra success. Avoid hardwood cuttings (from winter pruning)—they’re trickier to propagate. With patience, you’ll have free Dusty Miller babies for your garden!
What if my Dusty Miller looks ragged after pruning?
Don’t panic! Ragged edges mean it’s time to shape up. Use sharp shears to trim uneven growth, and fertilize lightly with a balanced formula to boost recovery. If the plant looks too stressed, skip heavy pruning next time and focus on deadheading flowers instead. Patience pays off!
How does pruning differ for Dusty Miller in pots vs. gardens?
Potted Dusty Miller needs more frequent trims (every 4–6 weeks) to prevent root-bound stress, while garden plants can go longer between prunings. Containers also dry out faster—water thoroughly after pruning to help recovery. Drainage is key: Ensure pots have holes to avoid soggy roots!
Wrapping up and next steps
Pruning your dusty miller plants doesn’t have to be intimidating—just follow these simple steps to keep them looking fluffy, healthy, and vibrant all year long! Whether you’re shaping them for aesthetics or encouraging new growth, a little regular care goes a long way.
Now that you’re armed with the right tools, timing, and techniques, there’s no better time to roll up your sleeves and give your plants the TLC they deserve.
Ready to see the difference? Grab your pruners and get pruning! 🌿✨ For even more gardening inspiration, check out our guide on reviving leggy dusty millers—your next pruning project awaits!