
Pruning
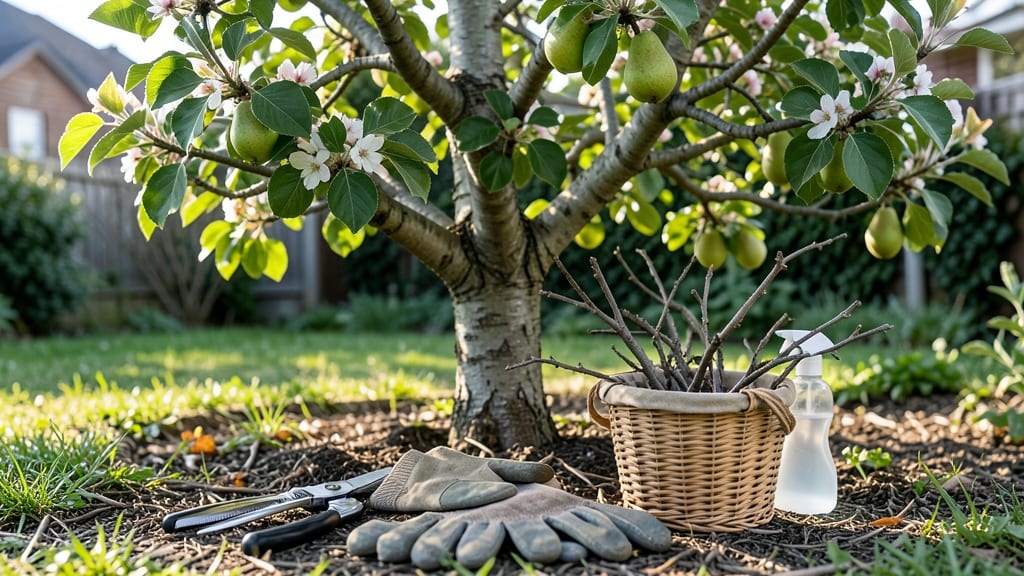
Pruning pear fruit trees transforms a tangled mess into a fruit-bearing powerhouse. ✂️ I’ve watched my own trees go from chaotic to productive in just one season—it’s all about timing, technique, and knowing which branches to keep (and which to cut).
The key is working with the tree’s natural shape while encouraging strong growth and heavy fruit sets. You’ll need sharp pruners, a saw for thicker branches, and a clean workspace to prevent disease spread.
Start by removing dead, diseased, or crossing branches first—these are the easy wins that instantly improve airflow. Then focus on thinning out crowded areas to let sunlight reach the center of the tree, where the best fruit forms.
By summer’s end, you’ll see fresh green shoots where you made cuts, signaling the tree is recovering well. The real payoff comes next year: fewer broken limbs from fruit weight, easier harvesting, and more pears than you’ve ever seen on a single tree.
It’s not just pruning—it’s setting your tree up for success. This method works for both young trees (building structure) and mature ones (maintaining productivity). The secret? Prune little and often rather than doing one big cleanup—your tree will thank you with years of harvests.
📚 In This Guide
- What you need
- Instructions
- Tips and common mistakes
- Wrapping up and next steps
What you need
- ● Pruning shears: Bypass pruners (for cuts up to ½ inch thick) – 1 pair (look for sharp, stainless-steel blades for clean cuts).
- ● Loppers: Bypass or anvil-style (for branches ¾–2 inches thick) – 1 pair (extendable handles are a plus for tall trees!).
- ● Pruning saw: Curved-tooth or folding saw (for branches 2+ inches thick) – 1 (lightweight and ergonomic preferred).
- ● Gloves: Heavy-duty, cut-resistant (to protect hands from thorns and rough bark) – 1 pair (gardening or pruning-specific gloves work best).
- ● Disinfectant: Rubbing alcohol (70%+), bleach solution (1:9 ratio with water), or commercial pruning sealant – small bottle (to sterilize tools between cuts and prevent disease).
- ● Twine or zip ties: Plastic-coated or biodegradable – small roll (for securing branches during pruning or training young trees).
- ● Ladder: Sturdy, extendable aluminum or fiberglass – 1 (if your tree is taller than 8–10 feet; prioritize safety with non-slip feet!).
- ● Pruning paint/sealant: Tree wound dressing (for large cuts > ½ inch; controversial but useful for some—skip if your climate is dry).
- ● Work boots: Steel-toe or sturdy hiking boots (for stability on uneven ground).
- ● Safety glasses: Impact-resistant (to shield eyes from debris).
- ● Notebook & pen: (to sketch your tree’s structure or mark cuts for future reference).
- ○ Tree growth regulator: Optional hormonal paste (to encourage faster healing on large wounds).
- ● Know your pear tree variety: Some (like Bartlett or Bosc) need more aggressive pruning than others. Check your tree’s label or consult a local nursery.
- ● Best timing: Prune dormant season (late winter/early spring) for major cuts, or summer for light shaping (avoid pruning when the tree is flowering or fruiting).
- ● Weather check: Choose a dry, overcast day (wet tools or branches can spread disease).
- ● Safety first: Ensure the area around the tree is clear of debris, pets, and bystanders—branches can fall unexpectedly!
Step-by-Step guide to pruning pear fruit trees
Here's the method I use every year to keep my pear trees healthy, productive, and easy to harvest.
✂️ Step 1: Prune in Late Winter for Structure
Start your pruning in late winter—just before buds swell but before new growth begins. This is when your tree is dormant, making it easier to see the branch structure. I always begin by removing dead, diseased, or crossing branches first. These are easy to spot as they're brown, brittle, or rubbing against other branches.
Next, cut back any branches that grow inward toward the center of the tree. You want sunlight and air to reach the center where fruit develops. Make your cuts just outside the branch collar—the swollen area where the branch meets the trunk. This ensures the tree heals properly and prevents disease from entering the wound.
☀️ Step 2: Thin Out Branches for Better Airflow
After shaping the tree’s structure, focus on thinning out branches to improve airflow and sunlight penetration. Pears need good airflow to prevent fungal diseases like fire blight. Look for branches that are too close together—remove the smaller or weaker one so the remaining branch has more space to grow.
I also remove any suckers—those vigorous shoots growing from the base or trunk. These drain energy from the tree and can become a haven for pests. Cut them off at the base, but be careful not to damage the main trunk. Aim for a balanced shape where sunlight can reach all parts of the tree.
🌿 Step 3: Summer Pruning to Control Growth and Fruit Load
Around late June or early July, after the first flush of fruit has set, do a light pruning to control growth and improve fruit quality. This is when you’ll remove any water sprouts—those fast-growing, vertical shoots that pop up on the trunk or branches. These are weak and don’t contribute much to fruit production.
You can also thin out some of the fruit clusters to reduce competition for nutrients. Leave about 6-8 inches between fruits—this ensures they grow larger and ripen evenly. Use sharp pruners to make clean cuts, and avoid tearing the bark. This summer pruning keeps the tree from becoming overloaded with fruit, which can stress the tree and reduce quality.
⏰ Step 4: Light Pruning After Harvest
Once the pears are harvested, do a final light pruning to clean up any remaining dead wood or branches that didn’t make the cut earlier. This is also a good time to remove any branches that grew too vigorously during the season. Keep cuts small and precise—no need to go overboard.
Pay attention to the tree’s overall shape. If any branches are growing too long or are rubbing against each other, trim them back now. This keeps the tree in good shape for next year’s growth. Avoid heavy pruning at this stage, as the tree needs to recover and prepare for dormancy.
🪴 Step 5: Maintain Year-Round with Regular Checks
Throughout the year, keep an eye on your pear tree for any signs of disease, pests, or structural issues. If you notice any dead branches or signs of infection, remove them immediately to prevent the problem from spreading. Regular checks help you catch issues early before they become major problems.
I also make a habit of marking branches that need attention with a small piece of twine or a flag. This way, I don’t forget to address them during the next pruning session. A little maintenance now means a healthier, more productive tree in the long run.
Tips & tricks for pruning pear fruit trees
These simple yet game-changing tips will help you transform your pear tree into a thriving fruit powerhouse.
Timing is Everything: Late winter pruning in Step 1 is critical because the tree is fully dormant, making it easier to see the branch structure and identify dead or crossing branches. I always check the weather forecast and schedule my pruning on a dry day with temperatures above freezing—this prevents stress on the tree. The goal is to finish before buds begin to swell, which is your signal that new growth is about to start.
Precision Cutting Technique: When making cuts in Step 1 and Step 2, use sharp pruning shears and cut just outside the branch collar. This swollen area is where the branch naturally heals, preventing disease from entering the wound. I make a point to clean my pruners with rubbing alcohol between cuts to avoid spreading any potential pathogens. For larger branches, I use the three-cut method to prevent bark tearing, which can leave the tree vulnerable to infection.
Visual Cues for Summer Pruning: In Step 3, when thinning fruit clusters, look for fruit that's smaller than a golf ball or has signs of disease. I also pay attention to the spacing—keeping 6-8 inches between fruits ensures they all get enough sunlight and nutrients. A helpful trick is to use a small ruler or measuring tape to check spacing as you prune, especially when working with multiple clusters on the same branch.
Year-Round Maintenance Strategy: The regular checks in Step 5 don't have to be complicated. I keep a small bag of twine and colored flags in my gardening toolbox. When I spot a branch that needs attention, I tie a flag on it so I remember to address it during the next pruning session. This simple system has saved me from missing important maintenance tasks over the years.
Pro Tips for Prune Pear Fruit Trees
- These simple yet game-changing tips will help you transform your pear tree into a thriving fruit powerhouse.
- Timing is Everything: Late winter pruning in Step 1 is critical because the tree is fully dormant, making it easier t...
- Precision Cutting Technique: When making cuts in Step 1 and Step 2, use sharp pruning shears and cut just outside the...
Frequently asked questions
Got questions about pruning pear trees? You’re not alone! Here are answers to the most common concerns to help you prune like a pro and keep your tree thriving.
When is the best time to prune pear trees?
Prune pear trees during their dormant season—late winter or early spring (just before buds swell) is ideal. Avoid pruning in fall, as this can invite disease. Light summer pruning (after harvest) is okay for shaping but keep it minimal to prevent stress.
Can I prune a pear tree in summer?
Yes, but only lightly! Summer pruning should focus on removing water sprouts or shaping branches. Heavy pruning in summer stresses the tree and may reduce fruit production. If you must prune more, do it after harvest (late July–August) and avoid removing more than 25% of foliage.
What if I prune at the wrong time?
Pruning at the wrong time (like late fall or winter) can weaken the tree and increase disease risk. If you’ve already pruned too late, don’t panic—just sterilize tools, avoid heavy cuts, and focus on airflow and light exposure to minimize damage. Next year, stick to dormant-season pruning!
Will pruning reduce my pear harvest?
Not if done correctly! Proper pruning boosts fruit quality by improving airflow and sunlight. However, over-pruning (removing >30% of branches) can reduce yield. Aim for 20–25% removal during dormant pruning and avoid cutting fruit-bearing branches unless necessary.
How often should I prune a pear tree?
Prune yearly during dormancy (winter/early spring) to maintain shape and health. Light summer maintenance (removing dead/diseased wood) is optional but helpful. Young trees need more frequent pruning (every 1–2 years) to establish structure, while mature trees can handle every 2–3 years with light upkeep.
Pro Tip:
Always sterilize pruners with rubbing alcohol between cuts to prevent fire blight (a common pear tree disease). And remember: less is more—pear trees are resilient but hate aggressive pruning!
Wrapping up and next steps
Pruning your pear fruit tree might seem like a daunting task, but with the right tools, timing, and techniques, you’ll unlock a healthier tree and bountiful harvests for years to come. 🌳✨ Remember, consistency is key—whether you’re shaping young branches or thinning fruit, each cut brings your tree one step closer to its full potential.
Now that you’re armed with knowledge, grab those pruners and give your pear tree the care it deserves—your future fruit will thank you!
Ready to take the next step? Start small:
- Mark your calendar for late winter or early spring.
- Observe your tree’s growth and adjust your pruning plan as needed.
- Celebrate each season’s progress—your hard work is already paying off!