
Pruning
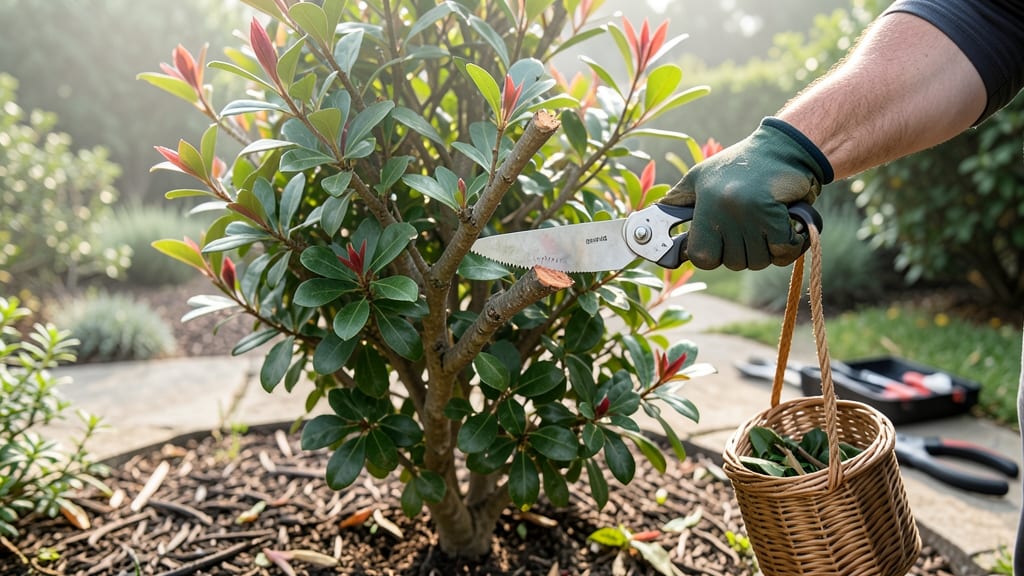
Pruning Photinia isn't just about shaping—it's about unlocking vibrant red foliage and thicker growth. 🌿 I've learned the hard way that timing and technique make all the difference, especially when you want those glossy leaves to stay disease-free and your shrub to thrive for years.
The best time to prune is late winter or early spring, right before new growth starts. This gives your Photinia the energy to recover quickly and produce fresh, healthy leaves.
You'll need sharp pruners, gloves, and a clear plan—because cutting too much at once can stress the plant and leave it vulnerable. What you'll end up with is a neat, bushy shape that blooms better and looks fuller.
The key is to cut just above a leaf node at a 45-degree angle, and never remove more than one-third of the plant in a single session. This keeps it strong and encourages new growth where you want it. Works for both young plants and older ones needing rejuvenation.
Let's get those branches looking intentional!
📚 In This Guide
- What you need
- Instructions
- Tips and common mistakes
- Wrapping up and next steps
What you need
- ● Pruning shears or loppers – Choose bypass pruners (for clean cuts) or anvil pruners (for thicker branches). Loppers should have a 20-24" handle for leverage.
- ● Hand pruners – Sharp, bypass-style for small branches (¼" thick).
- ● Pruning saw – For branches ½" or thicker. A curved-tooth saw prevents tearing.
- ● Gloves – Garden gloves (heavy-duty) to protect from thorns and sap.
- ● Disinfectant (70% isopropyl alcohol or bleach solution) – 1 part bleach to 9 parts water to sterilize tools between cuts.
- ● Rag or paper towels – For wiping tools clean.
- ● Ladder or step stool – If your Photinia is 6+ feet tall.
- ● Trash bags or bucket – For collecting pruned branches.
- ● Sharpener – A file or honing stone to keep blades razor-sharp.
- ○ Pruning sealant – Optional for large cuts to prevent disease (use sparingly).
- ● Safety glasses – Protects eyes from debris.
- ● Hose or spray bottle – To clean sap off tools post-pruning.
Instructions for pruning photinia to encourage lush, year-round growth
Here's my go-to method for keeping photinia bushes dense, flowering, and disease-free—no guesswork involved.
✂️ Step 1: Time Your Pruning for Best Results
Photinia responds best to pruning right after flowering, typically in late spring or early summer (May-June). This timing lets you shape the bush while preserving next year's blooms. Avoid pruning in fall or winter—you'll remove next season's flower buds before they form.
If you missed the window, a light shaping in early spring is better than nothing. Just avoid heavy cuts then, as new growth needs time to harden before winter. You'll see fresh, vibrant growth within 4-6 weeks of proper pruning—look for tight, leafy branches instead of sparse, leggy stems.
✂️ Step 2: Gather Tools and Prepare for Clean Cuts
Use only clean, sharp pruning shears or loppers—dull tools crush stems and invite disease. Disinfect blades with rubbing alcohol between cuts to prevent spreading fungal spores. I keep a small spray bottle of diluted bleach (1 part bleach to 10 parts water) handy for quick sterilization.
Wear gloves to protect against photinia's mild skin irritation. Remove any dead, diseased, or crossing branches first—they're the easiest to spot and create the most problems. You'll notice these as brown, dry stems or branches rubbing against each other, which creates wounds where pests love to hide.
✂️ Step 3: Shape the Bush for Airflow and Light Penetration
Start by thinning out the center of the bush to improve airflow—aim for no more than 1/3 of the plant's volume removed in one session. Cut branches back to an outward-facing bud or side branch to encourage outward growth. Never leave stubs; clean cuts just above a bud prevent disease and promote faster healing.
Step back often to check your shape. Photinia grows best with a rounded, vase-like form that lets light reach all branches. You'll see where light gets blocked by looking for sparse foliage or branches growing inward. Trim just enough to open up the center while maintaining the bush's natural silhouette.
✂️ Step 4: Finish with Light Maintenance Pruning
After shaping, do a final pass to remove any remaining dead wood, suckers at the base, or branches growing straight up (called "watersprouts"). These compete with your desired growth and make the bush look unkempt. Cut these back to the main stem or to a healthy bud.
Leave the pruned branches on the ground—photinia doesn't require special disposal. They'll break down naturally and return nutrients to the soil. For large branches over 1/2 inch thick, make a slight upward angle on your cut to prevent water from pooling and rotting the wound.
🌿 Step 5: Post-Pruning Care for Strong Recovery
Water the bush deeply after pruning to help it recover, especially if you've made significant cuts. Focus water at the base rather than overhead to avoid wetting the foliage, which can encourage fungal diseases. You'll know it's getting enough water when the soil feels moist 2-3 inches down.
Apply a balanced, slow-release fertilizer after pruning to support new growth. I use a 10-10-10 formula in early spring and again after summer pruning. Avoid high-nitrogen fertilizers—they promote leafy growth at the expense of flowers. Watch for fresh, green shoots emerging within 2-3 weeks as a sign your pruning was successful.
Tips & tricks for pruning photinia to encourage lush growth
These simple strategies will help you transform your photinia into a thriving, vibrant bush that stays beautiful year-round.
Timing is Everything: The late spring/early summer window (May-June) is non-negotiable for preserving next year's blooms. If you missed this, don't panic—just do a light shaping in early spring. The key is avoiding fall or winter pruning, which removes next season's flower buds. I've seen photinia recover beautifully from missed pruning, but heavy cuts in cooler months can stress the plant significantly.
Tool Prep Prevents Problems: Your pruning shears are more important than you think. Always disinfect blades between cuts with rubbing alcohol or diluted bleach (1:10 ratio) to prevent spreading disease. I keep a small spray bottle in my gardening toolkit—it takes seconds and saves hours of potential cleanup later. Sharp tools make clean cuts that heal faster, while dull tools crush stems and create entry points for pests.
Shape with Purpose: When thinning the center in Step 3, aim to remove no more than one-third of the plant's volume. This might sound like a vague rule, but trust me—it's the sweet spot for recovery. Cut branches back to outward-facing buds to encourage that lush, rounded shape. I like to visualize the bush as a vase: wide at the bottom, narrowing slightly toward the top. This creates that perfect photinia silhouette while allowing light to reach all branches.
Post-Pruning Care Creates Miracles: That deep watering after pruning isn't just for show—it's critical for recovery. Focus on the base and check soil moisture 2-3 inches down. The 2-3 week wait for new green shoots is worth it; it tells you everything about whether your pruning was successful. I've seen bushes that looked sad after pruning burst into vibrant growth within just 10 days when given proper care.
Pro Tips for Pruning A Photinia
- These simple strategies will help you transform your photinia into a thriving, vibrant bush that stays beautiful year...
- Timing is Everything: The late spring/early summer window (May-June) is non-negotiable for preserving next year's blo...
- Tool Prep Prevents Problems: Your pruning shears are more important than you think. Always disinfect blades between c...
Frequently asked questions
Got questions about pruning your Photinia? Here are some of the most common ones—plus quick, expert-backed answers to keep your shrub thriving!
When is the best time to prune a Photinia?
The ideal time is late winter or early spring (before new growth starts), but you can also prune lightly after flowering in late spring. Avoid heavy pruning in fall—it can stimulate tender new growth that may not survive winter. For shaping, spring is your best bet!
How much can I cut back a Photinia?
You can safely remove up to one-third of the plant’s height in a single session, but avoid drastic cuts. Over-pruning stresses the shrub and may reduce flowering. For rejuvenation, spread heavy cuts over 2-3 years to avoid shock.
Why are my Photinia leaves turning brown after pruning?
Brown leaves can signal stress from over-pruning, fungal issues, or pests (like spider mites). If cuts are too severe, the plant may struggle. Thin out instead of shearing, and apply a fungicide if needed. Keep the area well-watered post-prune to aid recovery.
Can I prune a Photinia for hedges, or is it better left as a shrub?
Yes! Photinia handles hedge pruning well—just use sharp shears for clean cuts and maintain a rounded or tapered shape. For formal hedges, prune every 4-6 weeks during the growing season. Avoid letting it grow too leggy before trimming!
What if I missed the spring pruning window?
Don’t panic! You can still prune in summer (after flowering), but avoid heavy cuts. Focus on removing dead/diseased wood and light shaping. Just be mindful—summer pruning may delay next year’s blooms slightly.
Still unsure? Drop your question in the comments—we’re happy to help!
Wrapping up and next steps
Pruning your Photinia doesn’t have to be intimidating—it’s all about timing, technique, and a little patience! 🌿 Whether you’re shaping it for aesthetics, promoting bushier growth, or maintaining its health, the key is to act with purpose and follow seasonal cues.
With the right tools and a clear plan, you’ll transform your shrub into a thriving, picturesque centerpiece.
Ready to take the next step? Start small: tackle one section at a time, observe how your Photinia responds, and adjust your approach as needed. Soon, you’ll be the proud gardener of a flawlessly pruned and vibrant landscape staple! 🌟