
Pruning
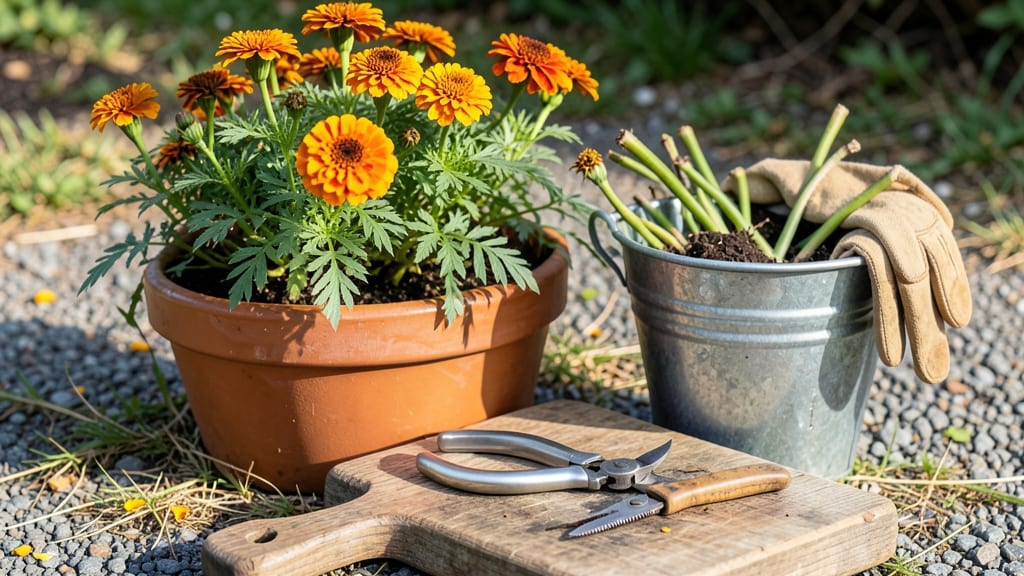
Pruning marigold plants transforms them from scraggly stems into bushy, bloom-covered powerhouses—and the secret is simpler than you think. 🌻 I’ve watched my own marigolds go from a few sad flowers to a nonstop cascade of orange-yellow blooms just by cutting back the right way.
The key? Deadheading spent blooms and shaping the plant at the right times to encourage fresh growth.
You’ll need just three tools: sharp pruning shears, clean scissors, or even your fingers (for small jobs). Timing matters too—prune in the morning on dry days to avoid fungal issues, and repeat every 7-10 days during peak bloom season.
The goal is to remove faded flowers and any leggy stems that steal energy from blooming.
After pruning, your marigolds will rebound with new shoots and buds within 2-3 weeks. The plant focuses its energy on producing fresh flowers instead of seeding, and you’ll avoid the common mistake of over-pruning (which stresses the plant).
Just avoid cutting into old wood—stick to green stems for best results.
This method works for both French and African marigolds, and it keeps them flowering throughout the season—even in heat or humidity. The payoff? A garden border that stays vibrant, fragrant, and pest-repelling (marigolds deter aphids and nematodes too). Ready to try it?
📚 In This Guide
- What you need
- Instructions
- Tips and common mistakes
- Wrapping up and next steps
What you need
- ● Sharp, clean pruning shears – Choose bypass pruners (not anvil-type) to avoid crushing stems. Size: 5-6 inches for precision.
- ● Gloves – Garden gloves (cotton or leather) to protect hands from thorns and sap. Tip: Opt for gardening-specific gloves with reinforced palms.
- ● Disinfectant (70% isopropyl alcohol or bleach solution) – 1 part bleach to 9 parts water. Sterilize shears before/after use to prevent disease.
- ○ Compost bin or bag – For removing deadheads and pruned foliage. Optional: A small bucket for easy transport.
- ● Water spray bottle – 8-16 oz with a fine mist nozzle to hydrate plants post-pruning.
- ● Hand lens or magnifying glass – For spotting pests or diseased areas up close.
- ● Pruning saw – Only needed if dealing with thick, woody stems (rare for marigolds).
- ● Plant food or fertilizer – Balanced 10-10-10 or bloom-boosting formula to revive plants after pruning.
- ● Mulch (straw or shredded leaves) – Apply post-pruning to retain moisture and suppress weeds.
- ● Notebook & pen – To track pruning dates and plant responses for future reference!
Step-by-Step guide to pruning marigolds for continuous blooms
Here's the foolproof method I use to keep marigolds flowering until frost—no fancy tools, just sharp scissors and timing.
✂️ Step 1: Identify and Remove Spent Blooms
Start by scanning each plant for fully opened flowers that have begun to fade—these are ready for deadheading. Marigolds signal spent blooms by drooping petals and browning edges. Use clean, sharp pruning shears to cut the stem just above the first set of healthy leaves below the bloom. This encourages new growth from lower buds.
I always work in the morning when stems are firm and dew has evaporated. Cutting at this angle prevents water from pooling on the wound, which could invite fungal issues. If you see any stems with blackened or mushy areas, snip those off immediately—they're already infected and will spread.
✂️ Step 2: Prune Leggy Growth for Bushier Plants
After deadheading, check for overly elongated stems that have lost their compact shape. These leggy growths weaken the plant and reduce flowering. Pinch back the tips of these stems above a leaf node where new buds form. For marigolds, this is usually 1-2 inches below the current growth tip.
This technique forces the plant to redirect energy into lateral branches rather than vertical growth. You'll notice within 7-10 days that side shoots emerge from the pinched areas. Avoid cutting into woody stems—marigolds regenerate best from green, flexible growth. If you accidentally cut too far, don't worry; the plant will still recover.
✂️ Step 3: Thin Overcrowded Foliage
Examine the plant's base for crowded or yellowing leaves that block sunlight from reaching lower stems. These leaves compete with blooms for energy and often harbor pests. Use your fingers or shears to gently remove any leaves that are more than 30% damaged or completely yellowed. Focus on leaves growing inward toward the plant's center.
Thinning improves airflow, which prevents powdery mildew—the #1 marigold killer. A well-ventilated plant will produce 20-30% more blooms over the season. After pruning, step back and assess the plant's shape. You should see an open, airy structure with sunlight reaching all branches. If stems are still too dense, repeat the thinning process until you achieve this balance.
🌿 Step 4: Fertilize and Water After Pruning
Within 24 hours of pruning, feed your marigolds with a balanced liquid fertilizer (10-10-10 ratio) diluted to half strength. This replenishes nutrients lost during pruning and supports new growth. Water deeply at the base—1 inch of water per week—to help the plant recover. Avoid wetting the foliage, as this can promote fungal diseases in the fresh cuts.
Here's the thing—marigolds are tough, but they still need consistent care after pruning. I like to mulch around the base with 1-2 inches of organic mulch to retain moisture and regulate soil temperature. This simple step keeps roots cool during hot afternoons and prevents soil-borne diseases from taking hold in fresh pruning wounds.
⏰ Step 5: Monitor and Repeat Weekly
Establish a weekly pruning routine during the peak blooming season (late spring through summer). Check plants every 5-7 days for new spent blooms or leggy growth. The key is consistency—marigolds respond best to regular maintenance rather than occasional heavy pruning. You'll know you're doing it right when you see new buds forming within 10-14 days of each pruning session.
As summer winds down, reduce pruning frequency to every 2-3 weeks unless you notice new blooms forming. Marigolds naturally slow production in fall, but a final light pruning in early September can stimulate one last flush of color before frost. Always prune in the morning to allow wounds to dry before evening dew settles in.
Tips & tricks for perfect marigold pruning
These little tricks will transform your marigolds from occasional bloomers into continuous floral powerhouses.
Timing Secret: The morning hours are your golden window for pruning—between 7 and 9 AM when stems are firm and dew has evaporated. This timing prevents water from pooling on fresh cuts, which is how fungal diseases like powdery mildew get started. I've seen marigolds go from healthy to wilted in just 48 hours when pruned in the evening dew. Trust me on this: the difference between a thriving plant and one fighting disease often comes down to when you wield those shears.
Visual Cues for Pruning: In Step 1, when identifying spent blooms, look for three key visual signals: drooping petals that no longer face upward, browning edges on the petals, and stems that feel slightly hollow when gently squeezed. These are your clear indicators it's time to snip. The first set of healthy leaves below the bloom should be vibrant green and free of yellowing—this is your cutting guide. If you're unsure, err on the side of leaving a bloom longer; marigolds are forgiving but respond best to precise cuts.
Pruning Precision: For Step 2's leggy growth pruning, focus on making clean cuts just above a leaf node where new buds form. I use my finger to locate the node—it feels like a slight bump where leaves attach to the stem. Cutting at a 45-degree angle above this node prevents water from collecting, which could lead to rot. And here's a pro move: if you accidentally cut into woody stems, don't panic. Simply make a new cut above the mistake and the plant will still recover beautifully. The key is working with the plant's natural growth patterns rather than against them.
Post-Pruning Care: The 24-hour window after pruning is critical for your marigolds' recovery. During this time, focus on three things: applying that diluted 10-10-10 fertilizer, watering deeply at the base, and avoiding any overhead watering that could wet the leaves. I've found that adding 1-2 inches of organic mulch right after pruning creates a microclimate that keeps roots cool and prevents soil-borne diseases from taking hold in fresh cuts. This simple layer acts like a protective blanket for your plants during their recovery phase.
Pro Tips for Pruning Marigold Plants
- These little tricks will transform your marigolds from occasional bloomers into continuous floral powerhouses.
- Timing Secret: The morning hours are your golden window for pruning—between 7 and 9 AM when stems are firm and dew ha...
- Visual Cues for Pruning: In Step 1, when identifying spent blooms, look for three key visual signals: drooping petals...
Frequently asked questions
When is the best time to prune marigolds?
Prune marigolds after they bloom to encourage more flowers. For deadheading (removing spent blooms), do it in the morning when flowers are dry. Avoid pruning in extreme heat or cold—aim for mild, sunny days. Pro tip: Regular pruning (every 1-2 weeks) keeps plants bushy and productive!
How much should I cut back marigold stems?
Trim stems back to just above a leaf node (where leaves grow) or a set of healthy leaves. Never cut into bare stems—this can stress the plant. For leggy marigolds, you can cut back up to ⅓ of the stem, but avoid over-pruning. Warning: Avoid cutting into woody stems near the base!
Can I prune marigolds too much?
Yes! Over-pruning removes too much foliage, reducing the plant’s ability to photosynthesize and produce energy. Stick to removing only spent blooms or overgrown stems. If your marigold looks stressed, pause pruning and focus on watering and sunlight. Signs of over-pruning: Fewer leaves, slow growth, or no new blooms.
What if my marigolds stop blooming after pruning?
If blooms halt, check for these fixes:
- Light: Ensure 6+ hours of sunlight daily.
- Water: Keep soil moist but not soggy.
- Fertilizer: Use a balanced bloom booster every 4-6 weeks.
- Pests: Inspect for aphids or spider mites.
Are there marigold varieties that don’t need pruning?
Most marigolds benefit from pruning, but French marigolds (like ‘Bonanza’ or ‘Jingle Bells’) are more forgiving and self-cleaning. African marigolds (like ‘Crackerjack’) may need occasional deadheading but bloom prolifically without heavy pruning. Tip: Focus on deadheading any marigold to extend the flowering season!
Wrapping up and next steps
Pruning your marigolds isn’t just about tidying up—it’s your secret weapon for nonstop, vibrant blooms all season! With the right tools, timing, and techniques (like deadheading and strategic trimming), you’ll keep those cheerful orange-yellow flowers shining bright. 🌻✨
Ready to level up your garden? Grab those shears, follow the steps, and watch your marigolds thrive like never before. Next up: Share your pruned marigold masterpiece on social media with #MarigoldMagic—let’s inspire each other to grow even more!