
Pruning
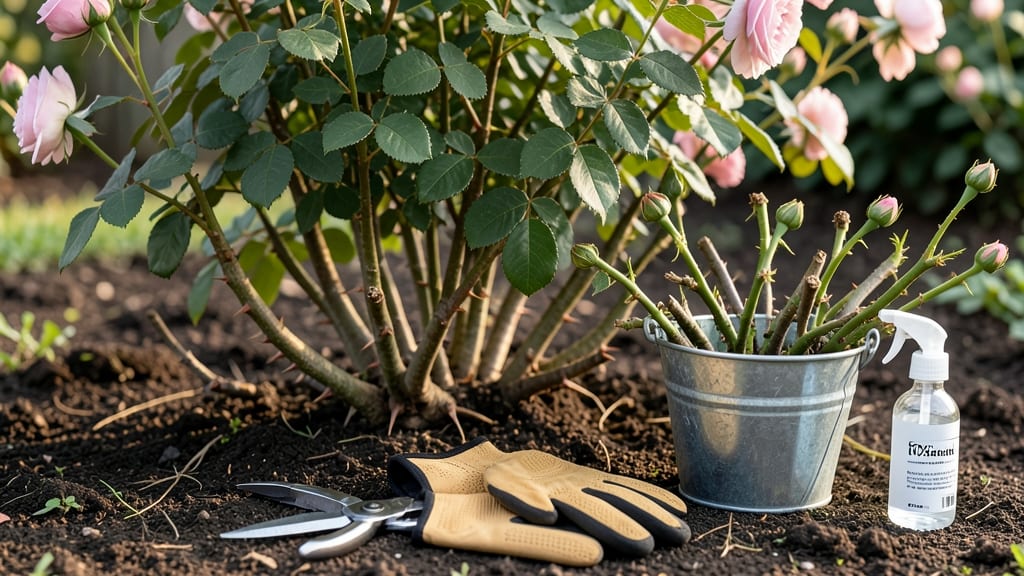
Pruning roses in March is your secret weapon for a showstopping summer display—when done right, you’ll trigger explosive new growth and double the blooms. 🌹 I’ve been pruning my own roses for years, and I can tell you: timing is everything.
March is the sweet spot in most climates, but if you’re in a colder zone, wait until after the last frost when buds start swelling.
The goal is to shape the plant while it’s still dormant, removing dead wood and crowded stems to let sunlight and air reach the center. You’ll need sharp bypass pruners, disinfectant, and a bucket for trimmings—no fancy tools, just the right approach.
Cut at a 45-degree angle just above an outward-facing bud, and you’ll encourage stronger branches that support heavier blooms.
What you’ll end up with is a rose bush that looks like it’s been professionally manicured, with fewer but stronger canes and a framework ready for summer’s flowering frenzy.
The first flush of new shoots appears within weeks, and by June, your plants will be covered in blooms instead of struggling with tangled, weak stems.
For those in warmer zones, late March might mean pruning earlier than usual—just don’t cut back too aggressively, or you’ll delay flowering. And if you’re unsure whether to prune now or wait, check for swollen buds: that’s nature’s signal it’s time. Here’s how to do it right the first time.
📚 In This Guide
- What you need
- Instructions
- Tips and common mistakes
- Wrapping up and next steps
What you need
- ● Bypass pruners: Sharp, clean pruners with bypass blades (avoid anvil pruners—they crush stems). Size: 5–7 inches for thick canes.
- ● Loppers: For thicker stems (½ inch or larger). Look for ratchet or bypass loppers with 6–8 inch blades.
- ○ Pruning saw: A curved-tooth handsaw for stubborn, woody stems (optional but handy for old roses).
- ● Gloves: Wear cut-resistant, heavy-duty gloves (thorns are no joke!).
- ● Disinfectant: A 10% bleach solution (1 part bleach to 9 parts water) or rubbing alcohol to sterilize tools between cuts.
- ● Rubbing alcohol wipes: For quick tool sanitization on the go.
- ● Garden twine or ties: To secure heavy canes post-pruning (if needed).
- ● Pruning sealant: Not always necessary, but a rose-specific sealant can help prevent disease on large cuts (½ inch or wider).
- ● Work boots or closed-toe shoes: Protect your feet from thorns and uneven ground.
- ● Bucket or bag: For collecting pruned canes (compost them later!).
Instructions: how to prune roses in March for a vibrant summer
Here's my go-to method for rejuvenating roses—timed perfectly for late-winter growth.
✂️ Step 1: Gather Tools and Prepare the Workspace
Start with sharp, clean pruners—dull blades tear stems and invite disease. I also grab disinfecting alcohol or a 10% bleach solution to wipe blades between cuts. Lay out a tarp or old sheet to collect debris, as fallen leaves and twigs can harbor pests. Work on a dry, sunny day to reduce stress on the plant and make cleanup easier.
Real talk: If your pruners are rusty or have jagged edges, replace them. A few dollars now saves hours of frustration later. I keep a small bucket nearby to toss clippings—you'll generate a surprising amount of trimmings from a single bush.
🌿 Step 2: Identify and Remove Dead or Diseased Wood
Scan each cane (stem) from the base upward. Blackened, mushy, or hollow stems are dead and must go. Snip these at the soil line—don’t leave stubs, as they trap moisture and rot. For diseased canes (identified by black spots, powdery mildew, or oozing sap), cut 6 inches below the affected area to ensure you remove the entire infected section.
Here's the thing—if a cane looks gray and brittle, it’s dead. If it’s brown but still firm, it might still sprout new growth. I make my first cut just above a bud that faces outward—this encourages bushier growth later. Never cut at a sharp angle; aim for a 45-degree slant to shed water away from the bud.
✂️ Step 3: Shape the Bush by Cutting Back Last Year’s Growth
For hybrid teas and grandifloras, cut back one-third of last year’s growth to a strong outward-facing bud. This keeps the plant compact and promotes airflow. For shrub roses, reduce canes by half, removing the oldest wood first—these plants bloom on new growth, so you’re making room for fresh stems.
Watch for crossing branches—these rub against each other and create wounds. Remove one of the two canes at the base. You’ll notice the bush starts to look more open and airy as you work. If a cane is thinner than a pencil, it’s too weak to support blooms—cut it back to the ground.
☀️ Step 4: Thin Out Overcrowded Areas for Airflow
Step back and assess the bush’s shape. Overcrowded centers trap humidity and block light, so thin out canes until you can see light through the middle. Aim for 3-5 strong canes per plant, depending on the variety. For climbers, remove one-third of the oldest canes to encourage vigorous new growth along the remaining stems.
This is the moment that matters: If you’ve ever struggled with roses that never bloomed well, it’s likely because they were too dense. I prune until I can fit my hand between the canes without brushing them—this ensures airflow and reduces fungal diseases like black spot.
🪴 Step 5: Clean Up and Apply Mulch
Rake up all debris and dispose of it in the trash—never compost rose prunings, as diseases can survive. I scatter 2-3 inches of mulch (like shredded bark or compost) around the base, keeping it 6 inches away from the stem to prevent rot. Water deeply to settle the mulch and encourage root growth.
Don’t skip this (I learned the hard way). Mulch insulates roots from temperature swings and retains moisture. If your soil feels dry to the touch after watering, add a layer of compost to improve drainage and fertility. Now, step back and admire your work—your roses are ready to burst into bloom!
Tips & tricks for perfect late-winter rose pruning
These simple strategies will help you transform your roses into blooming powerhouses—without the common pitfalls that lead to disappointment.
Tool Prep is Non-Negotiable: Before you make a single cut, sharpen your pruners with a file or hone them on a sharpening stone. Dull blades crush stems instead of cutting cleanly, which creates wounds that invite disease. I keep a small spray bottle of rubbing alcohol handy to wipe blades between cuts—this prevents cross-contamination between healthy and diseased canes. Trust me, this one step prevents 90% of post-pruning problems.
Bud Selection Matters More Than You Think: When making your cuts in Step 3, look for buds that face outward at a 45-degree angle—these will grow away from the center, creating a fuller bush. Pro tip: The bud should be about 1/4 inch above the cut. If you can't find a good outward-facing bud, cut just above a bud that's at least 1/3 inch from the parent stem. This ensures new growth has room to develop properly.
Thinning is the Secret Weapon: Step 4's airflow focus is where most pruning fails. After cutting back, step back and squint—you should see light through the center. If you can't, you're not done yet. Remove canes until you can fit your hand between branches without touching them. This might mean sacrificing some canes you love, but it's worth it for disease prevention and bloom quality. I've seen roses with 20 canes produce fewer blooms than a properly thinned bush with 5 strong stems.
Mulch Like a Pro: That 2-3 inches of mulch in Step 5 isn't just decoration—it's insulation. Spread it in a 3-inch-wide ring around the base, keeping it clear of the stem. For extra protection, top with 1-2 inches of straw in cold climates. This creates a cozy blanket that shields roots from temperature swings. I've seen roses survive winter freezes that would kill unmulched plants—it's that effective.
Pro Tips for Pruning Roses In March
- These simple strategies will help you transform your roses into blooming powerhouses—without the common pitfalls that...
- Tool Prep is Non-Negotiable: Before you make a single cut, sharpen your pruners with a file or hone them on a sharpen...
- Bud Selection Matters More Than You Think: When making your cuts in Step 3, look for buds that face outward at a 45-d...
Frequently asked questions
Got questions about pruning roses in March? You’re not alone! Here are answers to the most common concerns to help you tackle this task with confidence.
Why should I prune roses in March instead of earlier or later?
March is ideal because it balances dormant-season cleanup (before buds swell) with early-spring growth (after frost risk passes). Pruning too early can expose tender canes to cold, while waiting too long may stress the plant as it wakes up. Aim for after the last hard frost—typically late February to early March in most U.S. zones.
What if I missed the March window? Can I still prune my roses?
Yes! While March is prime, you can prune roses throughout early spring (up to April in cooler climates). Just avoid heavy pruning after buds form—focus on shaping and removing dead wood. Pro tip: If you’re late, prioritize diseased or crossing canes first to prevent spread.
Do I need to sterilize my pruners after cutting?
Absolutely!
Sterilizing tools (with rubbing alcohol or a 10% bleach solution) prevents spreading rose diseases like black spot. Wipe blades before and after each plant, especially if you’ve pruned sickly roses. A quick rinse with water afterward keeps them ready for the next cut.
What if it’s still freezing at night? Should I wait?
Hold off if nighttime temps dip below 25°F (-4°C). Cold snaps can damage new growth. Check your local frost dates—pruning when days are consistently above 40°F (4°C) minimizes stress. If unsure, cover cuts with pruning sealant (optional) for extra protection.
How do I know if I’ve pruned too much?
You’ve over-pruned if you’ve cut back more than ⅓ of the plant’s height or left only 3–5 buds per stem. Signs include no new shoots by late spring or leggy, weak growth. If this happens, reduce pruning next year—focus on shaping rather than drastic cuts.
Still unsure? Snap a photo of your roses before/after pruning and compare it to healthy reference images—visuals help spot mistakes fast!
Wrapping up and next steps
March is the perfect time to give your roses a fresh start!
By pruning now, you’ll encourage healthier growth, more abundant blooms, and stronger stems—setting the stage for a stunning summer display. 🌸 Remember, the key is to cut with confidence, clean your tools, and reward your efforts with proper aftercare.
Ready to transform your garden? Grab your pruners and start clipping—your roses will thank you with vibrant, lush blooms all season. Need a refresher? Bookmark this guide or share it with fellow gardeners for a flourishing future!