
Pruning
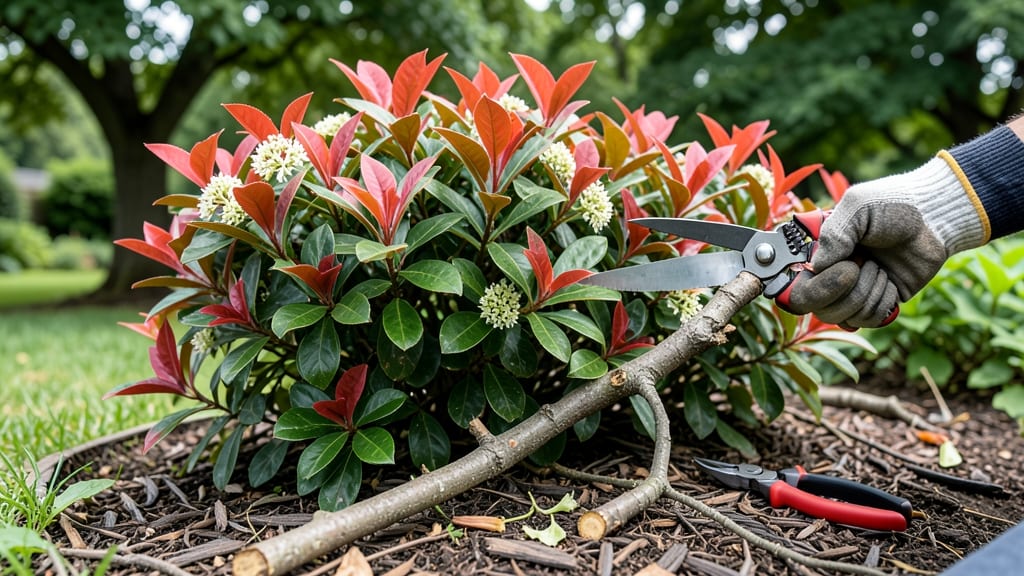
Late-winter pruning turns your Red Tip Photinia from a thorny mess into a bold, vibrant focal point. ✂️ I’ve pruned these shrubs for years, and the difference between a neglected hedge and a showstopper comes down to timing, technique, and a little patience.
The key? Cutting back in late winter—just as new growth begins to stir—when the plant is dormant but ready to rebound with fresh, thorn-free foliage.
You’ll need sharp bypass pruners, loppers for thicker branches, and a clean bucket for clippings. The goal is to remove up to one-third of the oldest wood while shaping the shrub into a rounded or vase-like form.
This isn’t just about looks—it revives the plant’s energy, encourages denser growth, and keeps those pesky thorns in check. Think of it as a spa day for your shrub: a little trim now means a fuller, healthier canopy all season.
After pruning, you’ll notice something magical: within 4-6 weeks, new red-tipped shoots will emerge, creating that signature bold contrast against the green. The shrub will fill out faster, resist pests better, and even flower more reliably.
Just avoid pruning in fall or early spring—you’ll risk inviting disease or stunting new growth. A little late-winter maintenance goes a long way.
For larger, overgrown Photinias, rejuvenation pruning (cutting back to the ground) can work—but only every 3-5 years. And always sterilize your tools between cuts to prevent spreading fire blight, a common disease in these shrubs.
With the right approach, your Red Tip Photinia will look like it just stepped out of a nursery, not a neglected corner of the yard.
📚 In This Guide
- What you need
- Instructions
- Tips and common mistakes
- Wrapping up and next steps
What you need
- ● Pruning shears: Bypass pruners (sharp, 5-7" blades) for clean cuts on small branches (1/4"–3/4" diameter). Anvil pruners are a backup but can crush stems—use sparingly.
- ● Loppers: Bypass loppers (8-10" blades) for medium branches (3/4"–2" diameter). Look for ratcheting models for extra leverage.
- ● Pruning saw: Curved-tooth handsaw for thick branches (>2" diameter). Avoid straight-tooth saws—they tear wood.
- ● Gloves: Heavy-duty gardening gloves (leather or reinforced) to protect against thorns and scrapes.
- ● Disinfectant: 70% isopropyl alcohol or a 10% bleach solution to sterilize tools between cuts (prevents disease spread).
- ○ Pruning sealant (optional but helpful): Tree wound sealant (like Tanglefoot Tree Wound Pruning Sealer) for cuts larger than 1/2".
- ● Ladder or step stool: Aluminum extension ladder (24–32' for tall Photinias) or a stable step stool (for shorter bushes). Always secure it!
- ● Trash bags: Heavy-duty contractor bags (30–50 gallon) for debris removal. Line with a biodegradable liner if composting.
- ● Sharpie or marker: Permanent marker for labeling cuts if training young plants.
- ● Hand pruners with ratchet: Eases cutting fatigue for long sessions.
- ● Pole pruner: For high branches (extendable up to 10–12').
- ● Safety glasses: Protects eyes from debris (especially when using a saw).
- ● Knee pads: If you’ll be kneeling or working on the ground.
- ● String or twine: For temporary support if shaping young branches.
- ● Plant food: Balanced fertilizer (10-10-10 or 20-20-20) to apply post-pruning for a growth boost.
Step-by-step guide to pruning red tip photinia for healthier growth
Here's how to transform your leggy shrubs into dense, vibrant bushes with this precise pruning method.
✂️ Step 1: Time Your Pruning for Maximum Impact
Prune your red tip photinia in late winter, just as new growth begins but before buds swell. This timing ensures you remove dead wood while encouraging fresh, vibrant spring growth. I always check for dormant buds along stems—when you see them plump and ready to burst, it's time to act.
Never prune in fall or early winter. You'll risk encouraging new growth that won't harden off before cold snaps, leaving tender shoots vulnerable to frost damage. If you missed the window, wait until early spring when buds show green coloration—that's your signal to proceed.
✂️ Step 2: Remove Dead and Diseased Wood First
Start by cutting out any dead, broken, or diseased branches at their base. Use clean, sharp pruners to make 45-degree cuts just outside the branch collar. I look for branches with no green tissue inside when I scrape with my thumbnail—those are the ones to remove completely.
Diseased wood often appears as branches with blackened or oozing lesions. Bag these immediately and dispose of them in yard waste—not your compost bin. Healthy wood should have a smooth, firm texture and vibrant green pith when cut open.
✂️ Step 3: Thin Out Overcrowded Branches
Next, remove 1/3 of the oldest wood from the center of the shrub to improve airflow and sunlight penetration. Focus on branches growing inward or crossing others—these compete for resources and create dense, thorny thickets. I aim to create an open vase shape that lets light reach all foliage.
Make cuts just above an outward-facing bud or branch. You'll see these as small bumps on the stem—they'll grow into new branches. Avoid leaving stubs; clean cuts heal faster and reduce disease risk. Step back often to visualize the balanced silhouette you're creating.
✂️ Step 4: Shape for Dense, Thorn-Free Growth
Now it's time to shape your photinia. Cut back last year's growth by 1/3 to encourage bushier branching. I make my cuts just above a set of 3-4 buds to promote multiple new shoots. For larger branches, use loppers for cleaner cuts.
Pay special attention to thorny growth—these develop when branches are overcrowded. Prune them back to leaf nodes (where leaves attach) to redirect energy into softer, foliage-heavy growth. You'll know you're doing it right when you see new red tips emerging within 4-6 weeks.
🌿 Step 5: Clean Up and Monitor for Recovery
After pruning, remove all clippings from the area and sterilize your tools with 70% rubbing alcohol. This prevents spreading disease between cuts. Water the base of the shrub deeply to help it recover, but avoid wetting the foliage—damp leaves invite fungal problems.
Watch for new growth within 3-4 weeks. Healthy photinia will show bright red new shoots and dense foliage. If you see yellowing leaves or slow recovery, you may have over-pruned—next time, be more conservative with your cuts.
Tips & tricks for pruning red tip photinia like a Pro
These game-changing insights will help you achieve that perfectly manicured, vibrant look without sacrificing your shrub's health.
Timing is Everything: The late winter window—when buds are plump but haven't yet swollen—is your golden opportunity. I've learned the hard way that pruning too early risks frost damage to new growth, while waiting too long means you're cutting back healthy foliage instead of dead wood. Check for those dormant buds that look ready to burst open: that's your cue to begin. If you missed the window, wait for green coloration in early spring as your second chance.
Tool Prep Makes All the Difference: Sterilizing your pruners with 70% rubbing alcohol between cuts isn't just good practice—it's essential. I keep a small bottle in my tool belt and wipe down blades after every 3-4 cuts, especially when dealing with diseased branches. Sharp tools also matter: dull blades crush stems and create jagged cuts that invite infection. Test your pruners by making a clean cut through a pencil—if it crushes, sharpen first.
Visualize Your Silhouette: Before making any cuts, step back and examine your photinia from multiple angles. You're aiming for that open vase shape that lets sunlight penetrate to the center. I sketch a rough outline on paper first—this helps me see where branches are competing for space. Focus on removing 1/3 of the oldest wood from the center while maintaining an outward-facing growth pattern. This creates that lush, full look without the thorny thickets.
Monitor for Recovery Like a Pro: After pruning, watch for new growth within 3-4 weeks—this is your confirmation that the shrub is responding well. Bright red new shoots mean you've done it right. If you notice yellowing leaves instead, you may have over-pruned. For next time, be more conservative with your cuts, especially on younger shrubs. Deep watering after pruning helps recovery, but avoid wetting the foliage to prevent fungal issues.
Pro Tips for Red Tip Photinia Pruning
- These game-changing insights will help you achieve that perfectly manicured, vibrant look without sacrificing your sh...
- Timing is Everything: The late winter window—when buds are plump but haven't yet swollen—is your golden opportunity. ...
- Tool Prep Makes All the Difference: Sterilizing your pruners with 70% rubbing alcohol between cuts isn't just good pr...
Frequently asked questions
about Red Tip Photinia pruning—get answers to the most common concerns before grabbing your shears!When is the absolute best time to prune Red Tip Photinia?
The late winter (February–March) is ideal—just before new growth starts. This timing promotes vibrant red tips and a fuller canopy. Avoid pruning in fall or early spring, as it can stress the plant or invite disease. Pro tip: Prune on a dry, overcast day to reduce stress on the plant.
Can I prune Red Tip Photinia in summer? What happens if I do?
While you can prune in summer, it’s not recommended. Heavy summer pruning can stunt growth and weaken the plant, making it more susceptible to leaf spot disease. If you must prune, do it lightly (10–20%) and avoid cutting into old wood—new growth won’t regenerate red tips as well.
How much can I prune Red Tip Photinia without harming it?
For established plants, aim to remove no more than 25–30% of the foliage per year. Over-pruning can reduce flowering and weaken the plant’s structure. If your plant is overgrown or leggy, spread pruning over 2–3 years to avoid shock. Pro tip: Focus on shaping rather than drastic cuts.
Why does my Red Tip Photinia have brown, crispy leaves after pruning?
Brown or crispy leaves after pruning usually mean over-pruning, stress, or disease. Check for:
- Thinning cuts (avoid shearing—prune just above a leaf node).
- Fungal issues (like Entomosporium leaf spot)—remove infected branches and sterilize tools with rubbing alcohol.
- Underwatering—pruning increases water needs. Keep soil consistently moist for 2–3 weeks post-prune.
Are there alternatives to Red Tip Photinia for low-maintenance hedges?
If you want bold color and thorn-free growth but less upkeep, consider:
- Dwarf Fountain Grass (Pennisetum alopecuroides) – Air-purifying, drought-tolerant, and no pruning needed beyond occasional trimming.
- Emerald Green Arborvitae (Thuja occidentalis ‘Smaragd’) – Slow-growing, disease-resistant, and thrives with minimal pruning.
- Dwarf Yaupon Holly (Ilex vomitoria ‘Nana’) – Evergreen, berry-producing, and handles light pruning well.
Wrapping up and next steps
Pruning your red tip photinia in late winter isn’t just about shaping—it’s your secret weapon for vibrant, thorn-free growth and long-term plant health. By following the right techniques, timing, and tools, you’ll encourage bold foliage, reduce disease risks, and keep your shrub looking showstopping year-round. 🌿✨
Now that you’re armed with the know-how, grab those shears and give your photinia the TLC it deserves! Start small—even a single branch makes a difference—and watch your garden thrive with confidence. Ready to prune? Roll up your sleeves and turn theory into a lush, leafy reality!