
Pests and Diseases
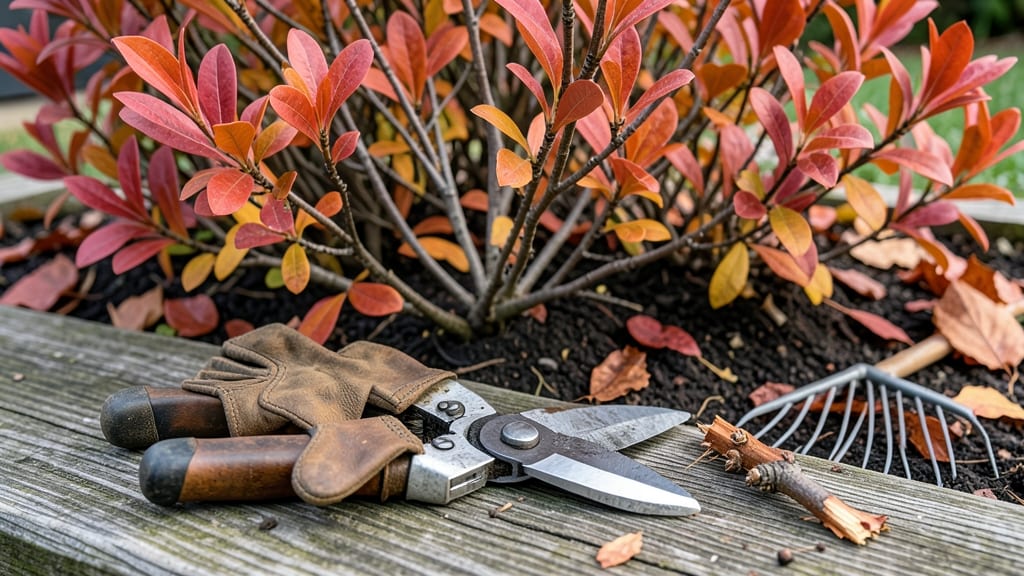
The best time to prune a burning bush 🌿 is late winter, just as new growth begins but before buds swell—this timing unlocks the boldest summer color and healthiest shape.
If your burning bush isn’t bursting with vibrant fall color or maintaining its signature shape, timing your prune could be the missing piece—late winter is the golden window for dramatic summer results.
Why does timing matter so much? Pruning too late in the season can stress the plant, reducing its hardiness and next year’s flower production. In colder zones like 6a, late winter pruning also avoids frost damage while encouraging strong new growth.
Below, I’ll walk you through the exact steps for late winter pruning, including when to cut, what tools to use, and how to shape your burning bush for maximum impact—plus the 5 mistakes that kill color and how to avoid them.
Why late winter pruning Maximizes burning bush growth and color
Late winter—specifically February to March—is the ideal time to prune your **burning bush (Euonymus alatus) because it aligns perfectly with the plant’s dormancy cycle.
During this period, the shrub has already shed its leaves and stored energy for spring growth, making it far less stressful to trim. This timing also prevents dieback and ensures bold foliage and vibrant fall colors later in the year.
When you prune in late winter, you’re optimizing sap flow while the plant is still dormant but before new growth begins. This allows the bush to redirect energy into developing strong, healthy stems and leaves.
Skipping this step or pruning at the wrong time can lead to stunted growth or even disease susceptibility due to open wounds.
The science behind late winter pruning involves understanding how plant hormones like auxin and cytokinin respond to cuts. Pruning during dormancy minimizes stress hormones and encourages cell division in the spring.
For USDA zones 3–9, this window works because most regions experience stable cold temperatures without late frosts that could damage fresh cuts.
In colder climates (zones 3–5), aim for late February to early March when daytime temperatures consistently reach above 40°F (4°C). In warmer zones (6–9), extend your window to mid-March, as the risk of frost damage is lower.
Always check your local last frost date to avoid pruning too early.
| Climate Zone | Best Pruning Window | Key Consideration | Why It Matters |
|---|---|---|---|
| USDA Zones 3–5 | Late February–Early March | Daytime temps >40°F (4°C) | Prevents frost damage to fresh cuts |
| USDA Zones 6–7 | Mid-February–Mid-March | Avoid late frosts | Encourages vigorous spring regrowth |
| USDA Zones 8–9 | Mid-March–Early April | Warmer winters | Maximizes summer color intensity |
Pruning in late winter also prevents dieback by removing dead, diseased, or crossing branches before the growing season. These cuts allow better air circulation, reducing the risk of fungal infections like powdery mildew.
Additionally, shaping your burning bush now ensures it develops a balanced structure, which is crucial for bold fall foliage.
One common misconception is that pruning in late winter will harm the plant. In reality, the opposite is true: strategic cuts stimulate new growth by promoting the release of growth hormones.
This leads to denser foliage and brighter fall colors, which is why gardeners in USDA zones 3–9 swear by this timing.
If you live in a milder climate (zones 8–9), you might wonder why late winter is still ideal. The answer lies in sap flow dynamics.
Even in warmer regions, pruning before bud break (when buds swell but before leaves emerge) ensures the plant isn’t stressed by rapid growth while healing from cuts. This is especially important for burning bushes, which rely on photosynthesis efficiency for their signature color.
For young burning bushes (under 3 years old), late winter pruning is even more critical. These shrubs are still establishing their root systems, and pruning now helps shape their structure without compromising their ability to absorb nutrients.
Older bushes benefit too, as rejuvenation pruning (removing up to one-third of old wood) can revive vigor and intensify color.
Finally, post-pruning care plays a role in maximizing results. After trimming, water deeply to help the plant recover, and avoid fertilizing until new growth appears in spring. This ensures the energy goes toward root and stem development rather than foliage, setting the stage for stunning summer and fall displays.
By pruning your burning bush in late winter, you’re not just maintaining its shape—you’re unlocking its full potential for vibrant growth and show-stopping color. The science is clear: timing is everything**, and late winter is the perfect window to give your shrub the care it deserves. 🌿✂️
Step-by-step late winter pruning guide for burning bushes
Late winter is the perfect time to prune your burning bush (Euonymus alatus)—before new growth begins but after hard frosts have passed. This timing ensures vibrant summer foliage and fall color while minimizing stress on the plant.
If you miss this window, you risk stunted growth or disease from improper cuts.
Pruning at this stage also removes dead or weak branches that can harbor pests, giving your shrub a clean slate for the growing season. For best results, aim to finish pruning by early March in most USDA zones 3–9.
Let’s dive into the exact steps to transform your burning bush into a showstopper.
Step-by-Step Late Winter Pruning
-
Step 1: Gather Tools
Use bypass pruners for small branches (½-inch thick) and loppers for thicker stems. Sterilize tools with rubbing alcohol to prevent bacterial spread.
-
Step 2: Remove Dead Wood
Cut out dead, diseased, or crossing branches first. Look for brown stems or mushroom growth—these are red flags for fungal infections.
-
Step 3: Thin the Canopy
Open the center of the shrub by removing 1/3 of the oldest stems at the base. This improves airflow and light penetration for lush growth.
-
Step 4: Shape the Hedges
For formal hedges, trim outer branches to encourage dense layers. For natural shapes, focus on even distribution of branches.
-
Step 5: Fertilize Lightly
Apply a balanced fertilizer (10-10-10) at 1 tbsp per plant to support new growth. Water deeply afterward to activate roots.
-
Step 6: Mulch and Water
Spread 2–3 inches of mulch around the base to retain moisture and suppress weeds. Water deeply once weekly until new shoots appear.
After pruning, your burning bush will reward you with brighter foliage and stronger structure by summer. Avoid heavy pruning later in the year, as it can reduce winter hardiness and fall color intensity.
If you notice yellowing leaves post-prune, it may signal over-pruning—adjust next time to remove only 1/3 of the plant.
Pro tip: Take before-and-after photos to track your progress! A well-pruned burning bush can double in vibrancy compared to neglected shrubs. With this method, your landscape will stand out all season long.
🌿