
How To
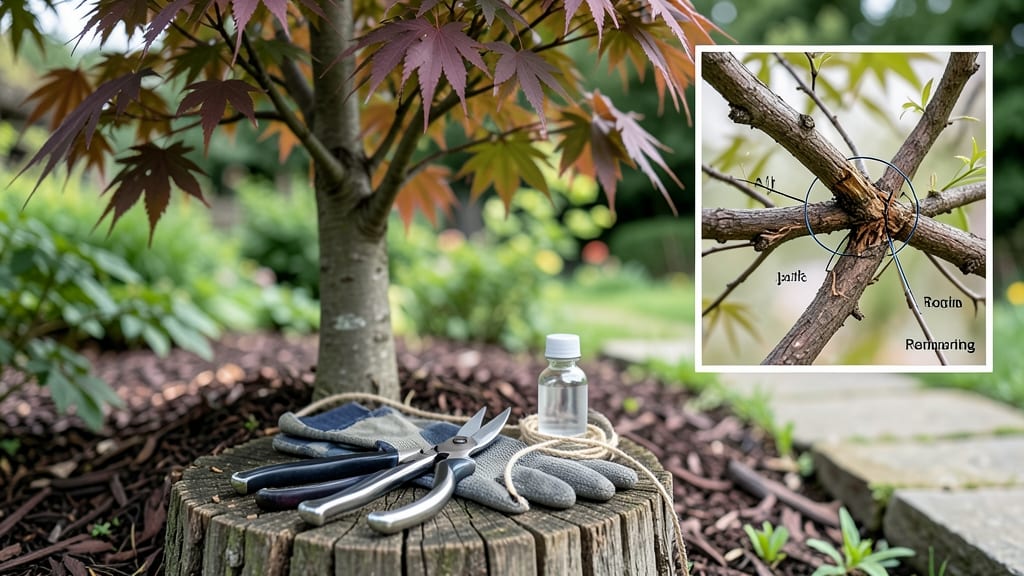
Pruning Japanese maple in late winter isn’t just about shaping—it’s about setting the stage for that vibrant red foliage you’ll adore all summer. ✂️ I’ve learned the hard way that timing and technique make all the difference, especially with these delicate trees that heal slowly.
A single wrong cut can scar the bark for years, so precision matters more than speed.
The key is working when the tree is dormant but before new growth starts—usually between mid-February and early March in most climates. You’ll need sharp bypass pruners, rubbing alcohol for sterilizing cuts, and a clear plan to remove only dead, crossing, or weak branches.
Think of it as giving your maple a fresh start, not a haircut.
📚 In This Guide
- What you need
- Instructions
- Tips and common mistakes
- Wrapping up and next steps
What you need
- ● Bypass pruners: Sharp, high-quality pruners (like Felco or Fiskars) with 4- to 6-inch blades for clean cuts on small branches.
- ● Loppers: For thicker branches (up to 1.5 inches in diameter), opt for loppers with 8- to 10-inch handles for leverage.
- ● Pruning saw: A bow or curved-tooth saw for branches larger than 1.5 inches—Japanese maples have delicate wood, so avoid aggressive cuts!
- ● Disinfectant (70% isopropyl alcohol or bleach solution): Clean tools between cuts to prevent disease spread.
- ● Rubbing alcohol or hand sanitizer: For sanitizing your hands before and after pruning.
- ● Garden gloves: Lightweight, nitrile-coated gloves to protect against thorns and sap.
- ○ Pruning sealant (optional but recommended): A wound dressing (like Tanglefoot Tree Wound Pruning Seal) to coat large cuts and reduce sap bleeding.
- ● Bucket or bag: For collecting pruned branches and debris.
- ● Extension pole: If your tree is tall, a 3- to 5-foot pole saw or loppers can save your back.
- ● String or twine: For temporarily marking branches to remove before cutting.
- ○ Magnifying glass (optional): Useful for spotting small, diseased buds or pests up close.
- ● Camera or phone: Snap before/after photos to track your tree’s progress!
Step-by-step instructions for pruning Japanese maple
Late-winter pruning transforms your Japanese maple into a stronger, more beautiful tree—here’s how to do it right.
✂️ Step 1: Identify and Remove Dead or Diseased Branches
Start by examining the tree closely for branches that are completely dead, showing no green in the bark or leaves, or displaying signs of disease like fungal growth or oozing sap. These branches won’t recover and will only weigh down the tree. Use sharp pruning shears to make clean cuts just outside the branch collar—the thickened area where the branch meets the trunk.
I always prune dead wood first because it’s the easiest to spot and removes potential entry points for pests. If a branch is only partially dead, leave it for now—healthy tissue might still recover. Cutting into live wood weakens the tree, so be patient and wait until you’re certain.
✂️ Step 2: Thin the Canopy for Better Airflow and Light
Next, focus on thinning out crowded branches to improve airflow and sunlight penetration. Look for branches that cross each other or grow inward—these compete for resources and create dense, shaded areas where diseases thrive. Remove about one-third of the smallest branches in the canopy, cutting them back to a healthy lateral branch or bud.
Japanese maples have delicate bark that can tear easily, so avoid heavy-handed cuts. Use clean, sharp pruning tools to make 45-degree cuts just above an outward-facing bud. This encourages new growth to sprout in the right direction. If you’re unsure which branch to remove, step back and imagine how the tree will look with the branch gone.
✂️ Step 3: Shape the Tree While Preserving Its Natural Form
Now it’s time to refine the tree’s shape, but resist the urge to over-prune. Japanese maples have a graceful, layered growth habit—your goal is to enhance, not alter, their natural silhouette. Focus on removing branches that spoil the tree’s symmetry or grow in an awkward direction, such as straight up or outward at sharp angles.
For larger branches, use three-cut pruning to avoid tearing the bark: First, make an undercut about 6 inches out from the branch collar, then a top cut about 2 inches farther out, and finally, remove the branch by twisting it gently away from the trunk. This method prevents the bark from splitting and gives the wound a better chance to heal.
✂️ Step 4: Clean Up and Apply Wound Dressing (If Needed)
After pruning, collect all the clippings and dispose of them properly—don’t leave them on the ground, as they can harbor diseases. Wipe your pruning tools with rubbing alcohol to prevent spreading pathogens between cuts. For larger wounds (over ½ inch in diameter), apply a wound dressing or pruning sealant to protect the tree from decay and pests.
I skip sealant on small cuts because fresh pruning wounds actually heal faster when exposed to air. Just make sure your cuts are clean and smooth—no jagged edges. Water the tree deeply after pruning to help it recover, especially if the winter has been dry. Avoid fertilizing immediately, as new growth will be vulnerable to late frosts.
⏰ Step 5: Monitor and Maintain Through the Growing Season
Keep an eye on the tree in the weeks following pruning. Healthy new growth should appear within 4-6 weeks, signaling that the tree is recovering well. If you notice any unusual wilting, yellowing leaves, or signs of stress, adjust your watering or check for pests. Japanese maples are sensitive to overwatering, so water only when the top 2 inches of soil feel dry.
Plan to do a light pruning in early summer if any new growth looks unbalanced or if you missed any branches during the late-winter session. This keeps the tree looking its best year-round. With proper care, your Japanese maple will reward you with lush foliage and a stronger structure for years to come.
Tips & tricks for pruning Japanese maple trees
Late-winter pruning is your chance to give your Japanese maple a fresh start—here's what I've learned to make the process smoother and more effective.
Tool Preparation: Before you even touch the tree, sharpen your pruning shears and clean them with rubbing alcohol. Dull blades tear bark instead of making clean cuts, which stresses the tree. I test my tools by making a clean cut on a scrap piece of bark first—if it's jagged, I sharpen again. This small step prevents unnecessary damage to your tree's delicate branches.
Visualization Technique: In Step 2 when thinning the canopy, I've found that stepping back and squinting one eye helps me see the tree's natural shape more clearly. This simple trick reveals which branches truly disrupt the tree's symmetry. Think of it as your "pruning vision"—it's amazing how much clearer the tree's form becomes when you force yourself to see it differently.
Seasonal Timing: The instructions mention late-winter pruning, but I've learned that the exact timing matters more than you might think. Prune when the tree is still dormant but buds have started to swell—this is usually 2-3 weeks before your last expected frost date. This timing gives the tree time to heal before new growth begins, while still allowing it to take advantage of early spring's energy boost.
Wound Care: For larger wounds over ½ inch in diameter, I've had the best results with a specialized pruning sealant that contains benzoic acid. This natural compound helps prevent decay while the wound heals. The key is to apply it immediately after pruning—don't let the wound sit exposed for even a few minutes. Small wounds (under ½ inch) don't need sealant and actually heal faster when left open to air.
Pro Tips for Prune Japanese Maple
- Late-winter pruning is your chance to give your Japanese maple a fresh start—here's what I've learned to make the pro...
- Tool Preparation: Before you even touch the tree, sharpen your pruning shears and clean them with rubbing alcohol. Du...
- Visualization Technique: In Step 2 when thinning the canopy, I've found that stepping back and squinting one eye help...
Frequently asked questions
Got questions about pruning your Japanese maple? You’re not alone! Here are answers to the most common concerns—so you can prune with confidence and keep your tree thriving.
When is the absolute latest I can prune my Japanese maple?
The best time is late winter (just before buds swell), but you can prune through early spring—just avoid heavy cuts after buds break. If you miss the window, wait until late summer or early fall (but avoid pruning when temps drop below 40°F).
Can I prune a Japanese maple in summer?
Yes, but lightly! Summer pruning is best for shaping or removing deadwood, but avoid heavy cuts—it stresses the tree and opens wounds to pests. If you must prune, do it on a mild, cloudy day and water afterward. For major work, stick to dormant season.
What if I see sap oozing after pruning?
Don’t panic! Sap bleeding is normal and harmless—it’s the tree’s way of sealing wounds. To speed healing, apply pruning sealant (optional) or let it air-dry. Avoid heavy rain for 24 hours post-prune to prevent infection. Most trees recover fully in a few weeks.
Should I remove small, weak branches entirely?
Not always! If a branch is thinner than a pencil, leave it—it’s often a water sprout or future growth. Thin out only crowded or crossing branches (cut to the nearest outward-facing bud). Weak branches can thicken over time with proper care.
How do I prune a Japanese maple in hot climates?
Hot, dry conditions demand extra caution. Prune early morning or late evening to avoid stress, and water deeply before and after. Reduce pruning to 20% of the canopy max—less is better. Mulch around the base to retain moisture, and avoid pruning during heatwaves.
Pro Tip:
Use sterilized tools (rubbing alcohol or bleach wipe) to prevent disease spread. And remember: Patience pays off—Japanese maples respond best to gradual shaping!
Wrapping up and next steps
Pruning your Japanese maple in late winter isn’t just about shaping—it’s about inviting healthier growth and a stunning canopy all season long! 🌿 With the right tools, timing, and technique, you’ll transform your tree into a vibrant centerpiece.
Now that you’re armed with the know-how, take that first confident cut and watch your maple thrive.
Ready to elevate your pruning game? Next, explore seasonal care tips—like watering, mulching, or even fertilizing—to keep your Japanese maple looking its best year-round!