
Pruning
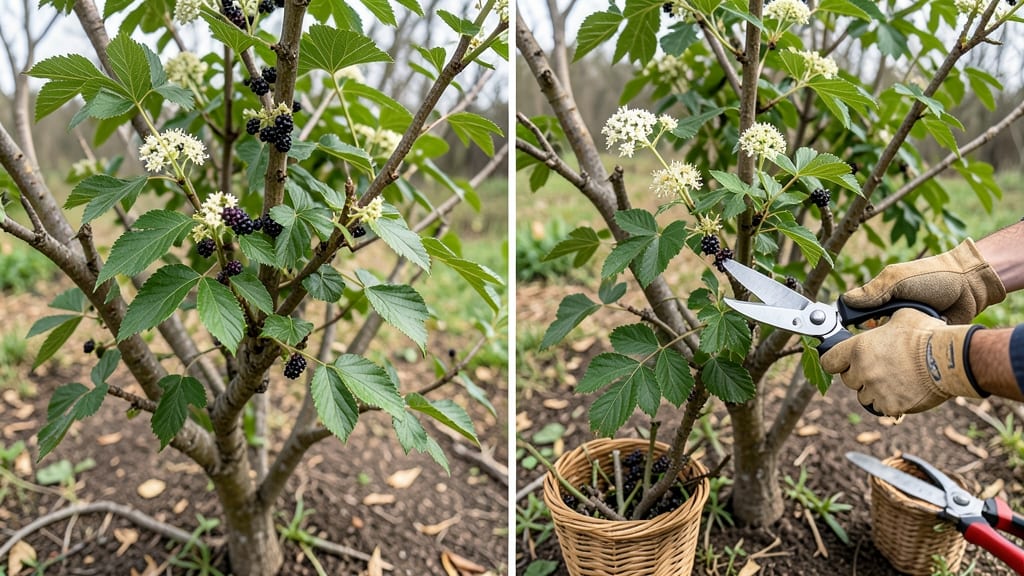
Pruning elderberry shrubs in late winter transforms them from tangled messes into productive powerhouses. ✂️ I’ve watched my own bushes go from struggling to bursting with fruit—all because I learned the right timing and cuts.
The key is working before buds swell but after the coldest stretch, when the plant’s energy is primed for new growth.
You’ll need sharp pruners, gloves (elderberries have thorns), and a clear day to see the structure. The goal is threefold: remove dead wood, thin crowded canes, and shape for airflow. Start by cutting out any blackened or brittle branches—these won’t fruit well.
Then, select 6-8 of the strongest, youngest canes to keep; the rest can go to encourage vigor in the remaining ones.
What you’ll end up with is a bush that produces 2-3 times more berries than before, with fewer pests and diseases. The canes will be sturdy, the fruit clusters larger, and the harvest easier to reach.
Plus, the plant’s energy focuses on what matters most—those sweet, deep-purple berries we all love.
This method works whether you’re pruning a young bush or reviving an overgrown veteran. The only real mistake is waiting too late—spring buds mean missed opportunities. Let’s get those shrubs shaped for a stellar season.
📚 In This Guide
- What you need
- Instructions
- Tips and common mistakes
- Wrapping up and next steps
What you need
- ● Pruning shears or loppers: Sharp, bypass-style shears (for small branches) or loppers (for thicker canes up to 1.5 inches in diameter). Quantity: 1-2 pairs (one for you, one for backup!).
- ● Pruning saw: A curved-tooth saw for cutting through older, woody stems thicker than 1.5 inches. Quantity: 1.
- ● Gloves: Heavy-duty, cut-resistant gloves (elderberry canes have thorns!). Quantity: 1 pair.
- ● Disinfectant: 70% isopropyl alcohol or a pruning sealant (like tree wound paint) to prevent disease spread. Quantity: Small bottle.
- ● Rake or broom: For clearing debris after pruning. Quantity: 1.
- ○ Bucket or bag: To collect pruned branches (optional but handy for composting or disposal). Quantity: 1-2.
- ● Ladder: If your shrubs are tall (6+ feet), a sturdy step ladder or extension pole pruner for hard-to-reach canes.
- ● Marking twine or flags: To tag canes for future reference (e.g., "keep" vs. "remove").
- ● Safety glasses: Protect your eyes from flying debris or sap.
- ○ Pruning oil: For sealing larger cuts (optional but great for preventing rot).
Step-by-step guide to pruning elderberry shrubs
Revitalize your elderberry bushes with this simple, proven method for stronger growth and better fruit.
✂️ Step 1: Identify and Remove Dead or Diseased Canes
Start by inspecting your elderberry shrubs for any canes that are completely dead, broken, or showing signs of disease like blackened stems or fungal spots. Use clean, sharp pruning shears to cut these out at the base, making sure to remove the entire cane down to the ground. Elderberries are resilient, but dead wood just takes up space and can harbor pests.
Look for canes that are hollow, shriveled, or lacking any signs of life—these are your first targets. If you're unsure whether a cane is dead, scratch the bark with your thumbnail. If it's brown underneath, it's dead and should be removed. This step ensures your plant focuses its energy on healthy growth.
✂️ Step 2: Thin Out Overcrowded Canes for Better Airflow
Elderberries thrive when they have good airflow, so the next step is to thin out any overly dense or crossing branches. Aim to leave about 4-6 strong, healthy canes per shrub—this gives your plant room to breathe and reduces the risk of fungal diseases. Start by removing the weakest canes first; these are usually thinner, older, or less vigorous.
When you cut, make your pruning cuts at a 45-degree angle, about ¼ inch above a bud or lateral branch. This encourages new growth to sprout from the right place. Avoid leaving stubs—always cut cleanly just above a bud to prevent water from pooling and rotting the wound.
✂️ Step 3: Prune Back Last Year’s Growth to Encourage New Fruit Canes
Now, focus on the remaining healthy canes. Elderberries produce fruit on new growth, so you’ll want to prune back last year’s canes to about 3-4 feet tall. This might sound drastic, but it’s the key to a bountiful harvest. Start by cutting just above a strong, outward-facing bud or branch to encourage fresh, fruit-bearing growth.
If a cane is too old (typically 3-5 years old), it’s time to remove it entirely. These older canes produce less fruit and take up valuable space. You’ll notice they’re often thinner and less flexible than the younger, more vigorous canes. This selective pruning keeps your elderberry shrub productive and healthy for years.
✂️ Step 4: Shape the Shrub for Balance and Sunlight Access
Finally, step back and assess the overall shape of your elderberry shrub. Prune any branches that are growing inward or crossing over others to prevent rubbing and damage. You want an open, vase-like shape that allows sunlight to reach the center of the shrub—this ensures even fruit production and reduces disease risk.
Use your pruners to trim back any overly long or unruly branches, cutting just above a bud or lateral branch. This step is all about creating a balanced, open structure. Elderberries respond well to shaping, so don’t be afraid to make bold cuts—your shrub will thank you with stronger canes and more fruit next season.
⏰ Step 5: Clean Up and Apply Mulch (Optional)
After pruning, gather all the clippings and remove them from the area to prevent disease from spreading. You can compost the healthy-looking trimmings, but avoid composting any diseased or pest-infested branches. Once the area is clear, consider adding a 2-3 inch layer of mulch around the base of the shrub to retain moisture and suppress weeds.
This is also a great time to fertilize lightly if your soil is poor. A balanced, slow-release fertilizer applied in early spring will give your elderberry shrub the nutrients it needs to recover from pruning and produce strong new growth. Water the base of the shrub thoroughly after fertilizing to help it absorb the nutrients.
Tips & tricks for pruning elderberry shrubs
Here's what nobody tells you about getting it right the first time—these tricks will save your shrubs from stress and set you up for a fruit explosion next season.
Pruning Shears Matter: Invest in a good pair of bypass pruners—they make clean cuts that heal faster than the jagged edges from cheap shears. I use Felco-style pruners because they stay sharp longer and handle thicker elderberry canes like butter. Always sterilize your shears with rubbing alcohol between cuts to prevent spreading disease from any infected canes you might encounter in Step 1.
Timing Secret: Late winter is ideal because the shrub is dormant, making it easier to see the structure and identify dead canes. But if you miss that window, don't panic—you can prune right up until buds begin to swell in early spring. Just avoid pruning when the plant is actively growing, as it'll be more stressed and slower to recover. The key is to prune when you can see the cane structure clearly without leaves obscuring your view.
Visual Cues for Step 3: When pruning back last year's growth to 3-4 feet, look for the first set of strong, outward-facing buds. These are your growth points for next season's fruit canes. If you're unsure which buds to target, imagine drawing an invisible line from the center of the shrub outward—this helps create that open vase shape that lets sunlight penetrate. I usually make my cuts just above the third or fourth bud from the base to encourage sturdy new growth.
Mulch Magic: That optional 2-3 inch layer of mulch in Step 5 does more than just retain moisture. Wood chips or straw mulch also help regulate soil temperature and prevent weeds from competing with your elderberries for nutrients. I like to use shredded hardwood mulch because it breaks down slowly and adds organic matter to the soil over time. Just keep it a few inches away from the base of the shrub to prevent rot.
Pro Tips for Pruning Elderberry Shrubs
- Here's what nobody tells you about getting it right the first time—these tricks will save your shrubs from stress and...
- Pruning Shears Matter: Invest in a good pair of bypass pruners—they make clean cuts that heal faster than the jagged ...
- Timing Secret: Late winter is ideal because the shrub is dormant, making it easier to see the structure and identify ...
Frequently asked questions
Got questions about pruning elderberry shrubs? You’re not alone! Here are some of the most common concerns—and their straightforward answers—to help you prune like a pro.
When is the absolute best time to prune elderberries?
The ideal window is late winter or early spring (just before buds swell), but you can also prune in fall if needed. Avoid pruning in summer—it stresses the plant and attracts pests. For container-grown elderberries, prune anytime except during fruit production.
How much should I cut back? Is there a “too much”?
For established shrubs, remove 1/3 of the oldest canes (they’re woody and fruit poorly). Cut back to the ground or a healthy bud. Over-pruning? If you remove more than 50% of the plant in one go, it may struggle to recover. Start light if your shrub is young or stressed!
My elderberries got pests after pruning. Did I do it wrong?
Not necessarily! Pruning opens up the plant, making it easier for pests like aphids or borers to invade. To prevent this:
- Clean up all debris after pruning.
- Use pruning sealer on large cuts (optional but helpful).
- Monitor for pests and treat early with neem oil or insecticidal soap.
Will pruning affect next year’s fruit harvest?
Pruning boosts fruit production—by removing old canes, you encourage new, vigorous growth that bears more berries. However, if you prune too late in spring (after buds break), you’ll delay fruit development. Time it right, and you’ll see bigger, healthier berries next season!
Can I prune elderberries if they’re in a small yard or container?
Dwarf or container-grown elderberries (Sambucus nigra ‘Black Beauty’) thrive with regular pruning to control size. Trim back by 1/3 annually, focusing on shaping and removing dead wood. Just avoid overcrowding—aim for 6–8 canes max in containers for optimal airflow and fruit.
Wrapping up and next steps
Pruning elderberry shrubs in late winter isn’t just about tidying up—it’s your secret weapon for bigger harvests and healthier plants! 🌿 By removing dead wood, thinning crowded canes, and shaping your shrubs correctly, you’re setting the stage for vibrant growth and sweet, plentiful berries.
With the right tools and techniques, even beginners can master this task and enjoy the rewards of a well-maintained elderberry patch.
Ready to roll up your sleeves? Grab your pruners, mark your calendar for late winter, and give your elderberries the care they deserve. Your future self—and your taste buds—will thank you!