
Pruning
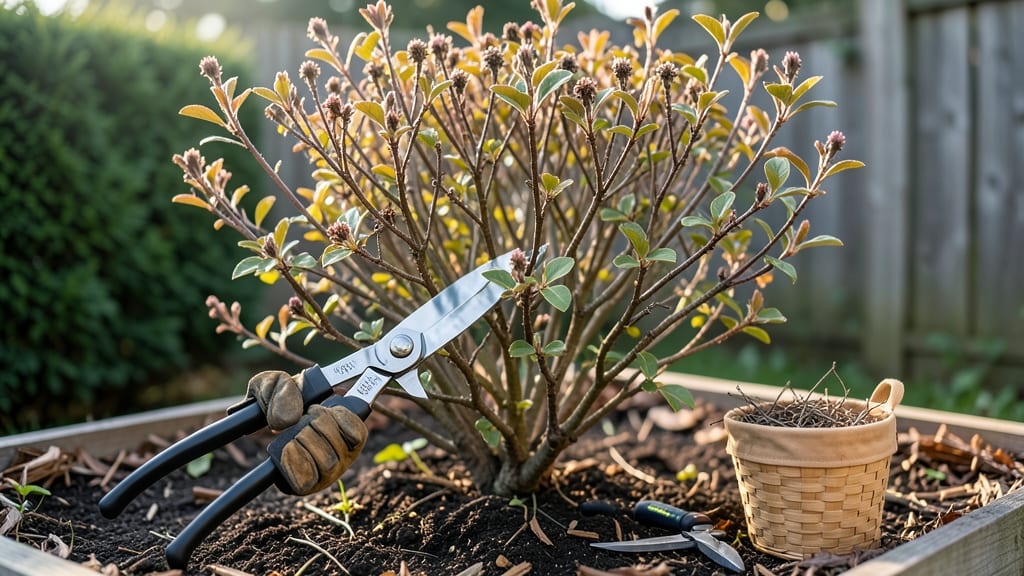
Spring spirea pruning sets the stage for a summer full of vibrant blooms. ✨ Every year, I’ve learned that timing is everything—prune too early, and you risk frost damage; too late, and you miss the growth window. The key is waiting until after the last frost when new shoots start pushing through the soil.
You’ll need just a few tools: sharp pruners, gloves, and a bucket for clippings. First, remove any dead or crossing branches—they’re the easy wins. Then, cut back one-third of the oldest stems to encourage fresh, bushy growth.
Think of it like giving your spirea a haircut that reveals its best shape.
After pruning, your spirea will reward you with dense clusters of blooms all summer long. The secret is in the cuts: always make them at a 45-degree angle just above an outward-facing bud. This opens up the center for airflow and sunlight, which means fewer diseases and more flowers.
For best results, feed your spirea with a balanced fertilizer after pruning. Mulch around the base to retain moisture, and watch as those new stems thicken into sturdy branches. Repeat this process every late winter, and you’ll have a spirea that’s the envy of the neighborhood.
📚 In This Guide
- What you need
- Instructions
- Tips and common mistakes
- Wrapping up and next steps
What you need
- ● Pruning shears: Bypass pruners (1 pair) – Sharp, clean blades (1/4"–3/8" cutting capacity) for clean cuts on smaller stems.
- ● Loppers: (1 pair) – For thicker branches (up to 2" diameter) with long handles for leverage.
- ● Pruning saw: (1) – Heavy-duty bow saw or pruning saw for stubborn, thick branches (over 2" diameter).
- ● Garden gloves: (1 pair) – Cut-resistant or heavy-duty gloves to protect hands from thorns and sharp edges.
- ● Disinfectant: (small bottle) – Rubbing alcohol (70%+) or bleach solution (1 part bleach to 9 parts water) to sterilize tools between cuts and prevent disease spread.
- ● Trash bags: (2–3) – Heavy-duty bags (13-gallon or larger) for collecting pruned branches and debris.
- ● Rake or leaf blower: (1) – To clear fallen leaves and debris from the pruning area.
- ● Water spray bottle: (1) – For rinsing tools and refreshing cuts if needed.
- ● Hand pruners: (1 pair) – For precision trimming on delicate stems.
- ● Knee pads: – If your spirea is low to the ground or you’ll be kneeling for extended periods.
- ○ Pruning sealant: – Tree wound dressing (optional) for large cuts, though many experts recommend skipping it for spirea.
- ● Notebook & pen: – To sketch a quick map of your spirea’s structure before pruning (helpful for complex shapes!).
- ● Safety glasses: – If your spirea has thorns or you’re working near your face.
Step-by-step instructions for pruning spirea in spring
Here's how to refresh your spirea for fuller growth and vibrant summer flowers.
✂️ Step 1: Time Your Pruning for Late Winter
Wait until after the last hard frost but before new growth begins—typically late February to early March in most climates. You'll know it's time when the ground thaws enough to work but the bushes remain dormant. Pruning too early risks cold damage to fresh cuts, while waiting too long lets the plant waste energy on unwanted growth.
I like to prune on a dry, 50-60°F day to minimize stress on the plant. If rain is forecast, schedule your pruning for the morning so cuts have time to dry before evening moisture sets in. This prevents fungal infections from taking hold in open wounds.
✂️ Step 2: Gather Your Tools and Assess the Bush
You'll need clean, sharp pruning shears (sterilize with rubbing alcohol between cuts) and bypass pruners for thicker stems. Examine your spirea for dead, crossing, or weak branches—these get removed first. Look for cankers (sunken, discolored areas) or signs of disease like powdery mildew, which should be pruned out completely.
Stand back and visualize the plant's natural shape. Spirea typically grows in a rounded form, so aim to maintain that silhouette. If your bush has grown leggy or one-sided, this is your chance to restore balance. I always sketch a quick mental map of where I'll make cuts to avoid over-pruning any section.
✂️ Step 3: Cut Back Old Wood to Encourage New Growth
Spirea blooms on new wood, so cut back one-third of the oldest stems to the ground. Make your cuts just above a bud or leaf node at a 45-degree angle—this directs water away from the cut. Avoid leaving stubs, as they trap moisture and invite rot. If you're unsure which stems are oldest, look for thicker, woody branches compared to the newer, thinner growth.
For the remaining two-thirds of stems, shorten them by half their height. This ensures a mix of old and new growth, which prevents the plant from becoming overcrowded. You'll see fresh, green growth emerging from the base after pruning—this is your signal that the plant is responding well.
✂️ Step 4: Shape and Thin for Airflow
Now focus on shaping the bush. Step back frequently to check your progress—this is where the art of pruning comes in. Remove any branches that cross or rub against others, as these create wounds and weak points. Thin out the center of the bush to improve airflow, which reduces humidity and fungal risks. Aim to leave 6-8 strong stems per plant for a balanced look.
If your spirea has become too large, you can reduce its overall size by 25% in one season, but never more than that—spirea is resilient but not invincible. After shaping, rake up and dispose of all clippings to prevent disease from spreading. A sharp mulch layer around the base helps retain moisture and protects new growth as it emerges.
⏰ Step 5: Post-Pruning Care for Strong Recovery
Water deeply after pruning to help the plant recover. Apply a balanced, slow-release fertilizer (10-10-10 ratio) around the base to support new growth. Avoid heavy nitrogen fertilizers, which encourage leafy growth at the expense of flowers. Monitor the plant closely for the first 2-3 weeks—new shoots should appear within 3-4 weeks if conditions are right.
Here's the thing—spirea is forgiving, but don't overdo it. If you accidentally prune too aggressively, the plant will still recover, though it may take a season or two to bounce back fully. The key is consistency: prune the same way each year, and your spirea will reward you with vibrant blooms from mid-summer to fall.
Tips & tricks for perfect spring spirea pruning
These practical pointers will help you transform your spirea into a lush, blooming beauty without the guesswork.
Timing is Everything: The late February to early March window is critical—this is when spirea is fully dormant but ready to burst into growth. I've learned the hard way that pruning too early (when frost lingers) can damage tender new growth, while waiting too long lets the plant waste energy on weak, leggy stems. If you miss the ideal window, don't panic—just aim to prune before you see any green buds forming. The plant will still recover, though you might sacrifice some of that first flush of summer blooms.
Tool Prep Prevents Problems: Sterilizing your pruning shears between cuts is non-negotiable. I keep a small bottle of rubbing alcohol handy and wipe down blades after every 3-4 cuts, especially if I spot any suspicious-looking branches. This simple step prevents spreading disease from cankers or infected areas. For thicker stems, bypass pruners give you the clean cuts you need—avoid anvil pruners, which crush stems and create larger wounds that heal poorly.
Visual Cues for Perfect Cuts: When making your 45-degree angle cuts, imagine you're slicing through a slice of pizza—just above a bud or leaf node. The angle helps water run off the cut instead of pooling, which would invite rot. For the one-third of oldest stems you're removing completely, look for branches that are noticeably thicker and woody compared to the newer, pencil-thin growth. These older stems won't produce many flowers anyway, so removing them makes room for vigorous new growth.
Recovery Checklist: After pruning, set a reminder to check your spirea in 2-3 weeks. You should see fresh green shoots emerging from the base—this is your confirmation that the plant is happy. If you don't see new growth after 4 weeks, it might be time to check your soil pH or consider a light application of phosphorus-rich fertilizer to encourage root development. The mulch layer you add after pruning should be about 2-3 inches thick—this helps retain moisture while protecting those tender new shoots from temperature fluctuations.
Pro Tips for Spirea Pruning Spring
- These practical pointers will help you transform your spirea into a lush, blooming beauty without the guesswork.
- Timing is Everything: The late February to early March window is critical—this is when spirea is fully dormant but re...
- Tool Prep Prevents Problems: Sterilizing your pruning shears between cuts is non-negotiable. I keep a small bottle of...
Frequently asked questions
Got questions about timing, tools, or tricks for pruning your spirea this spring? You’re not alone! Here are answers to the most common queries—so you can confidently snip your way to a showstopping summer display.
When is the exact best time to prune spirea in spring?
The sweet spot is late winter to early spring—just before new growth starts (usually 2–4 weeks before your last frost). For most spirea varieties, this means February through March in temperate zones. If you’re in a warmer climate, aim for January–February. Pro tip: Prune after the risk of hard freezes has passed to avoid stressing fresh cuts.
Do I need special tools for pruning spirea?
Not necessarily! A sharp pair of bypass pruners or loppers (for thicker stems) is ideal, but clean, disinfected tools will do. Avoid hedge trimmers—they can damage stems and leave ragged cuts. Bonus: A hand saw helps if you’re dealing with woody, overgrown branches.
What if I missed the spring pruning window? Can I still prune later?
Yes, but with caution! If you skip spring, you can lightly prune right after flowering (summer) to shape the plant. Avoid heavy cuts—this could sacrifice next year’s blooms. For severely overgrown spirea, space pruning over 2–3 years to reduce stress.
Why did my spirea stop blooming after pruning?
Spirea blooms on old wood, so over-pruning in spring (cutting back too much) can remove next year’s flower buds. Rule of thumb: Never trim more than 1/3 of the plant’s height. If blooms are sparse, lighten up and focus on shaping rather than drastic cuts.
Should I prune spirea if it’s raining or right after watering?
Avoid pruning wet plants—it can spread disease and dull your tools. Wait until morning when stems are dry, or prune afternoon if you must. Water deeply 1–2 days before to reduce stress, but never prune soggy soil. Think of it like grooming a wet dog: patience prevents problems!
Can I use the same pruning technique for all spirea varieties?
Not quite! Deciduous spirea (like Spirea japonica) thrive with hard pruning, while summer-blooming varieties (e.g., Spirea arguta) need minimal cuts. Always check your plant’s tag or research its specific blooming season. Quick guide:
Type
Best Pruning Time
Cut Back By
Spring-blooming (e.g., Spirea japonica)
Late winter/early spring
1/3 of plant height
Summer-blooming (e.g., Spirea arguta)
Right after flowering
Light shaping only
Wrapping up and next steps
Pruning your spirea in late winter or early spring is the secret to vibrant, bushier blooms all season long!
By following these steps—cleaning up dead wood, shaping with precision, and timing your cuts just right—you’ll encourage healthier growth and stunning floral displays. Don’t let fear of pruning hold you back—your spirea will thank you with lush, full foliage and showstopping flowers!
Now that you’re armed with the know-how, grab those shears and get pruning! 🌿✂️ Ready to transform your garden? Check out our guide to fertilizing spirea next to give your shrubs the extra boost they need for a show-stopping summer season.