
Pruning
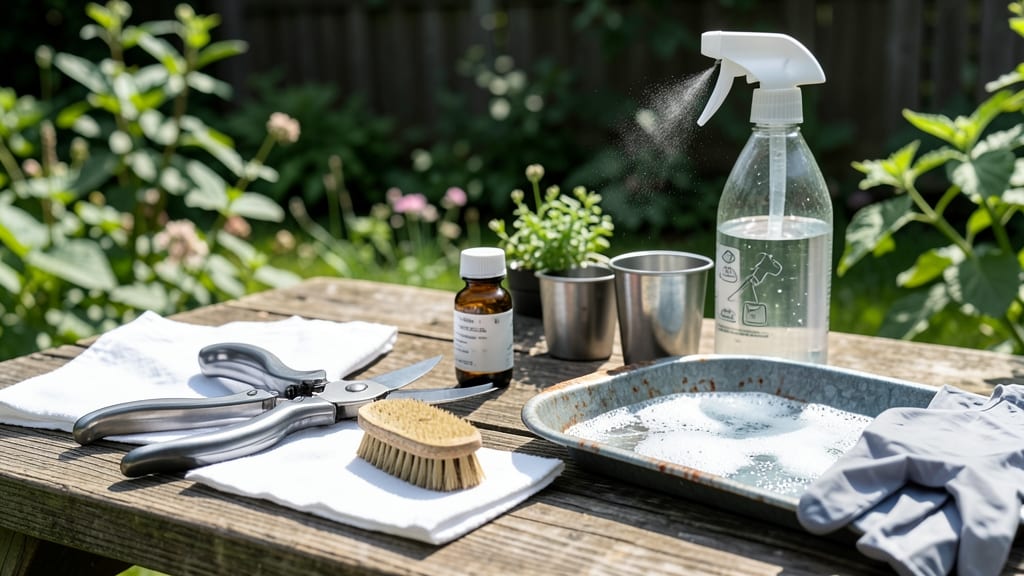
Disinfecting pruning tools isn't just a chore—it's the secret to keeping your garden thriving. 🌿 I learned the hard way when a single infected branch spread disease to my entire rose bush, turning vibrant blooms into sad, brown stems.
The good news? A quick 3-step disinfection routine prevents this nightmare before it starts.
You only need three simple supplies: rubbing alcohol (70% or higher), a clean rag, or a bleach solution (1 part bleach to 9 parts water).
Store your tools in a dry place between uses, and always wipe them down before and after pruning—especially when moving between plants or dealing with diseased branches. It takes less than 2 minutes and saves hours of cleanup later.
The payoff is immediate: healthier plants, fewer fungal spots on leaves, and tools that last longer. My roses now produce twice as many blooms because we stop disease at the source. Even better, this method works for every type of pruning tool—shears, saws, loppers, you name it.
Fair warning: the bleach solution has a strong smell, so work near an open window. And if you're pruning early in the morning or late in the evening, the tools will dry completely before your next session. Simple, effective, and game-changing for any gardener who wants lush, disease-free plants.
📚 In This Guide
- What you need
- Instructions
- Tips and common mistakes
- Wrapping up and next steps
What you need
- ● Pruning tools: Shears, loppers, pruning saws, or any tool that came into contact with plants (1–5 tools, depending on your needs).
- ● Disinfectant solution: 70% isopropyl alcohol (1–2 cups, depending on tool size) OR
- ● 10% bleach solution (1 part bleach to 9 parts water, ~1–2 cups total).
- ● Cleaning brush or old toothbrush: For scrubbing hard-to-reach areas (1–2).
- ○ Rubbing alcohol (optional but helpful): For wiping down tools after disinfection (small bottle).
- ● Paper towels or clean rags: For drying tools (5–10 sheets or rags).
- ● Container for soaking: A bucket, bowl, or large cup (large enough to submerge tool blades).
- ○ Gloves (optional but recommended): Nitrile or latex gloves to protect your hands (1 pair).
- ● Vinegar solution (50/50 vinegar & water): For a natural, residue-free rinse after disinfection.
- ● Tool sharpening stone: If your tools are dull, sharpen them before disinfecting for better performance.
- ● Label maker or markers: To label tools if you’re disinfecting multiple sets for different plants.
Step-by-step instructions for disinfecting pruning tools
Keeping your tools clean isn't just about sharp blades—it's the best defense against plant diseases.
🧼 Step 1: Clean Off Debris and Old Sap
Start by wiping down every surface of your pruning tools with a clean, damp cloth. Remove dried sap, dirt, or plant residue that's clinging to blades, handles, and joints. Sap buildup traps bacteria and fungi, so this step is crucial before disinfecting. I like to use a microfiber cloth here—it catches fine particles better than paper towels.
Pay special attention to crevices, hinges, and any rough spots where debris collects. A stiff-bristled brush helps loosen stubborn grime. If you're working with particularly sticky sap, a drop of mild dish soap on the cloth makes cleanup easier. Rinse thoroughly afterward to remove all soap residue—leftover soap can interfere with the disinfectant's effectiveness.
✂️ Step 2: Apply Disinfectant Properly
Use a 70% isopropyl alcohol solution or a 10% bleach solution (1 part bleach to 9 parts water) to disinfect your tools. I prefer rubbing alcohol because it evaporates quickly and doesn't leave harmful residues. Soak a clean cloth or cotton swab in the solution, then wipe down every surface of your tools—blades, handles, and even the inside of bypass pruners.
For stubborn areas, let the disinfectant sit for 1-2 minutes before wiping again. This ensures you kill any lingering spores or bacteria hiding in crevices. Avoid using straight bleach—it can corrode metal over time. After disinfecting, let the tools air dry completely in a well-ventilated area. Never store them wet, as moisture promotes rust and bacterial growth.
🪴 Step 3: Store Tools in a Dry, Organized Space
Once your tools are completely dry, store them in a way that keeps them clean and ready for use. I hang my pruners on hooks or use a wall-mounted organizer to prevent them from touching each other. This prevents cross-contamination between tools and makes them easy to grab when needed. For smaller tools, a clean, dry tool roll or caddy works well—just make sure it's stored off the ground and away from moisture.
If you're working with multiple types of plants (like fruit trees, roses, and vegetables), consider labeling your tools or using separate tools for each plant family. This reduces the risk of spreading diseases between different species. A quick wipe-down after each use keeps tools ready for the next job without a deep clean.
Tips & tricks for disinfecting pruning tools
Keeping your garden tools in tip-top shape isn't rocket science—just a few smart habits make all the difference.
Deep Cleaning Secret: For tools with stubborn sap buildup, soak them in warm, soapy water for 5-10 minutes before scrubbing. This loosens dried residue so you don't have to scrub as hard—saving your hands and making Step 1 much easier. A toothbrush works wonders for tight spots like hinge crevices where bacteria love to hide.
Disinfectant Choice Matters: While both 70% isopropyl alcohol and 10% bleach solution work, rubbing alcohol evaporates faster and won't damage metal tools over time. For the bleach solution, always use the exact ratio (1 part bleach to 9 parts water)—stronger concentrations can corrode blades. I keep both options on hand because alcohol works better for quick touch-ups between uses.
Storage Organization: Label your tools with plant family markers if you work with multiple species. A simple masking tape label with "Roses" or "Citrus" prevents accidental cross-contamination. I use a pegboard system in my garage—tools hang neatly, stay off the ground, and are easy to grab when needed. This also lets you see at a glance which tools need disinfecting after use.
Quick Maintenance Routine: After each use, give your tools a 30-second wipe-down with a disinfectant cloth. This prevents sap buildup and keeps them ready for the next job. Store the cloth in a sealed container with a few drops of disinfectant between uses—it stays effective for weeks. This habit cuts your deep cleaning time in half!
Pro Tips for Disinfect Pruning Tools
- Keeping your garden tools in tip-top shape isn't rocket science—just a few smart habits make all the difference.
- Deep Cleaning Secret: For tools with stubborn sap buildup, soak them in warm, soapy water for 5-10 minutes before scr...
- Disinfectant Choice Matters: While both 70% isopropyl alcohol and 10% bleach solution work, rubbing alcohol evaporate...
Frequently asked questions
Got questions about keeping your pruning tools clean and ready for action? Here are some of the most common ones—plus straightforward answers to keep your garden thriving!
How often should I disinfect my pruning tools?
Disinfect your tools after every use, especially if you’ve pruned diseased plants, weeds, or multiple varieties. For healthy plants, a quick wipe-down with rubbing alcohol or bleach solution every few cuts is ideal. Think of it like handwashing—consistency prevents trouble!
Can I use vinegar to disinfect pruning tools instead of bleach?
Yes! A 50/50 mix of white vinegar and water works well for disinfecting tools between uses. However, vinegar won’t kill all pathogens like bleach, so for severe infections, opt for a 10% bleach solution (1 part bleach to 9 parts water). Rinse thoroughly afterward to avoid corrosion.
What’s the best way to dry pruning tools after disinfecting?
Pat tools dry with a clean towel or cloth to remove excess moisture, then let them air-dry completely in a well-ventilated area. Storing damp tools can lead to rust or mold growth. Pro tip: Use a tool rack or hang them to speed up drying!
My pruned plants still get sick—why isn’t disinfecting working?
If diseases persist, check for hidden infections in the plant (like cankers or blight) or contaminated soil. Also, ensure you’re disinfecting all surfaces of the tool, including blades and handles. For stubborn cases, try a commercial pruning tool sanitizer or soak tools in a 70% isopropyl alcohol solution for 10 minutes.
Do I need to disinfect shears differently than loppers or saws?
No—the same disinfecting rules apply! However, larger tools (like pruning saws) may need a deeper clean. Scrub crevices with a brush, and for stubborn grime, a baking soda paste can help. Always rinse and dry thoroughly to prevent rust.
Wrapping up and next steps
Keeping your pruning tools clean and disinfected is a small but powerful step toward healthier plants and thriving gardens. 🌱 By following these three simple steps—cleaning, sanitizing, and storing properly—you’ll protect your garden from pests and diseases while extending the life of your tools.
Ready to take action? Grab your tools, gather your supplies, and give your garden the care it deserves!
Next step: Schedule a quick tool maintenance session after your next pruning session—consistency is key! 💪