
Pruning
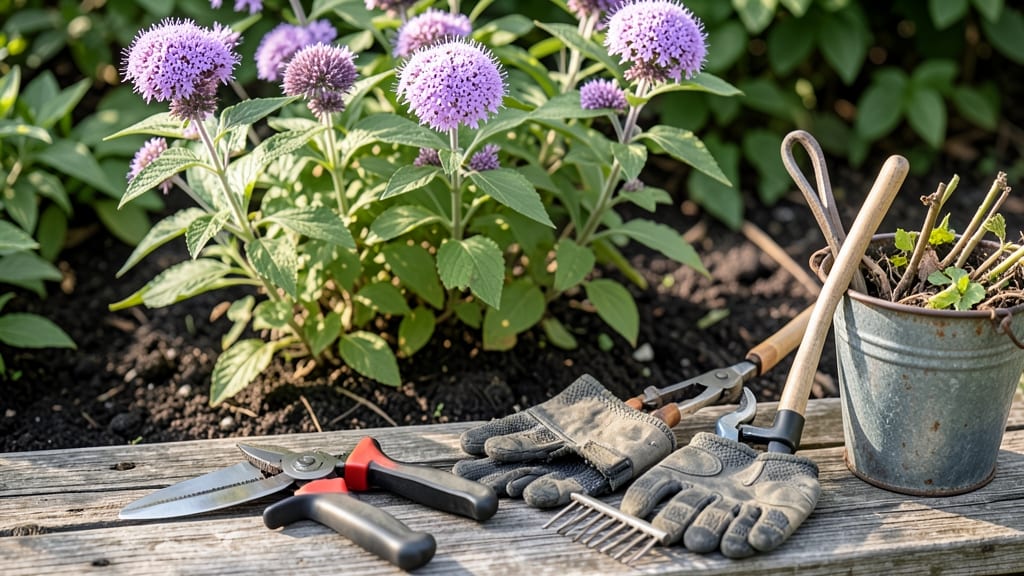
Late-winter pruning is how I turn my Monarda into a fragrant, bushy powerhouse every summer. 🌿 The right cuts—just before new growth starts—mean more blooms, fewer pests, and plants that thrive for years.
I’ve learned the hard way that timing matters more than technique, and I’ll show you exactly when and how to do it right.
You’ll need sharp pruners, gloves, and a clear day to see what you’re cutting. The goal is to remove dead stems but leave the plant’s energy reserves intact. I always prune back to about 2-3 inches above the ground, which might seem drastic—but trust me, it works.
This encourages fresh, vigorous growth from the base, not just the tips.
By late June, your Monarda will be covered in fragrant purple or pink blooms that hummingbirds and bees adore. The plant stays compact, resists flopping, and produces flowers for 6+ weeks.
Plus, you’ll cut down on powdery mildew, a common problem with crowded, unpruned stems. It’s a win-win for both your garden and your pollinators.
If you’re in a colder zone, wait until after the last frost but before buds swell. And never prune in fall—you’ll encourage tender new growth that won’t survive winter. Start now, and by summer, your Monarda will be the showstopper of your garden.
📚 In This Guide
- What you need
- Instructions
- Tips and common mistakes
- Wrapping up and next steps
What you need
- ● Bypass pruners – Sharp, clean, and sturdy (1 pair). Choose 5-inch to 7-inch blades for precision cuts.
- ● Hand pruners (felco or similar) – For smaller stems (4-inch blades recommended).
- ● Gloves – Heavy-duty, garden-grade (1 pair) to protect against thorns and sap.
- ● Disinfectant (70% isopropyl alcohol or bleach solution) – 1:9 bleach-to-water ratio (1 quart) to sterilize tools.
- ○ Rake or garden fork – To clear debris around the base (optional but helpful).
- ○ Garden twine or ties – For bundling pruned stems (optional, if composting).
- ● Choose the right time – Late winter (just before new growth starts) or early spring.
- ● Check the weather – Prune on a dry, calm day to avoid spreading disease.
- ● Assess plant health – Look for dead, diseased, or damaged stems to prioritize removal.
Instructions for pruning monarda: late-winter cuts for fragrant summer blooms
Here's the exact timing and technique I use to revive my monarda bushes every year.
✂️ Step 1: Time Your Pruning for Late Winter
Prune your monarda in late winter, just as new growth begins but before any leaves unfurl. In most climates, this falls between mid-February and early March. You'll know it's time when you see the first purple or green buds pushing through the ground—this signals the plant is waking from dormancy.
Never prune in fall or early winter. Cutting back too early exposes tender stems to cold snaps, while waiting until spring growth is already established stresses the plant. I always mark my calendar for February 15th as my target date—adjust based on your local last frost date.
🌿 Step 2: Cut Back to 3-4 Inches Above Ground Level
Use sharp, clean pruners to cut the entire plant back to 3-4 inches above ground level. This drastic cut removes all dead foliage and encourages vigorous new growth from the base. Look for the woody stems—these are your guide for where to make the cut.
Don't worry about being precise with the height. The key is removing all the old growth while leaving enough stem for new shoots to emerge. I like to make my cuts at a 45-degree angle just above a node (the little bump where leaves grow) to prevent water from pooling on the cut.
☀️ Step 3: Inspect for Dead or Diseased Stems
As you prune, examine each stem for signs of blackened tissue, mushy spots, or unusual discoloration—these indicate disease or winter damage. Remove any suspicious stems immediately, cutting back to healthy wood. Healthy stems should be firm to the touch and have a consistent color.
If you find hollow stems or extensive dieback, your monarda may be suffering from powdery mildew or verticillium wilt. In this case, prune even more aggressively and consider treating with neem oil in early spring. I've had to do this twice—both times the plants bounced back completely.
🌱 Step 4: Clean Up Debris and Fertilize Lightly
Remove all pruned material from the garden immediately. Leaving old stems and leaves creates a moist environment where fungal spores can overwinter. I always rake up the debris and dispose of it in the trash—not the compost—since diseased material can spread.
After pruning, spread a light layer of compost (about ½ inch) around the base of the plant. Avoid heavy fertilizers at this stage—the goal is to encourage root growth, not leafy top growth. Water thoroughly to help the soil settle around the fresh cuts.
⏰ Step 5: Monitor New Growth and Adjust Care
Within 2-3 weeks, you should see new shoots emerging from the base. These will be bright green and tender—a clear sign your pruning worked. If growth is slow or sparse, your plant may need more sunlight or better-draining soil.
Once new growth reaches 4-6 inches tall, you can begin regular maintenance pruning to encourage bushier plants. Pinch back the tips of the strongest stems to promote branching. I also add a balanced fertilizer (10-10-10) at this stage to support the plant's recovery.
Tips & tricks for perfect late-winter monarda pruning
These simple strategies will help you revive your monarda bushes with confidence and avoid common pruning mistakes.
Timing Secret: The mid-February to early March window is crucial because it aligns with your monarda's natural dormancy break. If you're in a colder climate, wait until after your last frost date—pruning too early can shock the plant. I've learned this the hard way after seeing new growth get nipped by unexpected freezes. Check for those first purple or green buds pushing through the soil as your cue.
Cutting Technique: When you're making those 3-4 inch cuts in Step 2, focus on clean, sharp cuts at a 45-degree angle just above a node. This angle prevents water from pooling on the cut, which could lead to rot. I use pruners that have been sharpened recently—dull blades crush stems instead of making clean cuts. If you don't have a node clearly visible, aim for about ½ inch above where you see the last healthy leaf attachment.
Disease Detection: In Step 3, pay special attention to the texture of the stems. Healthy stems should feel firm all the way through—like a fresh carrot. If you find any stems that feel hollow or mushy, those are red flags for disease. I've had to remove entire sections of plants with powdery mildew before, but catching it early makes all the difference. Don't hesitate to cut back more aggressively if you see these signs—your plant will thank you with stronger regrowth.
Post-Pruning Care: After you've finished pruning, resist the urge to add heavy fertilizer right away. The light layer of compost (about ½ inch) in Step 4 is perfect for encouraging root growth without overwhelming the plant. I've seen gardeners make the mistake of adding too much fertilizer too soon, which can actually stress the plant when it's just starting to recover. Water thoroughly after adding compost to help settle everything around those fresh cuts.
Pro Tips for Prune Monarda
- These simple strategies will help you revive your monarda bushes with confidence and avoid common pruning mistakes.
- Timing Secret: The mid-February to early March window is crucial because it aligns with your monarda's natural dorman...
- Cutting Technique: When you're making those 3-4 inch cuts in Step 2, focus on clean, sharp cuts at a 45-degree angle ...
Frequently asked questions
Got questions about pruning your Monarda? You’re not alone! Whether you’re a newbie gardener or a seasoned plant parent, these common queries can help you keep your bee balm thriving. Let’s dive in:
When is the best time to prune Monarda?
Late winter or early spring—just before new growth emerges—is ideal. This removes dead foliage and makes room for fresh, vibrant blooms. Avoid pruning in fall, as it can leave the plant vulnerable to cold and pests. Pro tip: If you missed late winter, prune after flowering to tidy up, but expect fewer blooms that season.
How much should I cut back Monarda?
Trim back one-third to one-half of the plant’s height, cutting just above a set of healthy leaves or buds. Avoid shearing too close to the base, as Monarda can be woody and may not regrow well. For established plants, this encourages bushier growth and more flowers. Pro tip: Use sharp pruners for clean cuts!
Will pruning Monarda reduce its attractiveness to pollinators?
Not at all! Pruning actually enhances blooms and keeps plants healthy, making them even more attractive to bees, butterflies, and hummingbirds. Just avoid over-pruning in early spring, as the plant needs energy to rebound. Pro tip: Leave some seed heads for winter interest and wildlife!
What if I prune Monarda at the wrong time?
If pruned too late (after flowering), you’ll sacrifice blooms that season, but the plant will recover. Pruning in fall can invite disease or rot, while early spring cuts may stress young growth. Pro tip: If you’re unsure, observe your plant—healthy new shoots mean it’s ready for a trim!
Can I prune Monarda if it’s young or newly planted?
Yes, but go easy! Lightly trim dead or damaged stems in late winter, but avoid heavy pruning for the first year. Young plants need all their energy to establish roots. Pro tip: Focus on removing only what’s necessary to avoid stunting growth.
Wrapping up and next steps
Pruning your Monarda in late winter isn’t just about tidying up—it’s your secret to vibrant summer blooms and healthier plants! 🌿 By following these steps, you’ll encourage lush growth, prevent disease, and enjoy those fragrant flowers all season long.
Now that you’re armed with the know-how, grab those pruners and give your bee balm the care it deserves.
Ready to transform your garden? Next, check out our guide on fertilizing Monarda for even more tips to keep your plants thriving! 🌸